
Have you ever found yourself in the kitchen, juggling a dozen plates while everyone else is munching on takeout? That’s where Quick Taco Cups come to the rescue! These fun, muffin-tin tacos are a game-changer for any home chef looking to whip up easy appetizers that will wow friends and family. With their crispy tortilla shells filled with seasoned ground beef and gooey cheese, they offer a delightful twist on traditional tacos without the mess. Plus, they’re perfect for those spontaneous gatherings or cozy nights in, ensuring you can enjoy delicious homemade food in no time. Curious to see how you can create these crowd-pleasers in just a few simple steps? Let’s dive in!
Why Are Quick Taco Cups a Must-Try?
Irresistible Crunch: The crispy tortilla shells create a delightful texture that balances perfectly with the gooey cheese and hearty beef filling.
Easy Preparation: With just a few simple steps, you can impress your guests without spending hours in the kitchen.
Customizable: Add your favorite toppings like avocado and salsa, or even swap in grilled vegetables for a vegetarian twist.
Perfect for Any Occasion: Whether it’s game night or a casual dinner, these mini tacos fit right in as crowd-pleasing appetizers.
No-Mess Fun: Say goodbye to messy taco assembly! These Quick Taco Cups provide a neat way to enjoy tacos that everyone will love.
For a tasty side to accompany your Quick Taco Cups, check out my delicious Broccoli Cheese Cups or spice things up with some Lemon Dill Chicken.
Quick Taco Cups Ingredients
For the Beef Filling
• Ground Beef – Provides savory flavor and protein; can substitute with ground turkey or pork for a lighter option.
• Taco Seasoning – Adds essential spices for flavor enhancement; consider using garlic powder, chili powder, and salt for a homemade mix.
For the Cups
• Mission Flour Street Taco Tortillas – Ideal size (4.5” diameter) for taco cups; other types may not hold shape well, so stick to this brand.
• Shredded Cheese – Melts beautifully for a creamy texture; sharp cheddar or a Mexican blend works best.
Optional Fillings
• Refried Beans or Black Beans – Adds depth and creaminess; choose based on your preference.
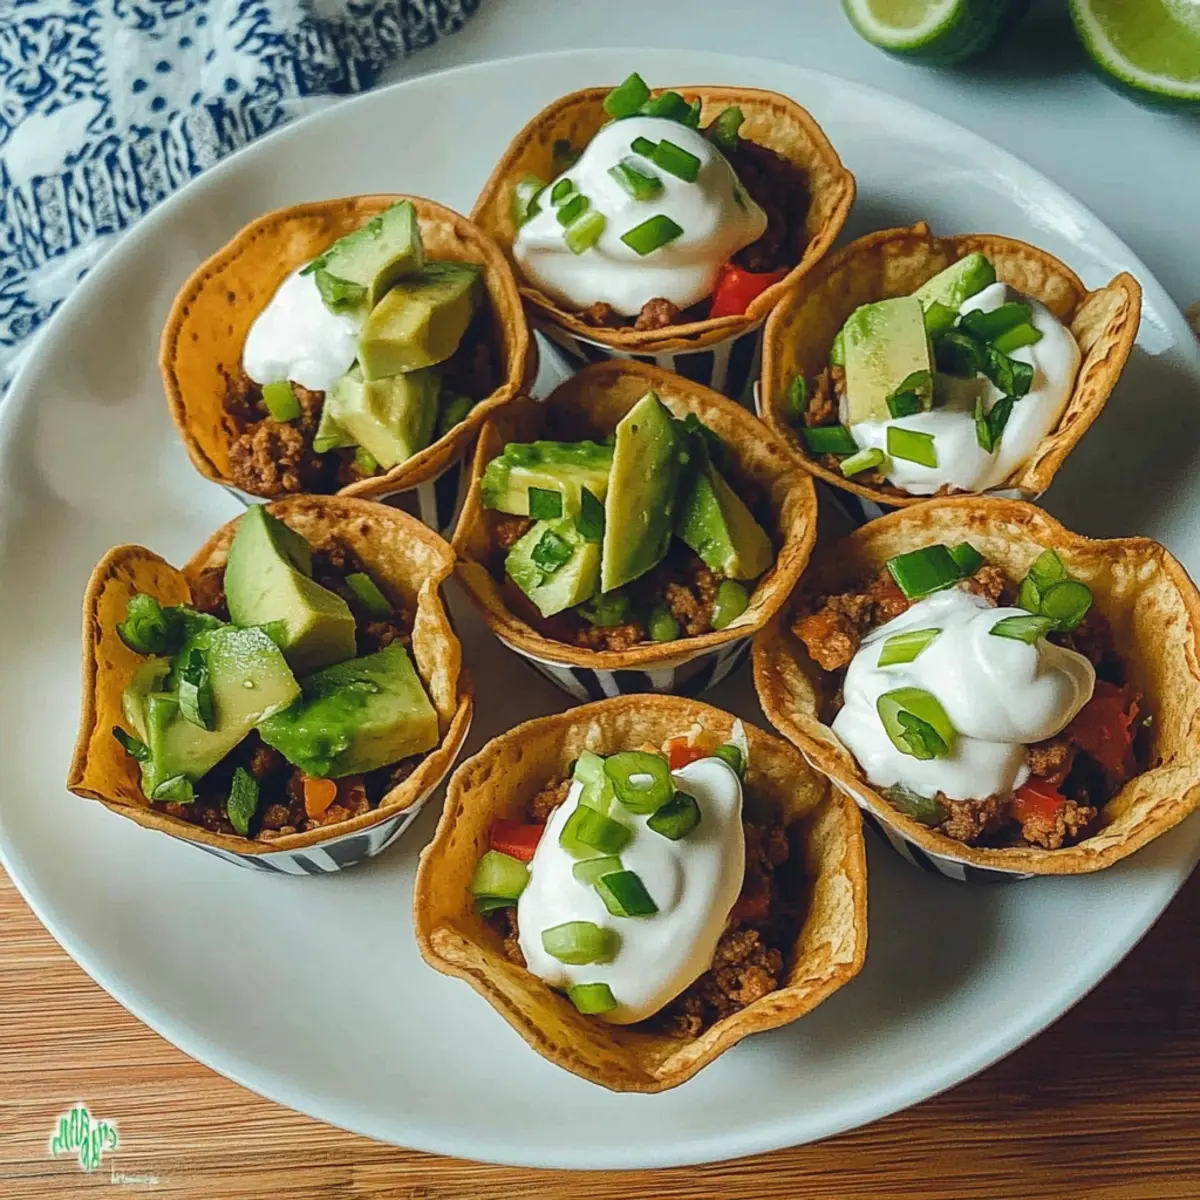
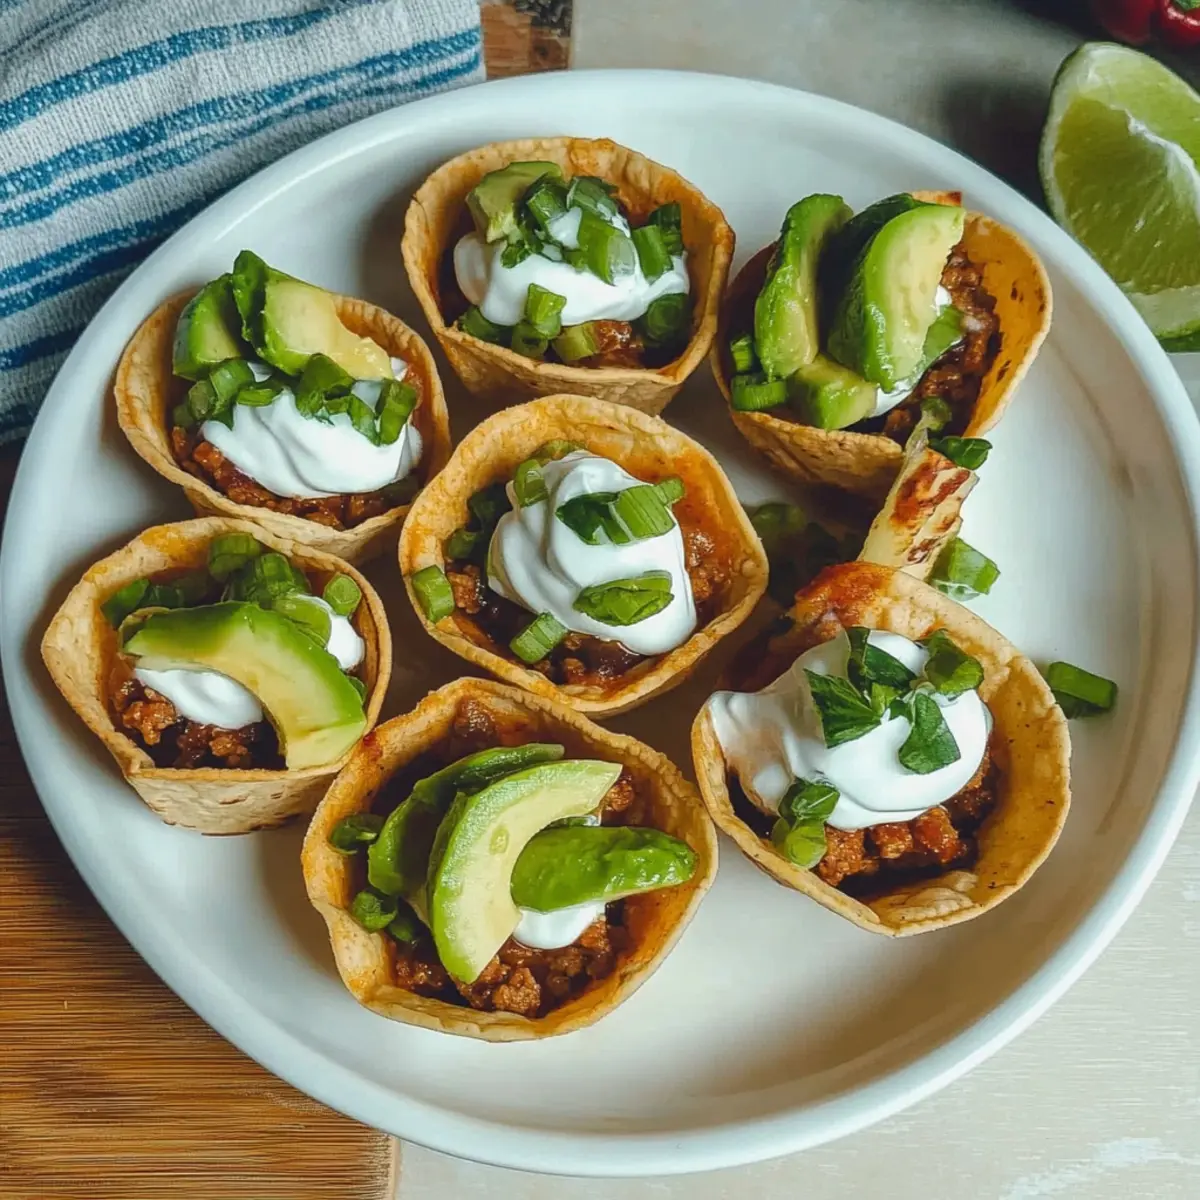
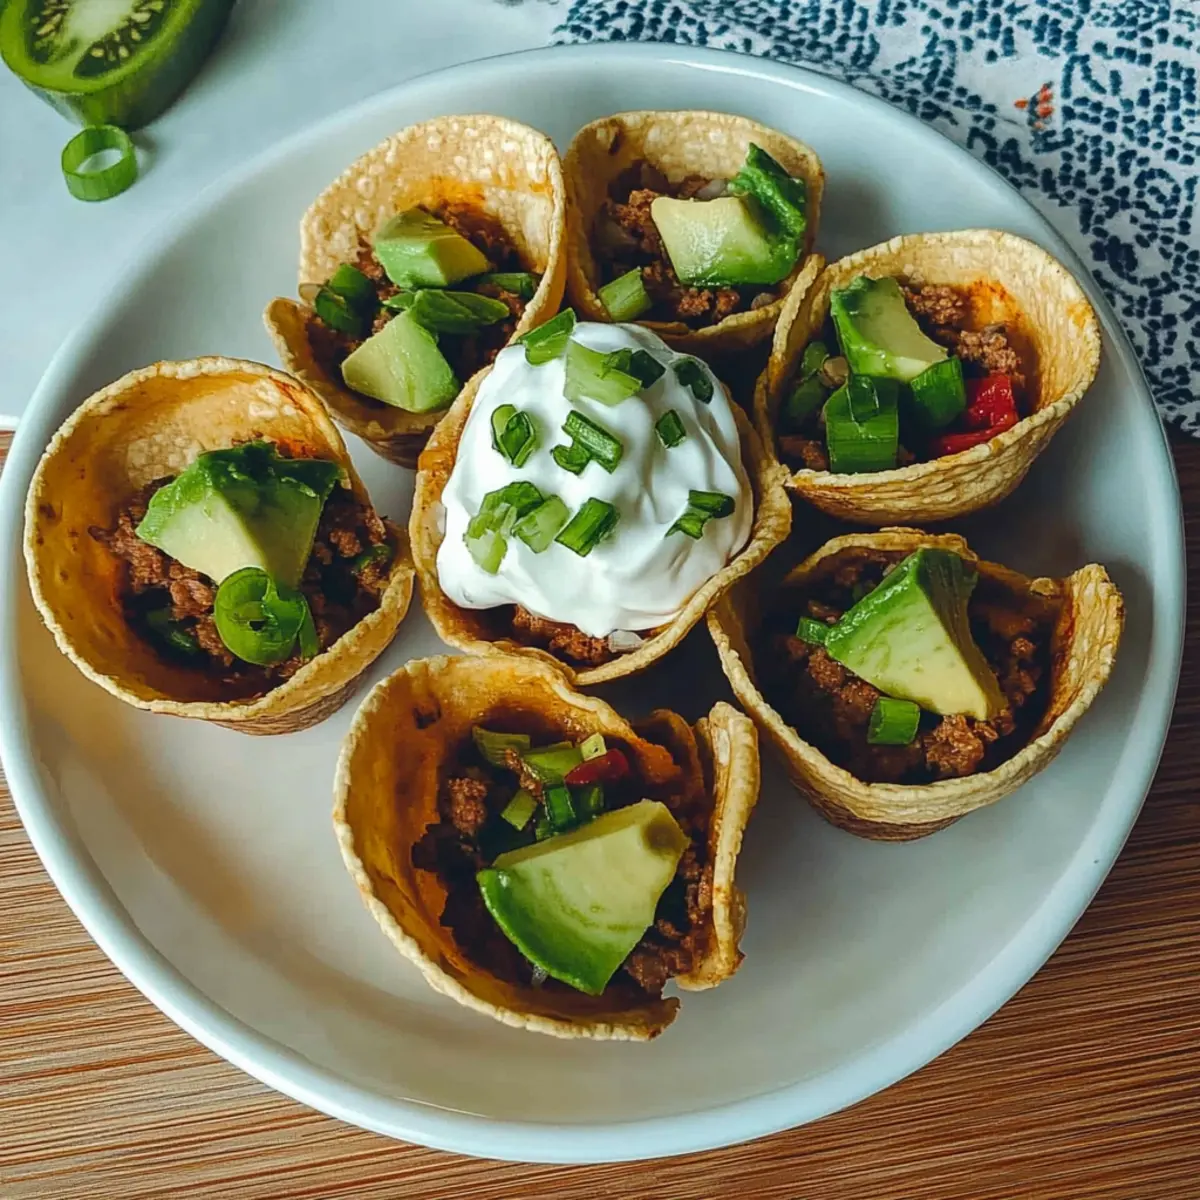
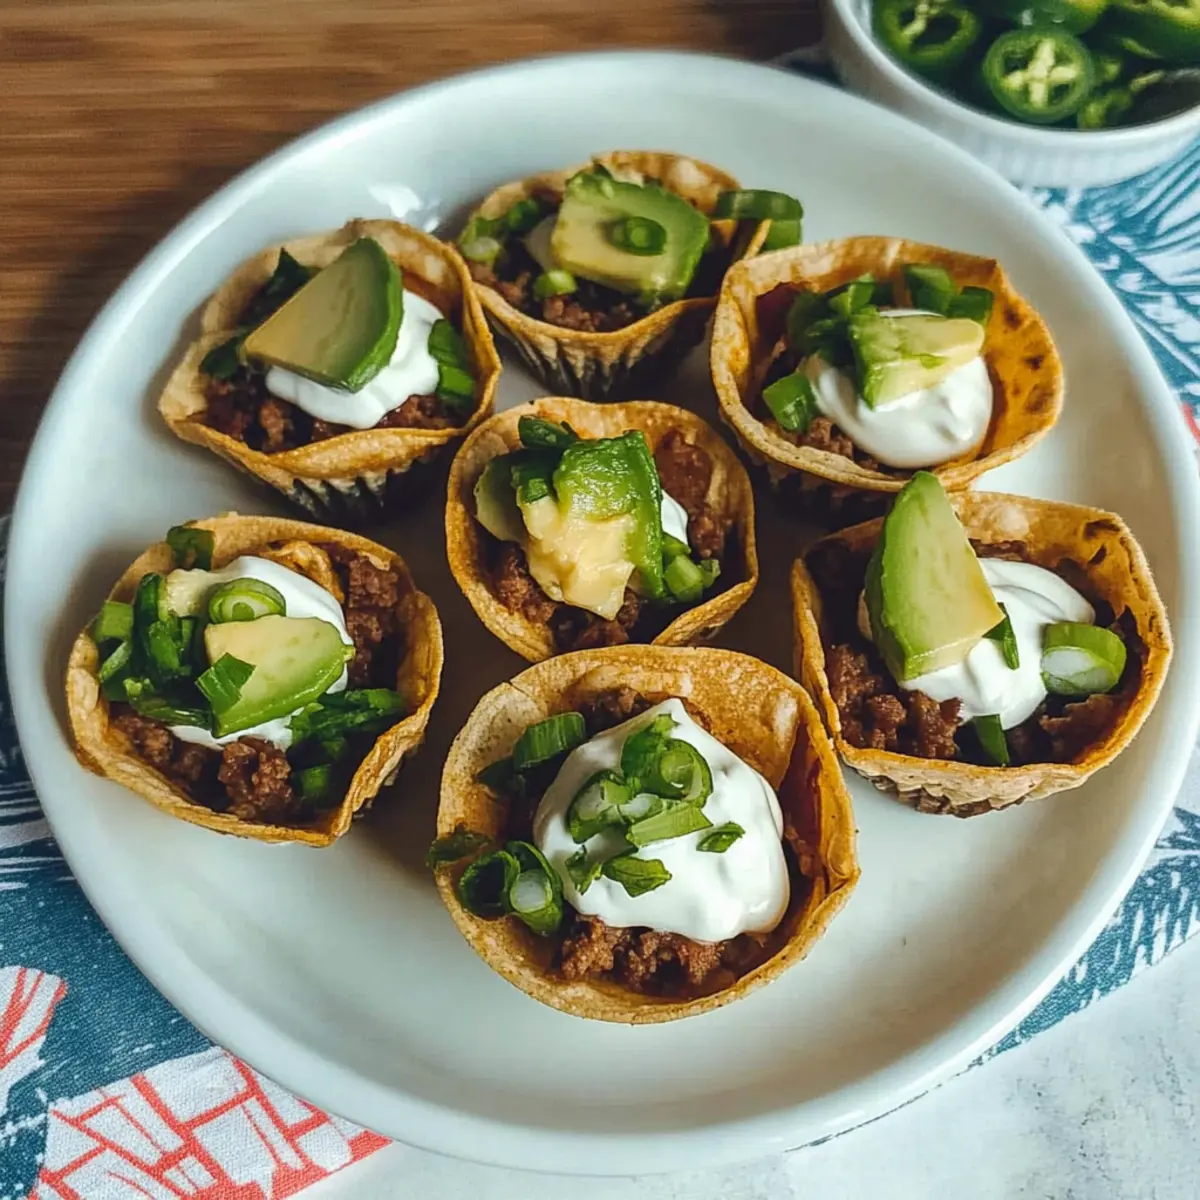
• Avocado – Fresh topping for creaminess; cut right before serving to prevent browning.
• Green Onion – Brightens up the dish with a mild onion flavor; only use the green parts for that fresh crunch.
For Toppings
• Sour Cream – Brings creaminess and tang; make sure to use fresh for the best flavor.
• Salsa – Adds acidity and extra flavor; opt for mild or homemade versions for freshness.
• Lime Wedges – Optional garnish for an acidity boost and brightness, enhancing the overall flavor.
With this easy ingredient list for your Quick Taco Cups, you’re set to create a scrumptious treat that will leave your guests asking for seconds!
Step‑by‑Step Instructions for Quick Taco Cups
Step 1: Preheat Oven
Begin by preheating your oven to 425°F (220°C). This high temperature is essential for ensuring that your taco cups achieve the perfect crispy texture. While the oven heats up, you can prepare your muffin tin and other ingredients, making the assembly process smoother later on.
Step 2: Cook Beef
In a skillet over medium-high heat, cook the ground beef until it’s thoroughly browned, about 5-7 minutes. Make sure to break the meat apart with a spatula as it cooks for an even texture. Once browned, drain any excess grease if needed, then add the taco seasoning, mixing well for about 2 minutes. The beef should be well-coated and fragrant, ready to fill your Quick Taco Cups.
Step 3: Prepare Muffin Pan
Spray your muffin tin generously with non-stick cooking spray, ensuring each cup is well-coated. This step is crucial for preventing your taco cups from sticking as they bake. After prepping the pan, gather your tortillas and cheese, as you’ll need them for the next step in creating these delightful bites.
Step 4: Assemble Taco Cups
Take one tortilla round and gently press it into each muffin cup, shaping it to form a small bowl. Fill each cup with approximately 2 tablespoons of the seasoned ground beef mixture, pressing down slightly to secure the filling. Top each with a generous sprinkle of shredded cheese, which will melt beautifully while ensuring the taco cups stay intact.
Step 5: Bake
Place the muffin tin in the preheated oven and bake for about 10 minutes. Keep an eye on them, as you’ll want the tortillas to turn a golden brown and the cheese to be melted and bubbly. This baking time ensures that your Quick Taco Cups are crispy on the outside, creating a delightful contrast with the warm filling.
Step 6: Add Toppings
After removing the taco cups from the oven, let them cool for a couple of minutes. Once slightly cooled, you can now top each cup with sour cream, fresh salsa, sliced avocado, and green onion for a burst of flavor and color. Arrange a few lime wedges on the side for that extra zesty kick, enhancing your Quick Taco Cups just before serving.
Make Ahead Options
These Quick Taco Cups are perfect for meal prep, saving you time for spontaneous gatherings! You can prepare the beef filling up to 3 days in advance, cooking it and then refrigerating it in an airtight container. Additionally, you can assemble the taco cups without baking them, covering the muffin tin with plastic wrap and storing it in the refrigerator for up to 24 hours. To maintain crispiness, avoid adding cheese and toppings until right before baking. When ready to cook, simply preheat the oven, add the cheese, bake for about 10 minutes, and finish with your favorite toppings for delicious, hassle-free appetizers!
Expert Tips for Quick Taco Cups
-
Tortilla Fit: Ensure your tortillas fit snugly in the muffin cups; this prevents filling from spilling and maintains the shape.
-
Grease Management: If using a fattier ground beef mix, drain excess grease after cooking to avoid soggy taco cups that can fall apart.
-
Filling Order: Press the beef mixture into the cups before adding cheese and toppings. This method ensures an even distribution and prevents overflow.
-
Baking Time: Keep an eye on the taco cups while they bake; over-baking can lead to tough tortillas. Aim for a golden brown finish for the best texture.
-
Topping Freshness: Add fresh toppings like avocado and sour cream just before serving to maintain their flavor and texture, making your Quick Taco Cups even more delightful.
What to Serve with Quick Taco Cups?
Creating an inviting meal for your loved ones is all about finding the right complements to enhance those delicious flavors.
-
Creamy Guacamole: A smooth avocado dip adds a rich, creamy contrast to the crispy taco cups, making each bite even more indulgent.
-
Mexican Street Corn Salad: This colorful dish bursts with fresh flavors and textures, perfectly balancing the savory taco cups with its sweet corn and zesty dressing.
-
Pico de Gallo: This fresh salsa brings a punch of brightness with its zesty lime and crunchy vegetables, enhancing the flavor profile of your taco cups.
-
Simple Green Salad: A light mix of greens and vinaigrette cuts through the richness of the taco cups, providing a refreshing palate cleanser alongside your meal.
-
Spicy Black Beans: These hearty beans offer a savory, spicy kick that complements the seasoning of your taco cups while adding a delightful texture.
-
Crispy Tortilla Chips: A side of crunchy chips with a classic salsa dip allows guests to nibble while they wait, enhancing the party spirit around your taco-themed gathering.
-
Margaritas: Serve these refreshing cocktails for a festive touch to your gathering, with their zesty lime flavor echoing the bright notes in your taco cups.
-
Flan for Dessert: End the meal on a sweet note with this creamy, caramel custard, offering a delicious contrast to your savory taco cups.
-
Churros: These sweet, crispy desserts are a delightful way to satisfy a sweet tooth, rounding off your taco-themed meal.
Storage Tips for Quick Taco Cups
Fridge: Store leftover taco cups in an airtight container in the fridge for up to 3 days. They are best enjoyed fresh, but you can still savor them later.
Freezer: If you want to freeze them, wrap individual taco cups in plastic wrap, then place them in a freezer-safe bag. They can last for up to 2 months.
Reheating: To retain their crispy texture, reheat taco cups in a preheated oven at 350°F (175°C) for about 10 minutes, checking frequently.
Assembly Tip: Consider storing the components separately—tortillas, filling, and toppings—to maintain their freshness and texture longer before reassembling for later enjoyment.
Quick Taco Cups: Exciting Variations to Try
Feel free to mix things up and tailor these taco cups to your taste by exploring these delicious variations!
-
Dairy-Free: Substitute cheese with a dairy-free blend or avocado for creaminess without dairy.
-
Spicy Kick: Add jalapeños or a splash of hot sauce to the beef mixture for an extra layer of heat. Spice lovers will appreciate the added zest that ignites the palate.
-
Vegetarian Delight: Use grilled vegetables like bell peppers, zucchini, and corn for a satisfying vegetarian option. This vibrant mix not only adds color but also enhances the flavor profile immensely.
-
Bite-Sized Fun: Make mini taco cups using smaller tortillas or cut larger tortillas into quarters. These bite-sized delights are perfect for parties and kids!
-
Southwestern Twist: Toss in some black beans and corn for a light, fresh flavor. This delightful mix not only feeds the soul but also gives your taco cups a vibrant flair.
-
BBQ Flavor: Blend cooked ground beef with BBQ sauce before filling the cups for a smoky twist that will surprise your taste buds. The richness of BBQ adds a new dimension to this traditional recipe.
-
Herb Infusion: Incorporate fresh herbs like cilantro or parsley into your toppings for a refreshing touch. Fresh herbs accentuate the flavor and bring brightness to every bite.
For more delicious ideas, check out my savory Energy Bites or indulge in some flavorful Lemon Dill Chicken as perfect accompaniments to your taco cups!
Quick Taco Cups Recipe FAQs
What kind of tortillas are best for Quick Taco Cups?
I recommend using Mission Flour Street Taco Tortillas, as they are the ideal size (4.5” diameter) for forming taco cups. Other types may not fold properly or hold their shape, leading to less satisfying results.
How should I store leftover Quick Taco Cups?
Store any leftover taco cups in an airtight container in the fridge for up to 3 days. They’re best enjoyed fresh, but if you must store them, they’ll still taste delicious later. Just remember to reheat them in the oven to keep their crispiness!
Can I freeze Quick Taco Cups?
Absolutely! To freeze, wrap each assembled taco cup tightly in plastic wrap, then place them in a freezer-safe bag. They can be stored for up to 2 months. When you’re ready to enjoy, simply reheat them from frozen in a preheated oven at 350°F (175°C) for about 10-15 minutes until heated through.
What if my taco cups are soggy after baking?
If you find your taco cups are soggy, it could be due to using too much fat in the ground beef. Make sure to drain any excess grease after cooking the meat. Additionally, avoid overfilling the cups to maintain their structure. For next time, using lean ground beef will help as well.
Are there any dietary considerations for Quick Taco Cups?
If you’re accommodating dietary restrictions, you can easily substitute the ground beef with ground turkey or chicken for a lighter option. You can also create a vegetarian version by using grilled vegetables or additional beans. Just be sure to check that your tortillas and other toppings do not contain any allergens that may affect your guests.
How can I keep toppings fresh for Quick Taco Cups?
To maintain the freshness of your toppings, it’s best to store them separately until you’re ready to serve. Avocado and sour cream should be added just before serving to avoid browning and maintain flavor. This way, your taco cups stay vibrant and delicious!
Quick Taco Cups: Crispy, Savory Bites for Any Occasion
Ingredients
Equipment
Method
- Preheat your oven to 425°F (220°C).
- In a skillet over medium-high heat, cook the ground beef until brown, about 5-7 minutes. Drain excess grease and add taco seasoning, mixing for 2 minutes.
- Spray your muffin tin generously with non-stick cooking spray.
- Press a tortilla round into each muffin cup, fill with seasoned beef and top with cheese.
- Bake for about 10 minutes until tortillas are golden and cheese is bubbly.
- Cool for a few minutes and top with sour cream, salsa, avocado, and green onion. Serve with lime wedges.
Leave a Reply