
The tantalizing aroma of freshly baked bread is a memory that floods my mind, transporting me to a cozy kitchen filled with laughter and shared stories. Today, I’m excited to share my secret to making Homemade Garlic Knots, a recipe that embodies comfort food at its finest. In just 35 minutes, you’ll create these fluffy, golden delights that are not only a breeze to whip up but also a sure crowd-pleaser for any gathering. Infused with aromatic garlic and fresh parsley, these knots are perfect as an appetizer or a delightful snack on their own. Ready to elevate your culinary skills and impress your loved ones? Let’s dive in!
Why are Garlic Knots a Must-Make?
Unrivaled Flavor: Each bite is filled with the robust taste of garlic and fresh parsley, elevating your dining experience.
Simplicity at its Best: With just a few staple ingredients and straightforward steps, you’ll master the art of bread-making in no time.
Perfect for Sharing: These knots make a fantastic appetizer or side dish at gatherings—everyone will be reaching for more!
Versatile Base: Swap the fresh parsley for basil or add cheese for a tasty twist, making it easy to customize to your liking.
Quick Fix: In just 35 minutes, you can go from flour to fluffy heaven—ideal when time is tight!
Homemade Goodness: There’s nothing like the satisfaction of creating your own food. Serve these alongside your favorite marinara sauce, or enjoy them with a refreshing salad. Interested in more delicious bites? Check out my Homemade Chicken Nuggets for another crowd-pleaser!
Homemade Garlic Knots Ingredients
• Get ready to gather the essentials for your delicious homemade garlic knots!
For the Dough
- All-Purpose Flour – Provides structure and chew; substitute with bread flour for a chewier texture.
- Active Dry Yeast – Leavening agent for rising; ensure it’s fresh for best results.
- Warm Water (110°F / 43°C) – Hydrates the yeast and flour; use milk for richness if desired.
- Granulated Sugar – Feeds the yeast and enhances browning; can substitute with honey.
- Salt – Enhances flavor; essential for balanced taste.
- Olive Oil – Adds moisture and flavor; can substitute with melted butter for a richer taste.
For the Coating
- Unsalted Butter (melted) – For coating; adds richness, optional to substitute with garlic-infused oil.
- Garlic (minced) – Provides the signature flavor; fresh is preferred, can use garlic powder in a pinch.
- Fresh Parsley (chopped) – Adds freshness and color; substitute with basil or omit for a more classic garlic flavor.
- Italian Seasoning – Enhances flavor profile; can use a mix of oregano and thyme instead.
- Red Pepper Flakes (optional) – For heat; leave out for a milder version.
- Grated Parmesan Cheese (optional) – For topping pleasure; use nutritional yeast for a dairy-free option.
Step‑by‑Step Instructions for Homemade Garlic Knots
Step 1: Activate Yeast
In a small bowl, combine 1 cup of warm water (110°F / 43°C) with 1 tablespoon of granulated sugar and 2 ¼ teaspoons of active dry yeast. Stir gently and let it sit for about 5-10 minutes, until frothy and bubbly. This indicates that your yeast is alive and ready to help create soft, fluffy homemade garlic knots.
Step 2: Mix Dry Ingredients
In a large mixing bowl, whisk together 3 ½ cups of all-purpose flour and 1 teaspoon of salt until well combined. The flour serves as the backbone of your garlic knots, providing the perfect texture. Once mixed, create a well in the center of the flour mixture to prepare for adding the wet ingredients in the next step.
Step 3: Combine Mixtures
Pour the frothy yeast mixture and 2 tablespoons of olive oil into the well you created in the flour. Using a wooden spoon or a spatula, gradually stir the mixture until it begins to form a sticky dough. This should take about 2 minutes. Allow the excitement of making homemade garlic knots to build as the dough starts to come together!
Step 4: Knead Dough
Turn the sticky dough onto a lightly floured surface. Knead it for approximately 5-7 minutes, until it’s smooth and elastic. If the dough is too sticky, sprinkle a bit more flour, but avoid over-flouring. You’ll know it’s done when it springs back after pressing gently with your finger.
Step 5: First Rise
Shape the kneaded dough into a ball and place it in a lightly oiled bowl. Cover it with a clean kitchen towel or cling wrap, and let it rise in a warm space for about 1 hour, or until doubled in size. This step creates those lovely bubbles and texture that make your homemade garlic knots so delightful.
Step 6: Shape Knots
Once risen, punch down the dough to remove air bubbles. Divide it into 12 equal portions. Roll each portion into a long rope about 8-10 inches in length. Tie each rope into a knot, tucking the ends underneath. This ensures your homemade garlic knots hold their shape beautifully, ready for the second rise.
Step 7: Second Rise
Place the shaped knots onto a parchment-lined baking sheet, spacing them apart. Cover them with a kitchen towel and let them rise for another 30 minutes. During this time, the knots will puff up again, preparing them for baking and enhancing their airy texture.
Step 8: Prepare Garlic Butter
While the knots are rising, melt ¼ cup of unsalted butter in a small bowl. Stir in 3-4 cloves of minced garlic, 2 tablespoons of chopped fresh parsley, and a pinch of Italian seasoning. This aromatic garlic butter will infuse the knots with flavor as soon as they come out of the oven, making your homemade garlic knots irresistible.
Step 9: Bake
Preheat your oven to 375°F (190°C). Once your knots have finished their second rise, bake them for 15-20 minutes, or until they are golden brown on top. Keep an eye on them toward the end of baking so they don’t over-brown and lose that beautiful color.
Step 10: Coat with Garlic Butter
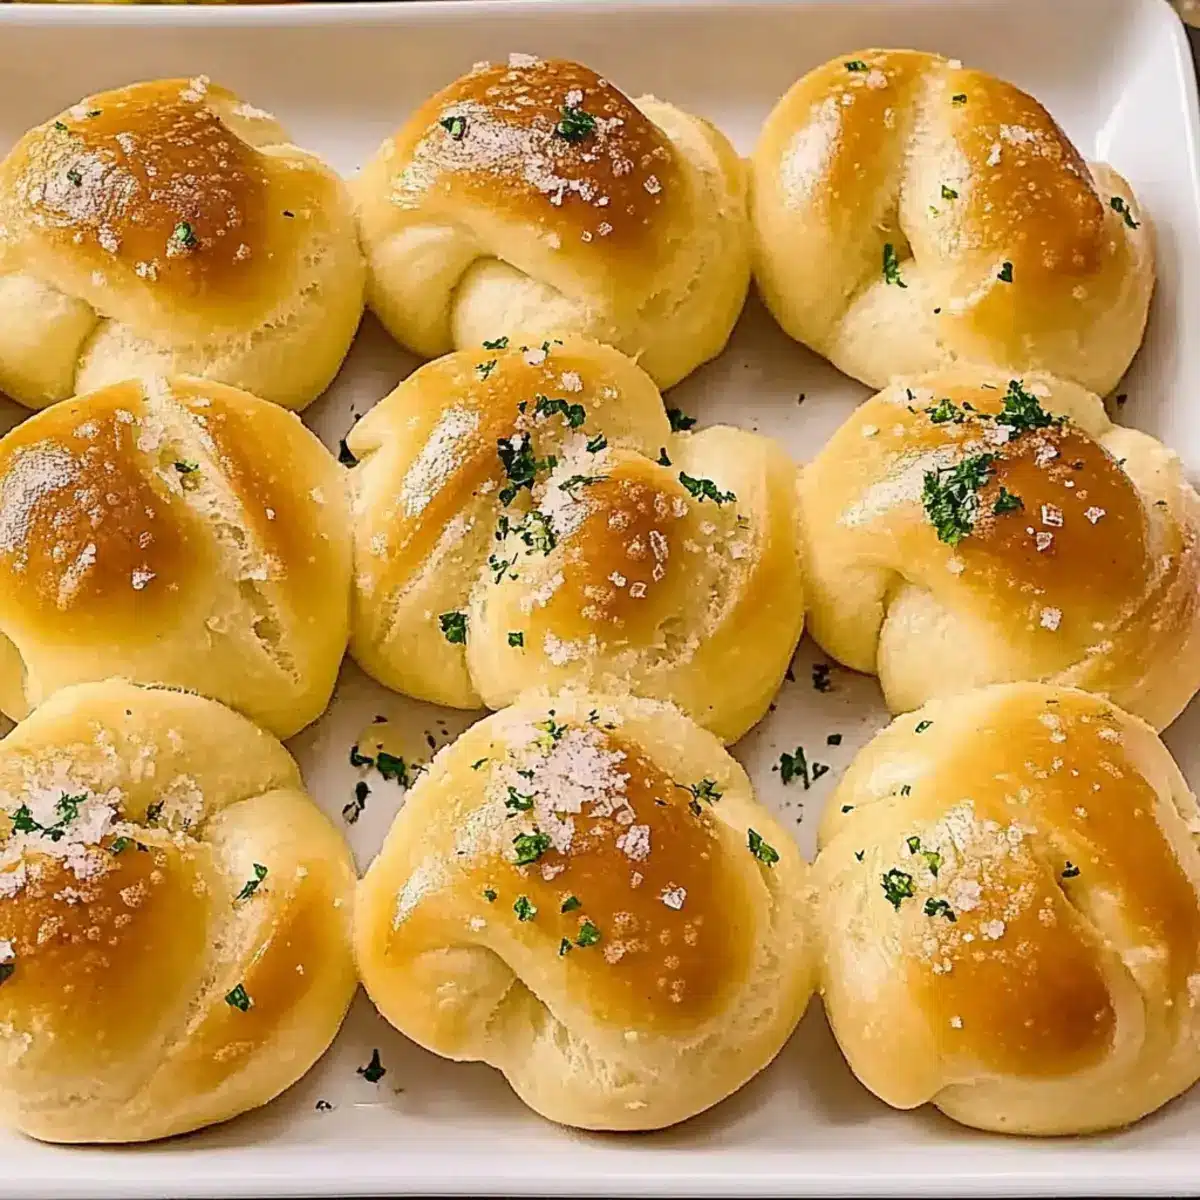
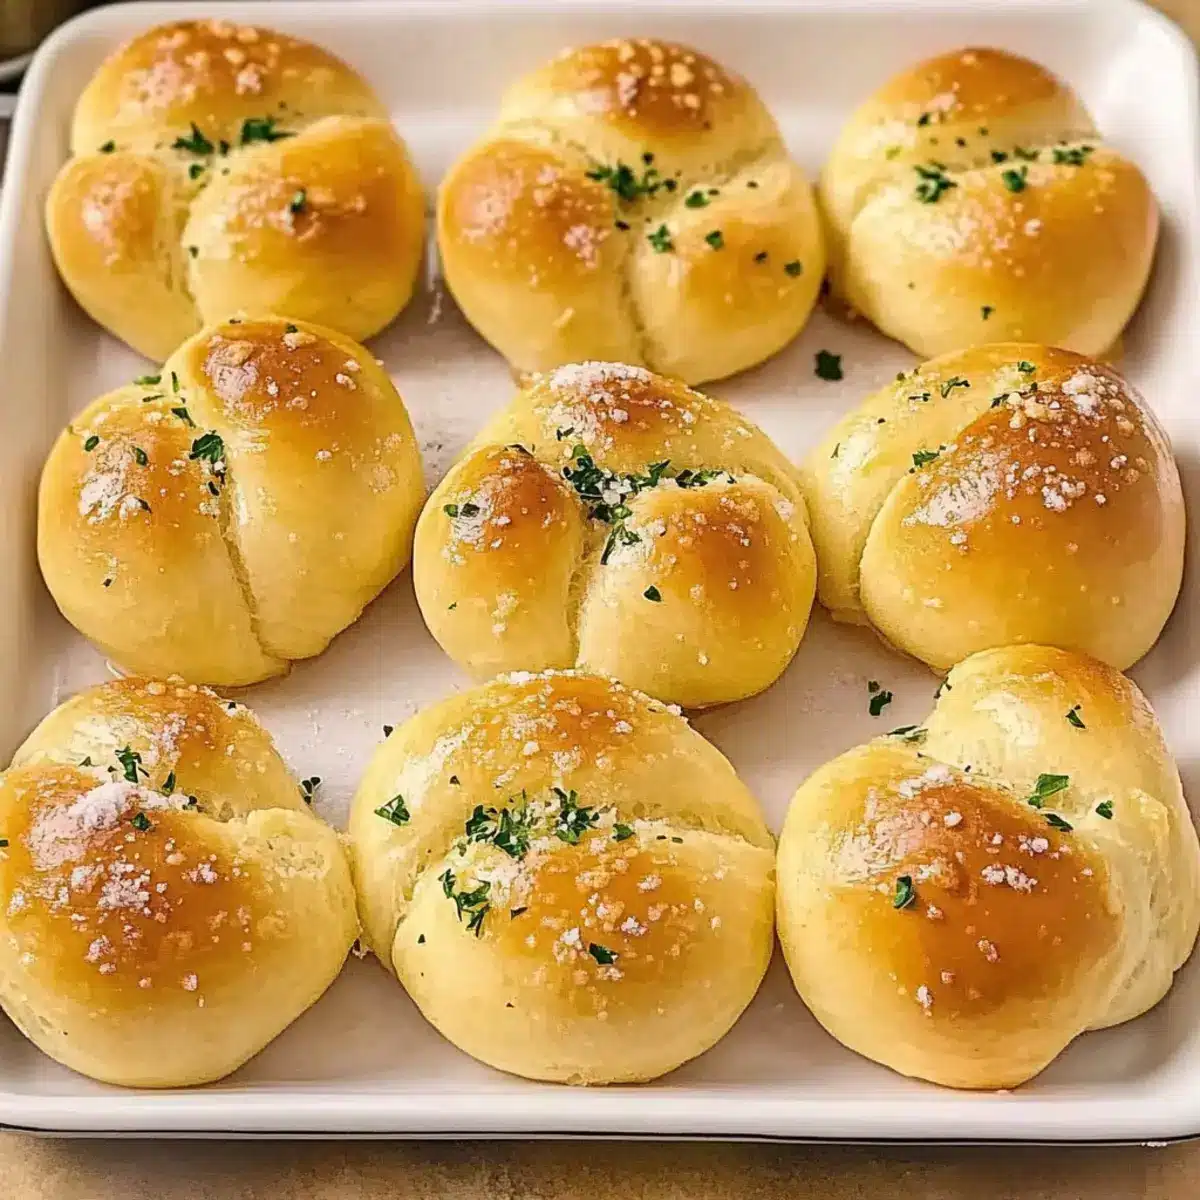
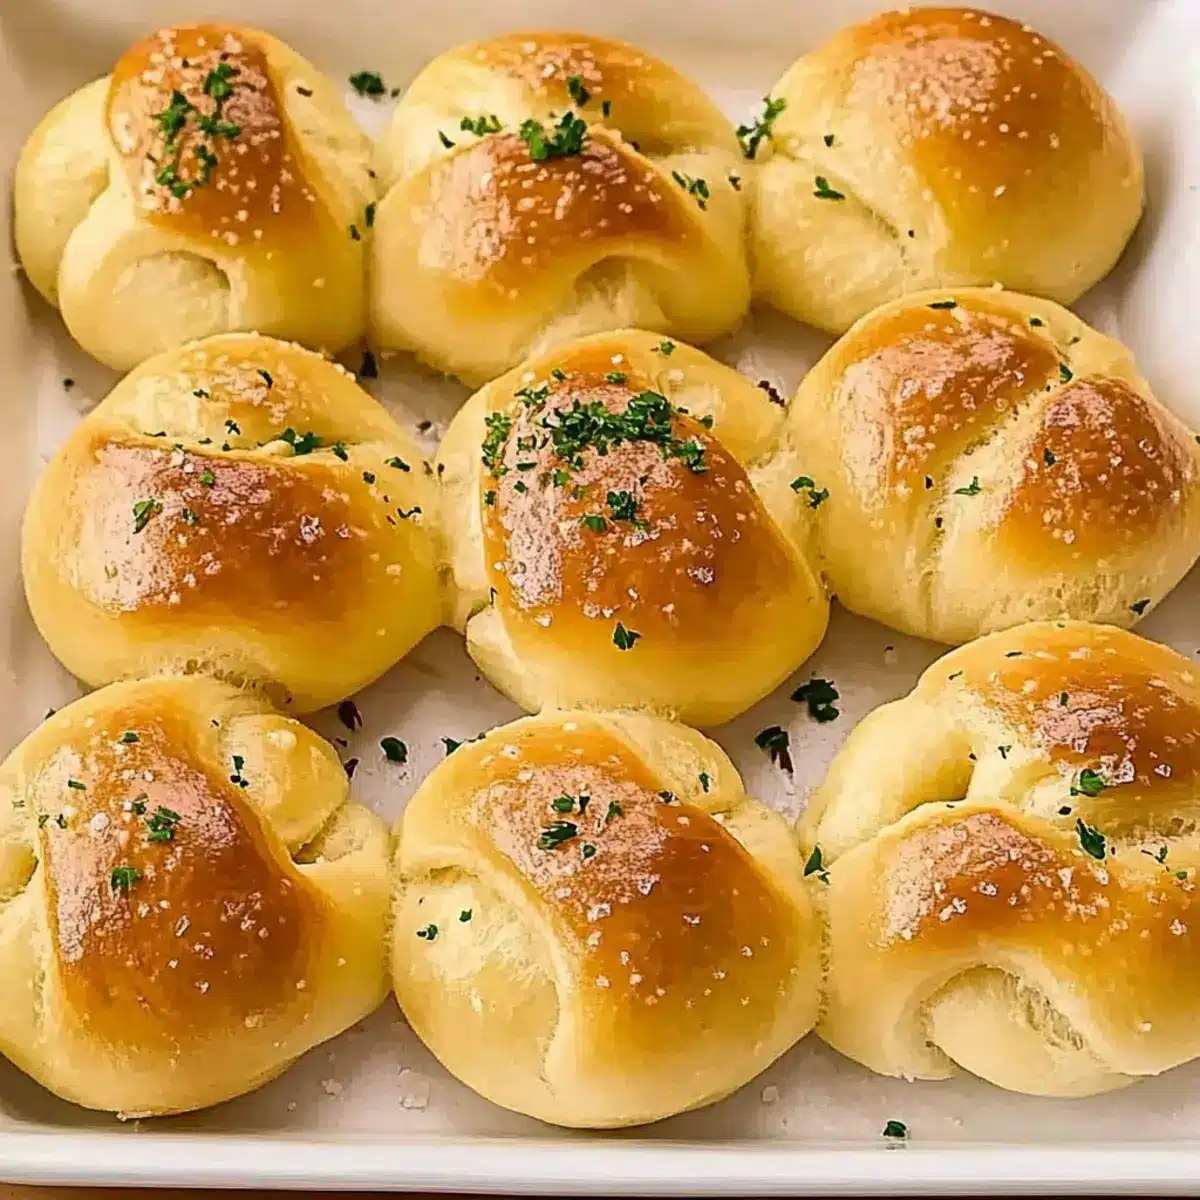
When your homemade garlic knots are finished baking, immediately brush them with the prepared garlic butter mixture. For added goodness, sprinkle grated Parmesan cheese over the top if you like a cheesy finish. These knots are now ready to be served, bursting with flavor and warmth!

Homemade Garlic Knots: Customization Ideas
Feel free to get creative with these garlic knots, allowing your culinary imagination to shine through!
-
Herb Variation: Substitute fresh parsley with rosemary, thyme, or even oregano for a delightful twist that changes the herbaceous profile.
The aroma of fresh herbs will fill your kitchen, embracing you in warmth as you bake. -
Cheese-Filled Delight: For a gooey surprise, incorporate small cubes of mozzarella into the center of each knot before shaping them.
Imagine the cheesy goodness that oozes out with every bite—pure magic! -
Mediterranean Touch: Add crushed black olives or sun-dried tomatoes for a Mediterranean flair that’ll transport your taste buds.
These additions introduce a savory depth, making every knot a bit of a gourmet experience. -
Spicy Kick: Mix in red pepper flakes directly into the dough or brush the finished knots with spicy garlic oil for added heat!
This fiery twist caters to the bold flavor seekers in your life! -
Garlic Powder Alternative: In a pinch, swap freshly minced garlic for garlic powder; just use about half the amount for a smoother flavor.
This option keeps the garlic goodness intact, ensuring satisfaction without the fresh hassle. -
Dough Variations: Swap all-purpose flour for whole wheat flour to add a nutty taste and extra fiber.
This simple switch enhances the texture while maintaining the delicious garlic flavor you love!
Remember, the beauty of these homemade garlic knots lies in their versatility! Looking for more delightful recipes? You’d love trying my Vegan Garlic Chickpea Soup or the irresistible Dill Butter Garlic Chicken as delicious companion dishes for your garlic knots!
Make Ahead Options
These Homemade Garlic Knots are perfect for meal prep enthusiasts looking to save time during busy weeknights! You can prepare the dough up to 24 hours in advance by mixing all the ingredients and letting it rise, then shaping the knots before refrigerating them. When ready to bake, simply allow the knots to sit at room temperature for 30 minutes for a final rise before popping them into the oven. Additionally, you can bake the garlic knots and store them in an airtight container for up to 3 days. To maintain their delightful texture, reheat them in the oven rather than the microwave. With these make ahead tips, you’ll enjoy delicious, warm garlic knots with minimal effort!
Storage Tips for Homemade Garlic Knots
Room Temperature: Store your garlic knots in an airtight container or wrapped in foil to keep them soft and fresh for up to 3 days at room temperature.
Fridge: For longer storage, place the garlic knots in the fridge, where they can last for up to 5 days. Reheat in the oven to restore their delightful texture.
Freezer: Freeze unbaked knots in a single layer, then transfer to a freezer bag; they can stay fresh for up to 3 months. Bake from frozen, adding a few extra minutes to the baking time.
Reheating: Reheat leftover garlic knots in a preheated oven at 350°F (175°C) for about 10 minutes to regain their softness and warmth, making them just as scrumptious as when they were freshly made!
What to Serve with Homemade Garlic Knots
The allure of warm, garlicky knots invites an array of delicious accompaniments that can enhance your meal experience.
- Marinara Sauce: This classic dip brings a zesty balance to the buttery flavor of the garlic knots, making each bite a delightful experience.
- Caesar Salad: Crisp romaine and creamy dressing pair beautifully with garlic knots, refreshing your palate while adding a savory crunch.
- Cheesy Baked Zucchini: Sliced zucchini topped with melted cheese offers a fantastic contrast in textures and flavors, complementing the knots’ softness perfectly.
- Spicy Arrabbiata Sauce: For those who love a kick, this fiery tomato sauce enhances the garlic knots with a touch of heat that excites the taste buds.
- Olive Tapenade: The salty, briny flavors of this tapenade create a savory blend that elevates the simple garlic knots to gourmet status. Pairing it with a delightful drink awaits!
- Italian Antipasto Platter: A colorful assortment of cured meats, cheeses, and olives adds a multitude of flavors, making for the perfect spread alongside your garlic knots.
- Chilled Lemonade: A refreshing drink that cuts through the richness of the butter in the knots, providing a perfect balance for warm weather gatherings.
Expert Tips for Homemade Garlic Knots
-
Yeast Activation: Ensure your yeast is fresh and bubbly before using; a proper activation means lighter, fluffier garlic knots.
-
Kneading Technique: Knead until the dough is smooth but avoid adding too much flour; over-kneading can lead to tough knots.
-
Rising Space: Create a warm, draft-free environment for rising; this helps the dough double in size and develop flavors.
-
Baking Watch: Keep an eye on the knots during the last few minutes of baking to prevent over-browning; golden brown is the goal!
-
Garlic Butter Bliss: Brush the knots with garlic butter while they’re still warm for maximum flavor infusion; can’t resist those rich flavors!
Homemade Garlic Knots Recipe FAQs
How do I know if my yeast is fresh enough?
Absolutely! To check if your yeast is fresh, combine warm water (about 110°F or 43°C), a teaspoon of sugar, and the yeast in a small bowl. Let it sit for about 5-10 minutes. If the mixture becomes frothy and bubbly, your yeast is active and ready to go!
What’s the best way to store leftover garlic knots?
Store your leftover garlic knots in an airtight container at room temperature for up to 3 days. If you want to keep them longer, refrigerate them for up to 5 days. To enhance their texture when reheating, pop them in the oven at 350°F (175°C) for approximately 10 minutes.
Can I freeze the garlic knots?
Yes, you can freeze them! To do so, shape the knots and place them on a baking sheet in a single layer. Freeze them for about 1-2 hours until solid, then transfer them to a freezer bag. They’ll last up to 3 months. When you’re ready to bake, you can cook them directly from the freezer—just add a few extra minutes to the baking time!
What can I do if my garlic knots end up too chewy?
If your garlic knots are chewy, it may be due to over-kneading the dough or adding too much flour while working with it. For best results, knead until smooth, but be gentle and avoid adding excess flour. Also, allow enough rising time for the dough to develop its airy texture!
Can I make these garlic knots gluten-free?
Certainly! To make gluten-free garlic knots, use a 1:1 gluten-free all-purpose flour blend. Make sure the flour contains xanthan gum, as this will help mimic the elasticity of wheat flour. Just keep an eye on the dough’s texture; gluten-free doughs can behave differently.
Are garlic knots safe for pets?
While garlic is a delicious ingredient for humans, it can be toxic to dogs and cats. It’s best to keep your garlic knots away from your pets to avoid any health issues. Stick to plain bread for furry friends instead!
Homemade Garlic Knots: Soft, Buttery Bites of Joy
Ingredients
Equipment
Method
- In a small bowl, combine warm water with granulated sugar and active dry yeast. Let sit until frothy and bubbly, about 5-10 minutes.
- In a large mixing bowl, whisk together all-purpose flour and salt until well combined.
- Pour the frothy yeast mixture and olive oil into the well in the flour. Stir until it begins to form a sticky dough.
- Turn the sticky dough onto a lightly floured surface and knead for approximately 5-7 minutes until smooth and elastic.
- Shape the dough into a ball, place in an oiled bowl, cover, and let it rise in a warm space for about 1 hour.
- Once risen, punch down the dough, divide into 12 portions, and roll into long ropes. Tie into knots.
- Place knots on a parchment-lined baking sheet, cover, and let rise for another 30 minutes.
- While knots are rising, melt unsalted butter, stir in minced garlic, chopped parsley, and Italian seasoning.
- Preheat oven to 375°F (190°C). Bake knots for 15-20 minutes until golden brown.
- Brush knots with garlic butter mixture immediately after baking. Serve warm.
Leave a Reply