
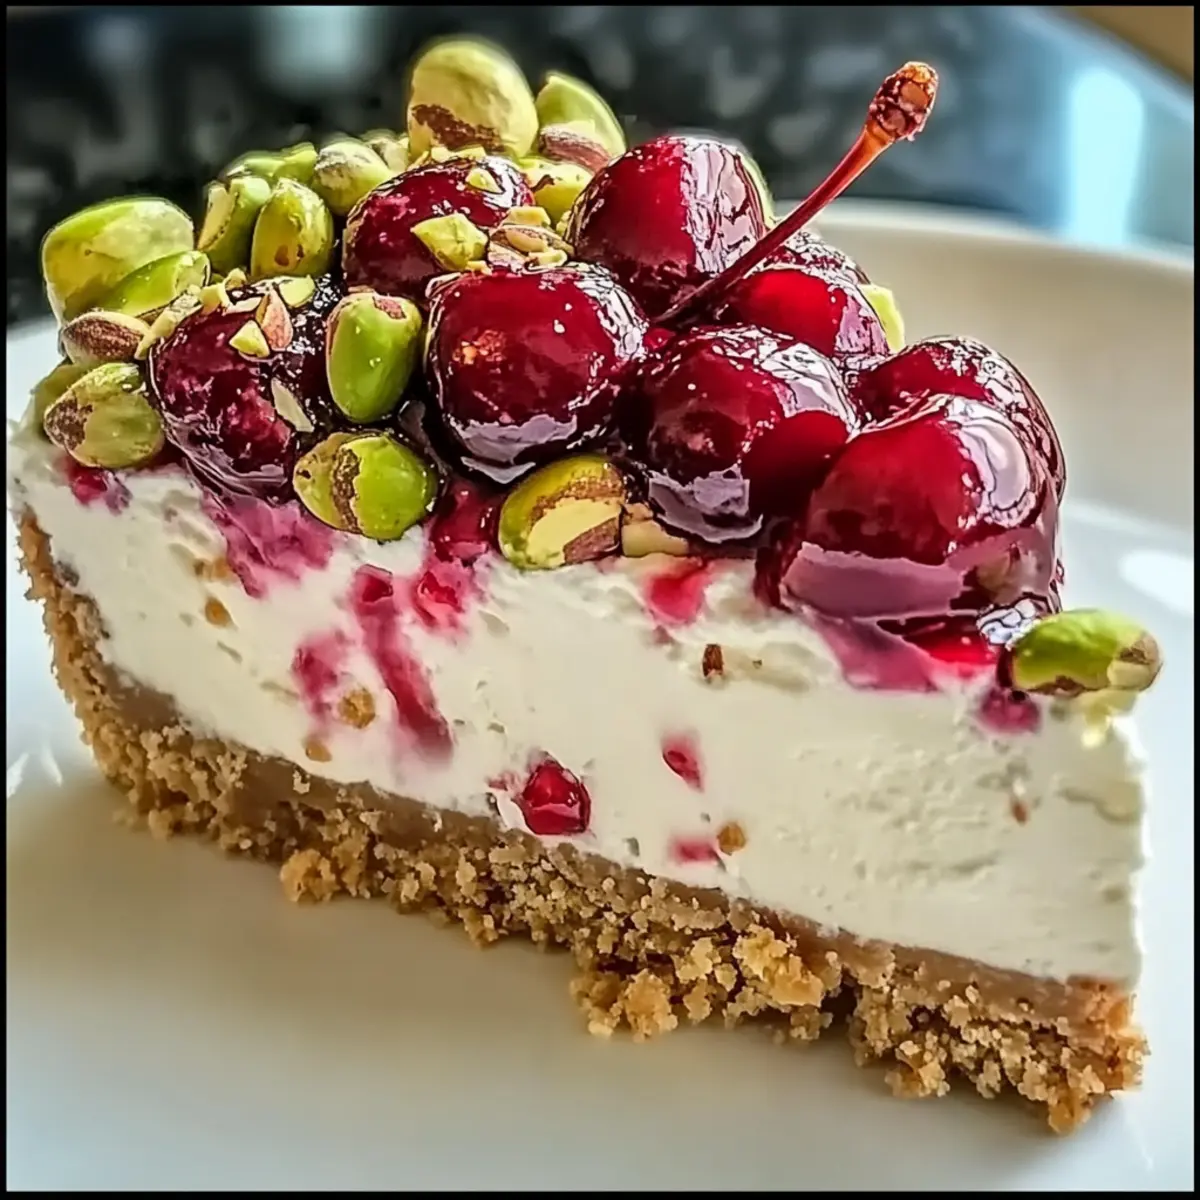
As I gazed at the stunning layers of my freshly made Cherry Pistachio Cheesecake, the vibrant red cherries glistening on top, I couldn’t help but smile. This show-stopping dessert is a delightful blend of creamy textures and nutty flavors, perfect for any celebration or simply when you want to treat yourself. With its easy no-bake preparation, you can whip it up in no time, making it an ideal choice for those busy holiday gatherings or spontaneous get-togethers. It’s both festive and versatile, guaranteeing that it will impress your friends and family. Are you ready to dive into this luscious creation and learn how to make it your own?
Why Is This Cheesecake So Special?
Unforgettable Flavors: The combination of creamy pistachio and sweet-tart cherry creates a delightful harmony that tantalizes your taste buds with each bite.
No-Bake Convenience: Perfect for busy cooks, this easy no-bake recipe saves you time without compromising on flavor or presentation.
Make Ahead Magic: Ideal for entertaining, you can prepare this show-stopping dessert a day in advance, allowing you to relax and enjoy your guests.
Visual Appeal: With its vibrant cherry topping and smooth texture, this cheesecake is as stunning as it is delicious, making it a standout at any gathering!
For those looking to explore more delightful options, check out my Mini Lemon Cheesecakes or Orange Creamsicle Cheesecake. You won’t be disappointed!
Cherry Pistachio Cheesecake Ingredients
For the Crust
- Graham Cracker Crumbs – Provide the crust’s structure and sweetness.
Substitution: Can use crushed vanilla wafers if desired. - Ground Pistachios – Adds flavor and texture to the crust.
Substitution: Ground almonds can be used for a similar taste. - Granulated Sugar – Sweetens the crust and filling.
Substitution: Coconut sugar can be used for a less processed option. - Melted Butter – Binds the crust ingredients.
Substitution: Coconut oil for a dairy-free alternative.
For the Filling
- Cream Cheese (16 oz) – Primary base for the filling, providing richness.
Substitution: Neufchâtel cheese for a lighter option. - Granulated Sugar (½ cup) – Sweetens the filling.
Substitution: Can reduce for a less sweet cheesecake. - Large Eggs (2) – Aid in setting the cheesecake.
Note: Important not to overmix to avoid cracks. - Sour Cream (½ cup) – Contributes creaminess and tang.
Substitution: Greek yogurt can be used for a similar texture. - Pistachio Pudding Mix (¼ cup, dry) – Enhances the pistachio flavor in the filling.
Substitution: For a natural version, use pistachio extract instead. - Vanilla Extract (1 tsp) – Adds depth to the filling’s flavor.
Substitution: Homemade vanilla or almond extract for unique flavor.
For the Topping
- Cherry Pie Filling (1 can, 21 oz) – Topping for the cheesecake.
Variation: Use fresh cherries for a less sweet and fresher flavor.
Step‑by‑Step Instructions for Cherry Pistachio Cheesecake
Step 1: Preheat the Oven
Begin by preheating your oven to 325°F (160°C). Meanwhile, prepare a 9-inch springform pan by greasing it lightly with butter or non-stick spray. This ensures easy removal of your Cherry Pistachio Cheesecake once it’s set and ready for serving.
Step 2: Make the Crust
In a large mixing bowl, combine graham cracker crumbs, ground pistachios, granulated sugar, and melted butter. Stir until the mixture resembles wet sand. Press this crumb mixture firmly into the bottom of your prepared springform pan, creating an even layer. Bake for 8 minutes or until lightly golden brown, then set aside to cool completely.
Step 3: Prepare the Filling
In a mixing bowl, beat the room-temperature cream cheese until smooth and creamy. Gradually add granulated sugar, mixing until fully incorporated. Add the eggs one at a time, mixing on low speed to avoid overmixing, followed by sour cream, pistachio pudding mix, and vanilla extract. Blend until just combined, ensuring a thick and creamy consistency for your Cherry Pistachio Cheesecake filling.
Step 4: Bake the Cheesecake
Pour the creamy filling over the cooled crust in your springform pan, smoothing the top with a spatula. Bake in the preheated oven for 45-50 minutes or until the center is slightly jiggly but the edges look set. Once done, turn off the oven and leave the cheesecake inside for 1 hour with the door slightly ajar to cool gradually.
Step 5: Chill the Cheesecake
After the cheesecake has cooled, carefully transfer it to the refrigerator. Allow it to chill for at least 4 hours, but overnight is recommended for the best texture and flavor. This waiting period helps the flavors to meld and the cheesecake to set perfectly.
Step 6: Top and Serve
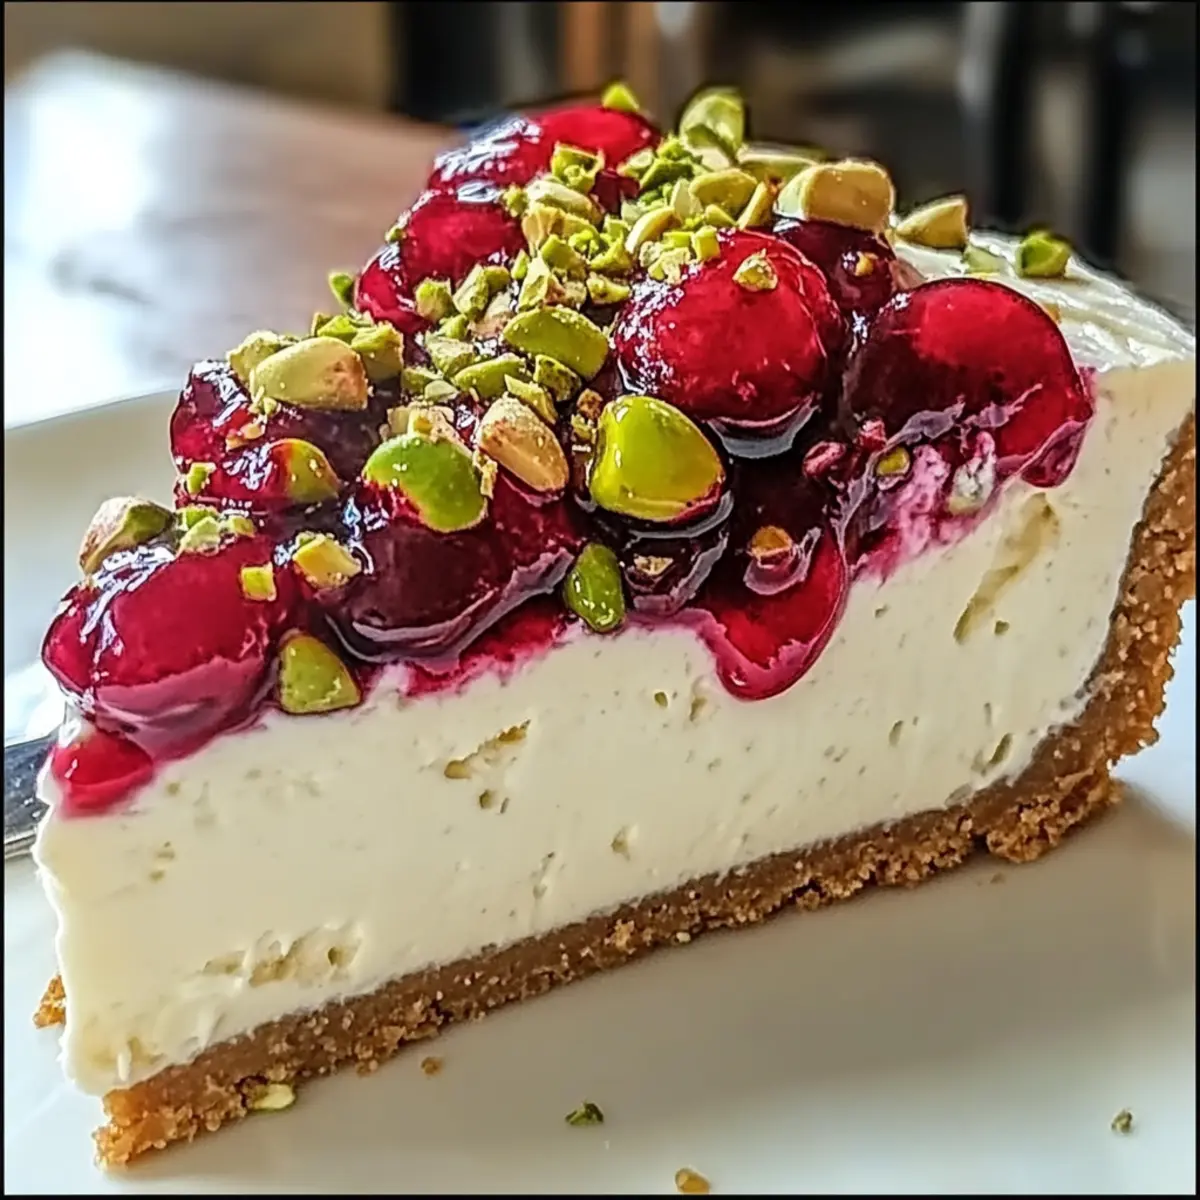
Once chilled, remove the Cherry Pistachio Cheesecake from the springform pan. Evenly spread the cherry pie filling over the top, allowing it to cascade over the edges. For an extra touch, garnish with a sprinkle of chopped pistachios before slicing into servings and delighting in this luscious dessert.
How to Store and Freeze Cherry Pistachio Cheesecake
Fridge: Store your Cherry Pistachio Cheesecake in the refrigerator for up to 5 days. Wrap it tightly in plastic wrap or place it in an airtight container to maintain freshness.
Freezer: For longer storage, freeze the cheesecake before adding the topping for up to 2 months. Make sure to wrap it well in plastic wrap and then aluminum foil.
Thawing: When ready to serve, thaw the cheesecake overnight in the refrigerator. This ensures the best texture and flavor when you finally dig in!
Serving Tip: After thawing, feel free to add the cherry topping, or serve plain if you prefer. The cheesecake remains rich and creamy, making it a delightful treat!
Expert Tips for Cherry Pistachio Cheesecake
-
Room Temperature Cream Cheese: Ensure your cream cheese is at room temperature for a smooth filling; cold cream cheese can lead to lumps in your Cherry Pistachio Cheesecake.
-
Mixing Caution: Avoid overmixing the eggs; this can cause cracks in the cheesecake as it bakes, so mix just until combined.
-
Cool Gradually: Allow your cheesecake to cool in the oven with the door ajar for at least an hour to minimize cracks on the surface.
-
Chill for Flavor: For the best flavor and texture, chill the cheesecake overnight. This helps the flavors to develop and the cheesecake to set properly.
-
Use Quality Toppings: Fresh cherries add a beautiful, vibrant touch. If using canned cherry pie filling, look for high-quality versions for the best taste.
What to Serve with Cherry Pistachio Cheesecake
Indulge in the full experience of a tasty gathering by pairing your dessert with these delightful options.
-
Creamy Mashed Potatoes: Silky and buttery, these potatoes create a comforting contrast to the sweet notes of your cheesecake. They’re a perfect accompaniment when served alongside a festive meal.
-
Savory Herb Roasted Chicken: The succulent flavors of rosemary and thyme in the chicken beautifully complement the cheesecake’s creaminess, making for a well-rounded dinner. Picture a hearty holiday table filled with warmth!
-
Fresh Garden Salad: A light, crisp salad with mixed greens, cherry tomatoes, and a tangy vinaigrette offers a refreshing bite that balances the rich dessert perfectly.
-
Sparkling Raspberry Lemonade: This refreshing drink adds a zesty contrast to the creamy cheesecake, making it a fun and vibrant drink choice for summer gatherings or festive occasions.
-
Chocolate Mousse: For a luxurious touch, serve alongside a rich, airy chocolate mousse. The combination of flavors will elevate the dessert experience to something truly exceptional.
-
Mini Fruit Tartlets: These colorful, bite-sized treats with fresh fruit provide a delightful crunch and additional layer of sweetness, enhancing the overall dessert presentation.
-
Espresso Coffee: A rich, bold espresso is an excellent way to cleanse the palate after the cheesecakes’ creaminess while providing a touch of warmth that complements dessert time.
-
Pistachio Ice Cream: For a harmonious theme, a scoop of pistachio ice cream adds a delightful nutty flavor while providing an extra layer of creaminess, enhancing your Cherry Pistachio Cheesecake experience.
Cherry Pistachio Cheesecake Variations
Feel free to let your creativity shine by customizing your Cherry Pistachio Cheesecake with these delightful twists!
-
Dairy-Free: Substitute cream cheese with dairy-free options like cashew cream for a luscious vegan cheesecake. It’s surprisingly rich and tasty!
-
Heathier Sweetener: Use honey or maple syrup instead of granulated sugar for a natural sweetness, keeping the recipe wholesome and delightful.
-
Nut-Free: If allergies are a concern, simply replace ground pistachios with sunflower seed meal for a nut-free version that still packs a flavor punch.
-
Fruity Twist: Instead of cherry pie filling, top your cheesecake with fresh strawberries or raspberries for a refreshing berry burst that brightens each bite.
-
Mini Cheesecakes: Turn the batter into individual mini cheesecakes by pouring into muffin tins, perfect for parties or portion control.
-
Flavor Boost: Enhance the pistachio flavor further by adding a teaspoon of almond extract to the filling. This subtle addition takes it to another level!
-
Layered Delight: Add a layer of chocolate ganache on top before the cherry filling for a chocolate-pistachio combination that’s irresistibly indulgent.
-
Garnish Switch-Up: Instead of chopped pistachios, consider using toasted coconut flakes or crushed graham crackers for a fun texture contrast on top.
Feeling inspired? Check out my Cherry Shortbread Cookies or venture into the realm of a creamy No-Bake Cheesecake for more home-cooked goodness!
Make Ahead Options
These Cherry Pistachio Cheesecakes are perfect for meal prep enthusiasts looking to save time for busy weeknights or special occasions! You can prepare the crust and filling up to 24 hours in advance, allowing the flavors to meld beautifully. Simply make the crust and filling as instructed, and before pouring the filling over the crust, cover the crust tightly with plastic wrap to prevent it from drying out. Once you’re ready to serve, just pour the filling on top and bake as directed. After cooling, chill the cheesecake in the refrigerator for at least 4 hours, or ideally overnight, ensuring it stays just as delicious and creamy as when made fresh. Enjoy the convenience of a delightful dessert that’s ready to impress your guests!
Cherry Pistachio Cheesecake Recipe FAQs
What type of cherries should I use for the topping?
I recommend using fresh cherries for a less sweet and fresher flavor, but if you prefer convenience, canned cherry pie filling is a great option as well. Just make sure to choose a high-quality brand for the best taste!
How long can I store my Cherry Pistachio Cheesecake?
Your luscious cheesecake can be stored in the refrigerator for up to 5 days. To keep it fresh, wrap it tightly in plastic wrap or transfer it to an airtight container. This will help maintain its creamy texture and flavors!
Can I freeze my Cherry Pistachio Cheesecake?
Absolutely! You can freeze the cheesecake, but be sure to do so before adding the cherry topping. Wrap it tightly in plastic wrap and then in aluminum foil. It can be frozen for up to 2 months. When you’re ready to enjoy, simply thaw it overnight in the refrigerator.
What do I do if my cheesecake cracks while baking?
Don’t worry! Cracks can happen, especially if the batter is overmixed. To help minimize cracks, make sure to mix the eggs in gently and avoid overmixing. Also, allowing the cheesecake to cool gradually in the oven with the door slightly ajar can help reduce cracking as well.
Is this recipe safe for people with nut allergies?
Good question! Since this Cherry Pistachio Cheesecake contains ground pistachios, it is not suitable for individuals with nut allergies. However, you could try substituting with a different crumb crust using crushed graham crackers and omitting nuts entirely to create a nut-free version.
Can I make this cheesecake ahead of time?
Yes, this cheesecake is perfect for making ahead! You can prepare it a day in advance, let it chill in the refrigerator overnight, and it will be ready to serve the next day. This is a great way to relieve stress on special occasions or gatherings!
Cherry Pistachio Cheesecake: A Creamy Dreamy Delight
Ingredients
Equipment
Method
- Preheat your oven to 325°F (160°C) and prepare a 9-inch springform pan by greasing it lightly.
- In a mixing bowl, combine graham cracker crumbs, ground pistachios, granulated sugar, and melted butter. Stir until the mixture resembles wet sand. Press the mixture into the bottom of your springform pan and bake for 8 minutes.
- Beat the room-temperature cream cheese until smooth, then gradually add sugar. Mix in the eggs one at a time, followed by sour cream, pistachio pudding mix, and vanilla extract. Blend until just combined.
- Pour the filling over the cooled crust and bake for 45-50 minutes until slightly jiggly in the center. Turn off the oven, leave the cheesecake inside for 1 hour with the door slightly ajar.
- Transfer the cheesecake to the refrigerator and chill for at least 4 hours, preferably overnight.
- Remove the springform pan and top with cherry pie filling. Garnish with chopped pistachios if desired before serving.
Leave a Reply