
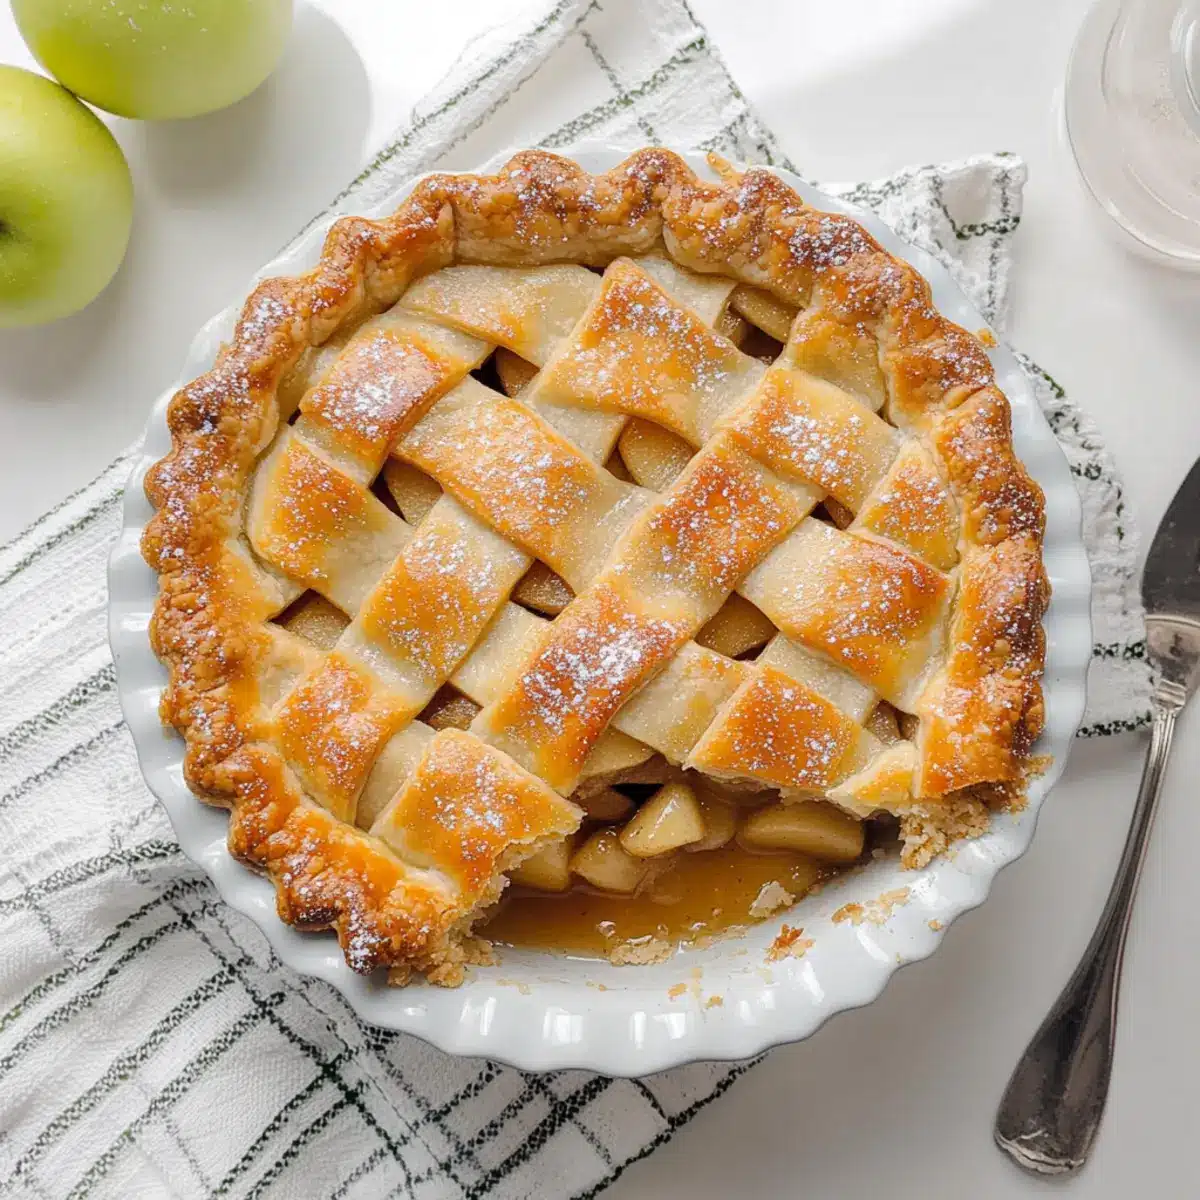
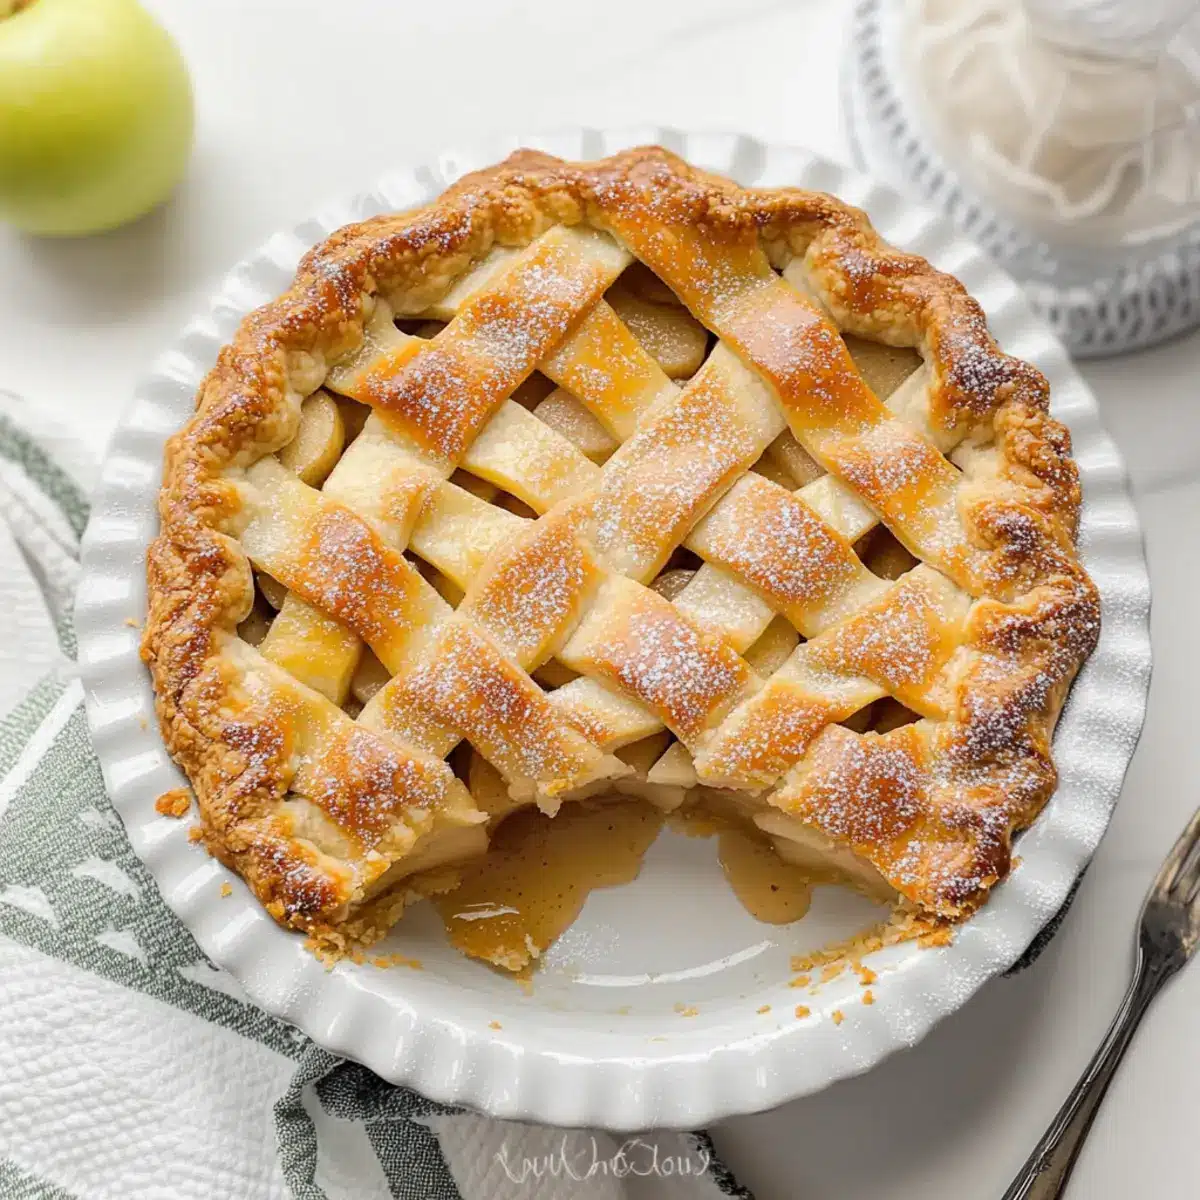
As I stood by the window, the crisp scent of autumn wafted in—an irresistible reminder that it was time to bake my classic homemade Apple Pie. This recipe encapsulates everything we love about comfort food: a flaky, buttery crust enveloping a warm filling of perfectly spiced apples. With simple ingredients and effortless steps, this Apple Pie Recipe transforms into a crowd-pleasing delight that brightens any gathering or quiet evening at home. Not only is it a fantastic opportunity to showcase your baking skills, but it’s also a lovely way to reconnect with cherished memories, making each bite feel like a sweet hug. Are you ready to fill your kitchen with the enchanting aroma of baked apples and cinnamon?

Why is this Apple Pie Recipe a Must-Try?
Unforgettable Aroma: The moment you begin baking, your home will fill with the warm, inviting scent of buttery crust and spiced apples, creating a cozy atmosphere that’s simply irresistible.
Classic Comfort: This recipe combines traditional flavors that evoke nostalgic memories while offering a delicious treat that everyone will love, making it the perfect dessert for family gatherings or cozy nights in.
Easy to Customize: Feel free to experiment with different apple varieties and spices—whether you prefer tart Granny Smith or sweet Honeycrisp, the choice is yours!
Minimal Effort, Maximum Impact: With straightforward steps and basic ingredients, you’ll have this crowd-pleaser ready to impress in no time. Plus, why not serve it warm with a scoop of vanilla ice cream for an extra special touch?
As you savor every slice, you may also want to check out our [Apple Pie Bread](https://myrecipex.com/apple-pie-bread-pudding/) for a delightful twist or the perfect Chocolate Pie Decadent to satisfy your sweet tooth even more!
Apple Pie Recipe Ingredients
For the Pie Crust
• Perfect Pie Crust Recipe – A flaky and buttery crust that serves as the base for our classic apple pie.
• ¼ cup butter – Adds richness and aids in crust flakiness; unsalted butter is recommended for precise flavor control.
• 1 egg – Gives your crust a beautiful golden sheen when brushed on top.
• 1 teaspoon water – Used in the egg wash for a glossy finish.
For the Apple Filling
• 8 cups thinly sliced apples (peeled and cored) – The star of the show; use a mix of tart and sweet varieties like Granny Smith and Gala for the best flavor balance.
• 2/3 cup lightly packed brown sugar – Sweetens the filling and deepens its flavor; feel free to swap with white sugar for a sweeter note.
• 1 tablespoon all-purpose flour – Helps thicken the apple filling; gluten-free flour can also be used.
• 2 teaspoons cinnamon – Enhances the apple flavor and adds warmth; nutmeg makes a delightful alternative if desired.
• 1 teaspoon lemon juice – Brightens and balances sweetness; apple cider vinegar works as a substitute in a pinch.
• ¼ teaspoon salt – Essential for amplifying flavors, helping to balance the sweetness.
Optional Topping
• Coarse sugar – Sprinkled on top for a delightful, crunchy finish that adds a touch of elegance to your apple pie.
This Apple Pie Recipe is sure to warm your heart and home!
Step‑by‑Step Instructions for Classic Homemade Apple Pie
Step 1: Preheat Oven & Prepare Pan
Begin your journey by preheating your oven to 425°F (220°C). While the oven warms up, take a moment to gather your 9-inch pie plate. This pie plate will cradle your delicious Apple Pie, so make sure it’s ready for the comforting goodness about to unfold.
Step 2: Cook Apples
In a medium pot over medium-low heat, melt ¼ cup of butter until it sizzles gently. Add your 8 cups of thinly sliced apples, followed by 2/3 cup of brown sugar, 1 tablespoon of flour, 2 teaspoons of cinnamon, 1 teaspoon of lemon juice, and ¼ teaspoon of salt. Cook the mixture for about 8–10 minutes, stirring occasionally, until the apples are tender but not mushy. Once done, set aside to cool.
Step 3: Prepare Crust
While your apple filling cools, take out your pie dough and divide it into two equal discs. Roll out one disc on a floured surface until it’s big enough to fit in the bottom and sides of your pie plate. Place this rolled crust into the dish, making sure it fits snugly without any tears, ready to hold your apple filling.
Step 4: Assemble Pie
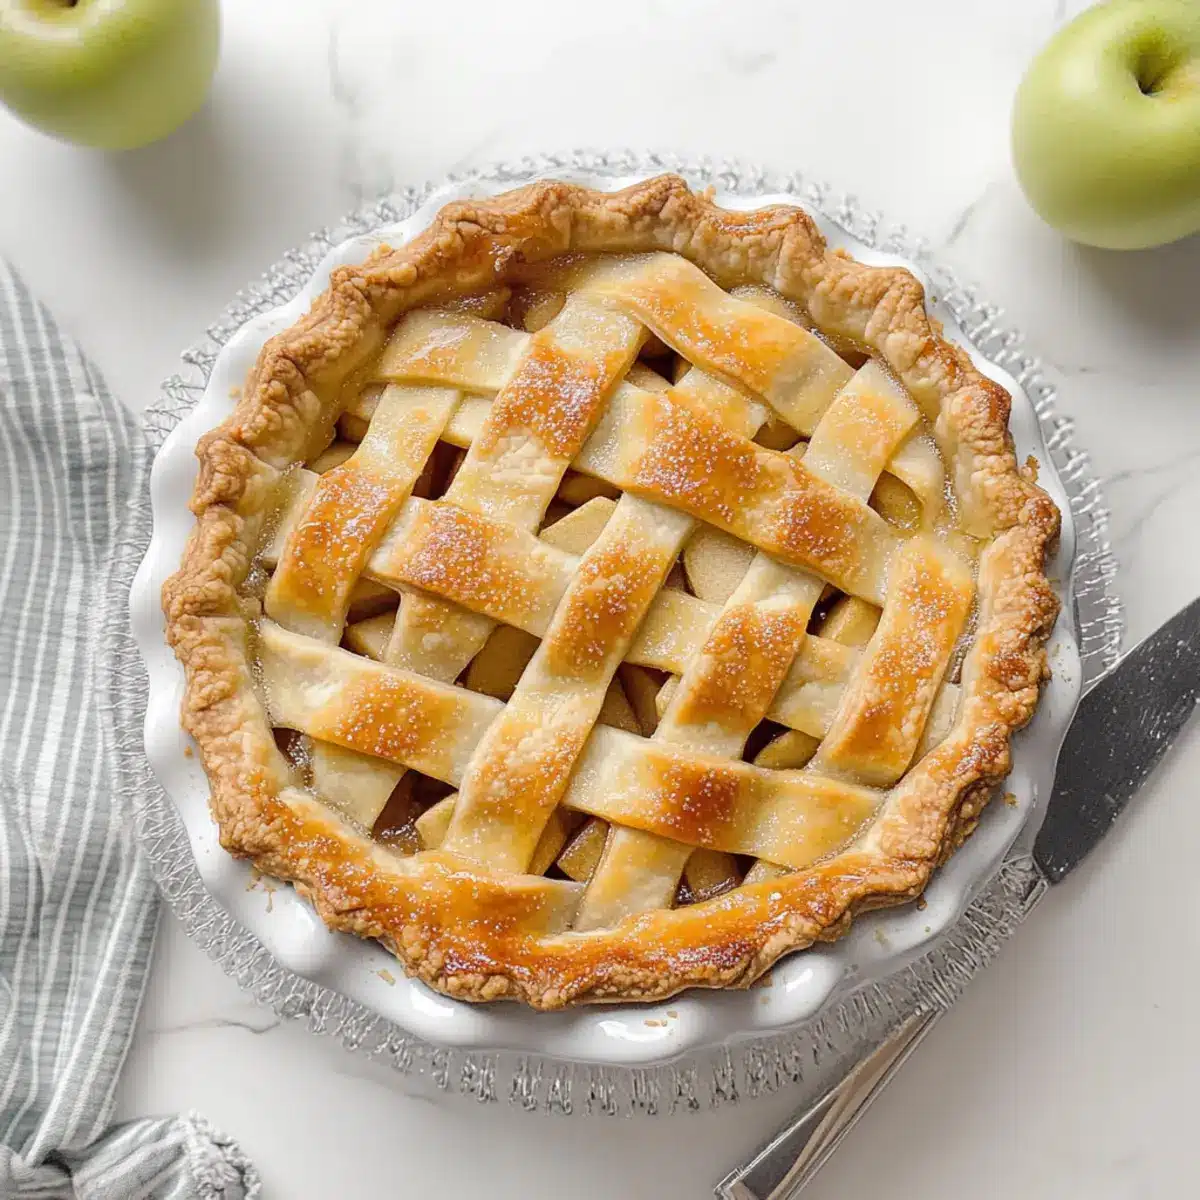
Once your apple filling has cooled, pour it evenly into the prepared pie crust in the dish. Roll out the second disc of pie dough, and decide whether to cover the pie completely or create a decorative lattice pattern on top. If you’re opting for a full crust, remember to cut a few vents for steam to escape. Trim any excess dough, then crimp the edges together for that homemade touch.
Step 5: Brush & Bake
Whisk 1 egg with 1 teaspoon of water to create an egg wash, and gently brush it over the top of the pie crust for that gorgeous golden finish. If you’d like, sprinkle some coarse sugar on top for added crunch. Place your pie in the preheated oven and bake at 425°F for 15 minutes, then reduce the temperature to 350°F (175°C) and continue baking for another 40 minutes, or until the crust is golden brown and the filling bubbles enticingly.
Step 6: Cool & Serve
When your Classic Homemade Apple Pie is finished baking, remove it from the oven and let it cool for at least 15 minutes. This cooling period helps the filling set and makes slicing easier. Serve with a scoop of vanilla ice cream for an extra delightful treat, and enjoy every comforting bite!
Apple Pie Recipe Variations
Get ready to unleash your creativity in the kitchen—customizing your Apple Pie is a fun way to make it uniquely yours!
-
Apple Variety: Use a mix of your favorite apples, like Honeycrisp for sweetness and Granny Smith for tartness, creating a delightful balance.
-
Sugar Swap: Adjust sugar levels for taste—reduce if using naturally sweet apples or consider experimenting with coconut sugar for a different flavor profile.
-
Spicy Twist: For a flavor boost, incorporate nutmeg or allspice along with cinnamon, adding warmth and complexity to your filling.
-
Dairy-Free: Substitute the butter with coconut oil or vegan butter to create a deliciously flaky crust that’s perfect for dairy-sensitive guests.
-
Gluten-Free: Use a gluten-free flour blend in the crust and filling to accommodate gluten-free eaters in your crowd without losing that homey taste.
-
Extra Crunch: Incorporate chopped walnuts or pecans in the filling for an added texture that beautifully contrasts with the soft apples. It’s a nutty surprise!
-
Flavor Infusion: Add a tablespoon of vanilla extract to the apple filling to elevate the flavor profile, making it even more comforting and creamy.
-
Heat Factor: Toss in a pinch of cayenne pepper or red pepper flakes for a surprising kick, enhancing the warmth and bringing a new level of excitement to every bite.
And while you’re at it, why not check out our delightful [Chocolate Pie Decadent](https://myrecipex.com/chocolate-pie-recipe/) for another level of sweetness after your apple-loving adventure? Or perhaps try our delightful Butternut Squash Apple bake for a fall-inspired twist!
Make Ahead Options
These Classic Homemade Apple Pies are perfect for busy home cooks looking to streamline their meal prep! You can prepare the apple filling up to 3 days in advance; simply cook the apples and let the mixture cool completely before storing it in an airtight container in the refrigerator. Additionally, the pie crust can be rolled out and placed in the pie plate, covered with plastic wrap, and refrigerated for up to 24 hours. When you’re ready to bake, just fill the crust with the chilled apple filling, top with your preferred crust design, brush with egg wash, and bake according to the original instructions. This way, you’ll enjoy a delicious, homemade apple pie with minimal last-minute effort while maintaining its delightful texture and flavor!
Expert Tips for the Perfect Apple Pie
-
Avoid Soggy Crust: Cooking the apple filling beforehand allows excess juices to evaporate, ensuring the apples are tender without making the crust soggy.
-
Choosing Apples: For the best flavor balance, mix tart and sweet apple varieties, like Granny Smith and Honeycrisp in your Apple Pie Recipe.
-
Make It Ahead: Prepare the apple filling in advance and refrigerate. This will enhance flavors and save you time on baking day.
-
Watch the Baking Time: If your crust browns too quickly, cover it loosely with foil to prevent burning while the filling cooks through.
-
Let It Cool: Allow the pie to cool for at least 15 minutes before slicing. This helps the filling set, making for neater slices.
What to Serve with Classic Homemade Apple Pie
There’s nothing quite like rounding off a meal with a sweet touch that brings everyone together.
-
Vanilla Ice Cream: A classic pairing that melts into the warm pie, enhancing its comforting flavors and adding a creamy texture.
-
Whipped Cream: Light and fluffy, a dollop of whipped cream adds an airy contrast, making each slice feel indulgent and special.
-
Caramel Sauce: Drizzling warm caramel over your slice creates a rich, sweet layer that complements the spiced apples beautifully.
-
Cheddar Cheese: Pairing apple pie with sharp cheddar creates a delicious sweet-and-savory combination, enhancing both flavors for a unique treat.
-
Chai Tea: The spicy warmth of chai tea complements the cinnamon flavors in the pie, offering a cozy beverage option for a chilly night.
-
Cider or Sparkling Juice: A glass of chilled cider or fizzy juice adds a refreshing contrast to the warm pie, perfect for gatherings or celebrations.
-
Pumpkin Spice Latte: Embracing the flavors of fall, this warm drink mirrors the spices in the apple pie, making it a delightful match.
-
Bourbon or Spiced Rum: A small glass of bourbon or spiced rum elevates the dessert experience, adding warmth to your gathering while harmonizing with the pie’s flavors.
-
Maple Pecan Topping: Create a crunchy topping with roasted pecans and maple syrup for an exciting twist that pairs well with the pie’s sweetness.
How to Store and Freeze Apple Pie
Fridge: Store leftover apple pie in an airtight container in the refrigerator for up to 3 days; it will stay fresh and delicious.
Freezer: If you want to freeze your apple pie, wrap it tightly in plastic wrap and then aluminum foil to prevent freezer burn. It can last up to 3 months.
Reheating: For the best texture, reheat slices in the oven at 350°F (175°C) for about 10-15 minutes until warmed through. Enjoy your Apple Pie Recipe just like freshly baked!
Thawing: If you freeze the pie, bake it directly from frozen; just adjust the baking time accordingly to ensure it’s heated through.
Apple Pie Recipe FAQs
What type of apples should I use for the best flavor in my apple pie?
Absolutely! For that perfect balance of sweet and tart, I recommend using a mix of Granny Smith and Honeycrisp apples. Granny Smith gives you that delightful tartness, while Honeycrisp adds just the right amount of sweetness. Feel free to experiment with other varieties like Fuji or Gala, based on your taste preference!
How should I store any leftover apple pie?
You can keep any remaining apple pie in an airtight container in the refrigerator for up to 3 days. But if you want to savor it longer, consider freezing! Just make sure it’s tightly wrapped in plastic wrap and then aluminum foil to ward off freezer burn.
Can I freeze my apple pie? If so, how?
Yes, you absolutely can freeze your apple pie! First, allow it to cool completely after baking. Then, wrap it tightly in plastic wrap, followed by a layer of aluminum foil. This way, it can last up to 3 months in the freezer. When you’re ready to enjoy it, don’t thaw before baking; simply bake it straight from frozen, adjusting the time as necessary for thorough heating.
What can I do if my pie crust comes out soggy?
If you find that your pie crust is soggy, don’t fret! Next time, try cooking the apple filling first to evaporate excess juices before pouring it into the crust. Additionally, make sure to roll your crust slightly thicker to absorb any moisture from the filling. And as a tip, you can brush the crust with a little egg wash to form a barrier against the juices.
Is your apple pie recipe pet-friendly?
While the ingredients used to make this apple pie (like apples and butter) might be safe for pets in moderation, be cautious with added sugar and spices such as cinnamon, as these can upset their stomach. It’s best to enjoy this delicious apple pie yourself and stick to pet-friendly treats for your furry friends.
How can I make my apple pie filling thicker?
If you want a thicker filling, I suggest increasing the amount of flour or using cornstarch as a thickener. Mix 1-2 tablespoons of cornstarch with the brown sugar before adding it to the apples. This helps soak up excess moisture after baking. Additionally, allow the pie to cool fully before slicing, as this will help the filling to set and become less runny.
Irresistibly Good Apple Pie Recipe for Cozy Nights
Ingredients
Equipment
Method
- Preheat your oven to 425°F (220°C) and prepare your 9-inch pie plate.
- Melt ¼ cup of butter in a medium pot over medium-low heat. Add in the apples, brown sugar, flour, cinnamon, lemon juice, and salt. Cook for 8-10 minutes until apples are tender.
- Roll out one disc of pie dough and place it into the pie plate.
- Pour the cooled apple filling into the pie crust and cover with the second rolled disc, trimming and crimping the edges.
- Brush the top crust with the egg wash and sprinkle with coarse sugar. Bake at 425°F for 15 minutes, then reduce to 350°F (175°C) and bake for another 40 minutes.
- Let the pie cool for at least 15 minutes before serving.
Leave a Reply