
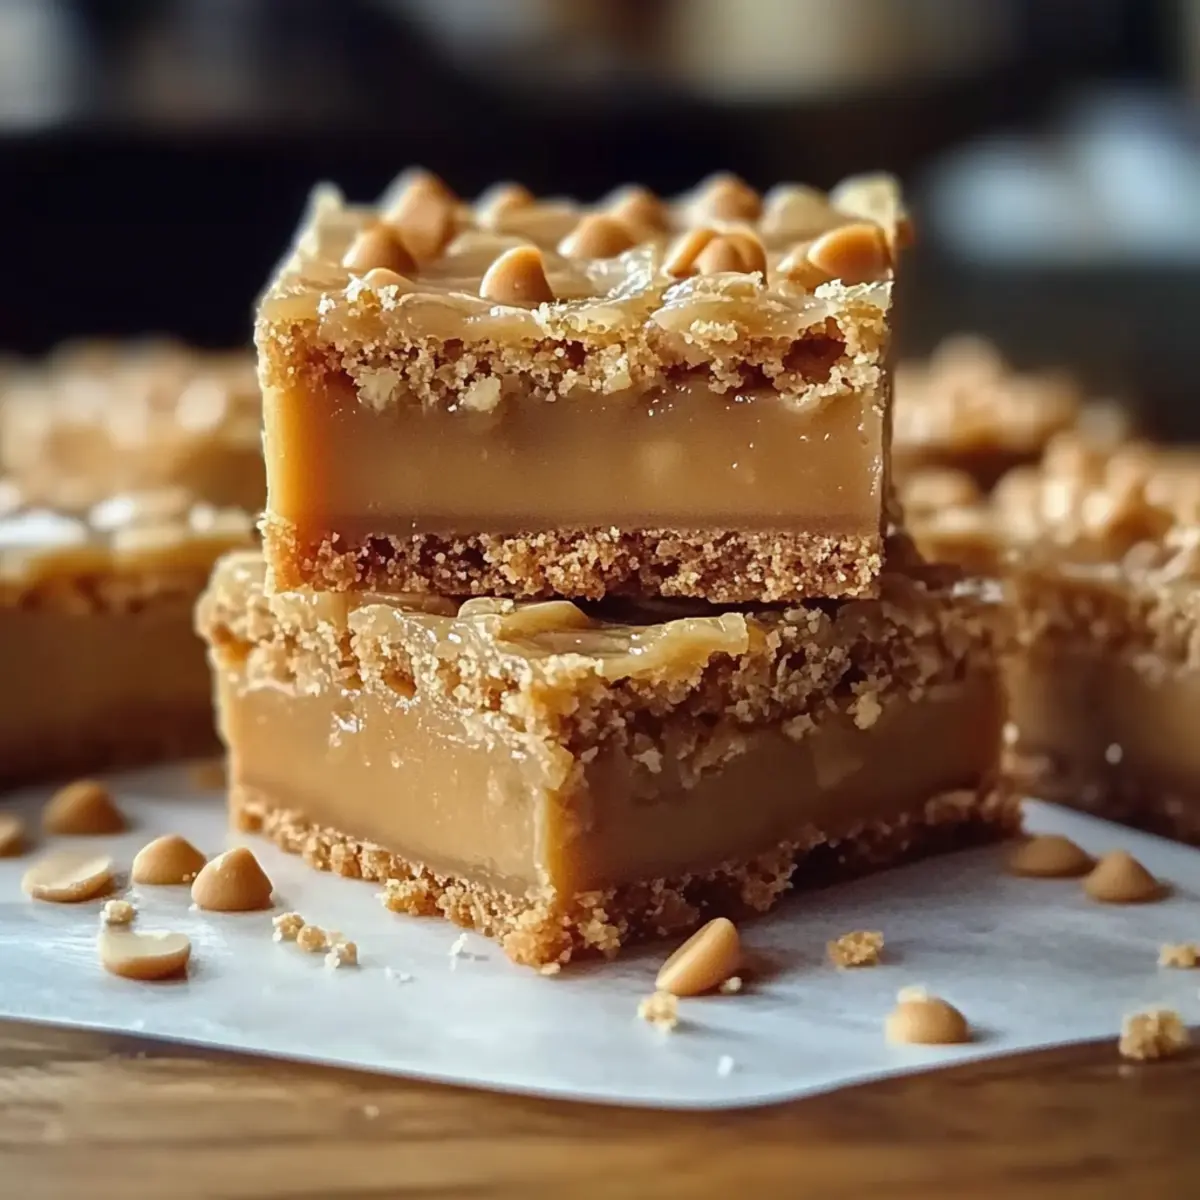
Walking into a cozy kitchen filled with warm, buttery aromas immediately transports me back to cherished moments with my family. That’s exactly how I feel when I make Trisha Yearwood’s Butterscotch Bars. These chewy, indulgent treats meld perfectly sweet butterscotch flavor with a delightful texture, making them an irresistible choice for any occasion. Whether you’re a busy home chef or someone looking for a comforting dessert, these bars offer quick preparation with minimal fuss while being crowd-pleasers at gatherings. Plus, with a simple gluten-free variation, everyone can indulge in this mouthwatering delight. Curious about how to bring that nostalgic flavor into your kitchen? Let’s dive into the recipe!
Why Are Butterscotch Bars So Irresistible?
Nostalgic Comfort: There’s nothing quite like the rich, sweet scent of butterscotch in the air, evoking memories of family gatherings and cozy evenings at home.
Effortless Preparation: With only a handful of ingredients and simple steps, busy home chefs can whip up these bars in no time, making them perfect for impromptu gatherings.
Deliciously Versatile: You can easily customize with nuts or a drizzle of chocolate, allowing you to tailor each batch to your liking!
Gluten-Free Option: Everyone deserves a treat, and by swapping in gluten-free flour, your friends with dietary needs can enjoy these delightful squares too.
Crowd-Pleasing Delight: Whether served at potlucks, parties, or just as an afternoon snack, these chewy butterscotch bars are sure to impress! Looking for more sweet ideas? Try making some Cereal Bars Homemade or indulge in a slice of Butterscotch Crunch Cake for an extra dose of sweetness!
Butterscotch Bars Ingredients
For the Batter
- Unsalted Butter – Adds richness and moisture. Substitution Note: Salted butter can be used; reduce added salt slightly.
- Light Brown Sugar – Provides sweetness and a hint of caramel flavor. Substitution Note: Dark brown sugar for a deeper flavor.
- Granulated Sugar – Balances sweetness and contributes to the bar’s structure.
- Large Eggs – Binds ingredients for a chewy texture. No substitutions recommended; eggs enhance texture.
- Vanilla Extract – Enhances overall flavor. Substitution Note: Use pure vanilla for the best results.
- All-Purpose Flour – Gives structure and stability to the bars. For gluten-free, use a gluten-free flour blend.
- Baking Soda – Leavening agent for lightness. Do not omit; it’s essential for the texture.
- Salt – Balances sweetness. Use kosher or sea salt for best flavor.
- Butterscotch Chips – Key flavor component, adds sweetness and texture. Substitution Note: Chocolate chips or nuts can be used for variation.
Step‑by‑Step Instructions for Trisha Yearwood’s Irresistible Butterscotch Bars
Step 1: Preheat the Oven
Begin by preheating your oven to 350°F (175°C). While it warms up, prepare a 9×13 inch baking pan by greasing it lightly or lining it with parchment paper. This will prevent the butterscotch bars from sticking and make for easy removal once they cool, paving the way for a successful baking experience.
Step 2: Cream the Butter and Sugars
In a large mixing bowl, add softened unsalted butter, light brown sugar, and granulated sugar. Using an electric mixer, beat the mixture on medium speed for about 3 to 5 minutes until it becomes light and fluffy. This creamy base is essential for the texture of your butterscotch bars, so ensure it is well incorporated before moving on.
Step 3: Incorporate Eggs and Vanilla
Next, add the large eggs to the butter-sugar mixture one at a time, mixing well after each addition. Then, stir in the vanilla extract until fully combined. The mixture should look smooth and well-blended, which will contribute to the chewy texture of your delicious butterscotch bars.
Step 4: Combine Dry Ingredients
In a separate bowl, whisk together the all-purpose flour, baking soda, and salt. This step is key to ensuring the ingredients are evenly distributed and will help provide lift to your butterscotch bars. Once combined, set this dry mixture aside as you prepare to bring everything together.
Step 5: Mix Wet and Dry Ingredients
Gradually add the dry ingredients to the wet mixture, stirring slowly until just combined. Be careful not to overmix, as this can affect the final texture of your butterscotch bars. The batter should be slightly thick and cohesive, signaling that you’re ready for the next step.
Step 6: Fold in Butterscotch Chips
Now it’s time to stir in the butterscotch chips, ensuring they are evenly distributed throughout the batter. This will guarantee that every bite of your bars is bursting with that sweet, buttery flavor. Once combined, you can move on to the baking stage!
Step 7: Spread and Bake
Pour the batter into your prepared baking pan, spreading it out evenly with a spatula. Bake in the preheated oven for 20 to 25 minutes, or until the edges turn golden brown and a toothpick inserted in the center comes out with a few moist crumbs. This baking process is crucial for achieving that perfect chewy texture.
Step 8: Cool and Serve
After baking, allow the butterscotch bars to cool completely in the pan. This may take about 30 minutes. Once cooled, slice them into squares, revealing their chewy interior and golden edges. These irresistible butterscotch bars are ready to be enjoyed, whether served as a sweet treat or a delightful addition to any gathering!
Make Ahead Options
These Trisha Yearwood Butterscotch Bars are perfect for meal prep enthusiasts! You can prepare the batter up to 24 hours in advance by mixing all the wet and dry ingredients, then store it covered in the refrigerator to maintain freshness. Just remember to allow the batter to come to room temperature before spreading it into the baking pan for even baking. Additionally, you can make the bars entirely and refrigerate them for up to 3 days in an airtight container. For the best flavor and texture, enjoy them warm after reheating in the oven for a few minutes before serving. This way, you can indulge in these golden, chewy bars with minimal effort on busy evenings!
What to Serve with Trisha Yearwood’s Butterscotch Bars
Indulging in the rich, buttery sweetness of butterscotch bars creates a delightful craving for the perfect pairings to elevate your dessert experience.
-
Vanilla Ice Cream: A scoop of creamy vanilla ice cream balances the sweet richness of the bars, enhancing the overall indulgence.
-
Whipped Cream: Light and fluffy, a dollop of whipped cream adds an airy texture that complements the dense chewiness of butterscotch bars.
-
Fresh Berries: Juicy strawberries or tart raspberries provide a burst of flavor and freshness, cutting through the sweetness and adding a pop of color.
-
Coffee: A warm cup of coffee perfectly complements the buttery flavors, making each bite even more comforting and satisfying.
-
Chocolate Drizzle: A drizzle of chocolate on top adds a luxurious twist, enhancing each bar’s sweetness while providing a beautiful presentation.
-
Chopped Nuts: Scatter some toasted pecans or walnuts for a crunchy texture that contrasts wonderfully with the soft, chewy bars.
-
Caramel Sauce: Serve with a side of warm caramel sauce for dipping; its rich flavor matches beautifully with the butter and butterscotch.
-
Milk: A glass of cold milk is a classic pairing, washing down the deliciousness and ensuring every bite is smoothly savored.
-
Chai Tea: This spiced beverage provides warmth and aromatic flavors that enhance the sweetness of the bars, perfect for a cozy gathering.
Expert Tips for Perfect Butterscotch Bars
-
Softened Butter: Ensure your butter is softened, not melted, for creamy consistency and the best texture in your butterscotch bars.
-
Mix Carefully: Avoid overmixing the batter after adding flour to prevent dense bars. Mix just until combined for that chewy texture.
-
Cool Completely: Let the bars cool completely in the pan before cutting. This ensures clean edges and helps them set perfectly.
-
Watch the Bake Time: Keep an eye on the baking time. Overbaking can dry out the bars, so pull them when they’re golden and a toothpick has moist crumbs.
-
Flavor Variations: Don’t hesitate to experiment with add-ins like nuts or chocolate chips for a delicious twist on these butterscotch bars!
Storage Tips for Butterscotch Bars
Room Temperature: Store your butterscotch bars in an airtight container at room temperature for up to 3-4 days to maintain optimal freshness and flavor.
Fridge: For longer shelf life, you can refrigerate the bars, where they’ll last for up to a week. Be sure to wrap them tightly to prevent drying out.
Freezer: Freeze leftover butterscotch bars by wrapping individual squares in plastic wrap and placing them in a freezer-safe bag for up to 2-3 months.
Thawing: When ready to enjoy, thaw the bars at room temperature for a couple of hours or pop them in the microwave for a quick, warm treat.
Butterscotch Bars Variations & Substitutions
Feel free to let your creativity shine and customize these delightful treats to suit your taste buds!
-
Nutty Twist: Add 1 cup of chopped pecans or walnuts for extra crunch and flavor. The combination of soft butterscotch and crunchy nuts creates a delightful contrast.
-
Chocolate Drizzle: Melt some chocolate and drizzle it over the cooled bars for an indulgent treat. This not only adds a luxurious touch but also a new layer of flavor that complements the butterscotch beautifully.
-
Fruit Infusion: Stir in 1/2 cup of dried cranberries or chopped dried apricots. The sweetness and chewy texture of dried fruit will brighten up your bars and offer a delicious twist.
-
Zesty Surprise: Incorporate the zest of one lemon or orange to make your bars burst with citrusy freshness. This unexpected hint of flavor can elevate your butterscotch experience!
-
Gluten-Free: Substitute all-purpose flour with a gluten-free flour blend for a gluten-free version that everyone can enjoy. This swap maintains that lovely texture while accommodating dietary needs.
-
Flavored Extracts: Replace vanilla extract with almond or maple extract for a unique flavor profile. Just a little can go a long way in transforming your bars into something special.
-
Seasonal Spices: Add a teaspoon of cinnamon or nutmeg for a warm, spiced flavor that’s perfect for cozy gatherings. These spices enhance the sweetness and evoke a truly comforting vibe.
-
Savory Kick: Mix in a pinch of sea salt flakes on top before baking for a balanced salty-sweet flavor that elevates the entire treat. This unexpected addition may become your new go-to!
With so many options, your butterscotch bars can be tailored to fit any occasion or craving. Enjoy experimenting, and if you find another inspiring variation, share it with your friends! For more delicious recipes, don’t miss out on trying Cereal Bars Homemade or indulge in a slice of Butterscotch Crunch Cake next!
Trisha Yearwood’s Irresistible Butterscotch Bars Recipe FAQs
What should I look for when selecting butterscotch chips?
Absolutely! When selecting butterscotch chips, look for brands that use high-quality ingredients. Ensure the chips are free from any discoloration or hard clumps. Opt for chips that have a smooth, consistent texture for the best melting quality; this will significantly enhance your bars.
How do I store leftover butterscotch bars?
Very simple! Store your butterscotch bars in an airtight container at room temperature for up to 3-4 days. If you find you have leftovers, refrigerating them can extend their shelf life to about a week; just remember to wrap them tightly to keep moisture out.
Can I freeze butterscotch bars?
Of course! Freezing is a great option. To freeze butterscotch bars, wrap each square tightly in plastic wrap and place them in a freezer-safe zip-top bag. This way, they’ll stay fresh for up to 2-3 months. When you’re ready to eat, simply thaw them at room temperature for a couple of hours or gently warm them in the microwave.
What should I do if my butterscotch bars are too dry?
If your butterscotch bars turned out dry, don’t fret! This can happen if they were overbaked or if the butter was too cold during creaming. To counter this, I recommend adding a small drizzle of melted butter or a scoop of vanilla ice cream on top when serving to restore some moisture and enhance flavor.
Are there any dietary considerations for these butterscotch bars?
Absolutely! To make these bars suitable for gluten-free diets, simply substitute the all-purpose flour with a good quality gluten-free flour blend. Additionally, keep an eye out for possible allergies; for instance, if someone is allergic to nuts, avoid any nut add-ins, and ensure your butterscotch chips are nut-free and made in a nut-free facility.
Can I modify the recipe to include other flavor add-ins?
The more the merrier! You can easily modify the recipe by adding nuts like chopped pecans or walnuts for a delightful crunch. For a richer flavor, consider drizzling melted chocolate over the top or adding a tablespoon of almond extract in place of vanilla. Experimenting with different flavors can really make your butterscotch bars unique!
Deliciously Chewy Butterscotch Bars for Sweet Cravings
Ingredients
Equipment
Method
- Preheat your oven to 350°F (175°C) and prepare a 9x13 inch baking pan by greasing it or lining with parchment paper.
- In a large mixing bowl, beat together the softened unsalted butter, light brown sugar, and granulated sugar on medium speed for about 3 to 5 minutes until light and fluffy.
- Add the large eggs one at a time, mixing well after each addition, then stir in the vanilla extract until fully combined.
- In a separate bowl, whisk together the all-purpose flour, baking soda, and salt, then set aside.
- Gradually add the dry ingredients to the wet mixture, stirring slowly until just combined.
- Fold in the butterscotch chips evenly throughout the batter.
- Pour the batter into the prepared baking pan and spread evenly. Bake for 20 to 25 minutes until golden brown and a toothpick comes out with a few moist crumbs.
- Allow the bars to cool completely in the pan for about 30 minutes before slicing into squares.
Leave a Reply