
As I rummaged through my pantry, the comforting scent of cheesy goodness filled the air, igniting my appetite. That’s when it hit me: I needed to whip up some Easy Tuna Melt Sandwiches. This simple yet satisfying dish combines creamy tuna salad, melty cheddar cheese, and the crunch of fresh tomato, all snugly encased in golden toast. Perfect for either a quick lunch or dinner, this recipe saves me from the temptation of fast food while delivering that warm, comforting feeling we all crave after a long day. Plus, it’s effortlessly adaptable—fed up with the same old? You can personalize your melt with crispy bacon or zesty pickles! So, are you ready to transform your midday meal into something special? Let’s dive into this delicious adventure!
Why is this Easy Tuna Melt a Must-Try?
Quick and Easy: This recipe takes only minutes to prepare, making it perfect for those busy weeknights when cooking feels like a chore.
Versatile Flavor: You can easily customize it with ingredients like crispy bacon or zesty pickles for a unique twist every time.
Crowd-Pleasing Comfort: With its melty cheese and creamy tuna salad, it’s a dish that everyone loves—perfect for family dinners or casual gatherings.
Guilt-Free Indulgence: Using healthier substitutions like Greek yogurt keeps this savory meal light yet satisfying.
Perfect Pairing: Serve it with a side of Air Fryer French Fries or a refreshing Caesar Salad for a complete meal that feels indulgent without the fast-food guilt.
Easy Tuna Melt Ingredients
For the Tuna Salad
• White Tuna – Use tuna in water for a leaner and healthier option.
• Mayonnaise – Adds creaminess; swap with Greek yogurt for a lighter dish.
• Lemon Juice – Freshly squeezed gives the best flavor and balances the richness.
• Celery – Finely chopped for a refreshing crunch that brightens the salad.
• Green Onion – Adds a mild flavor; chives work as a great substitute.
• Fresh Parsley – Use for color and freshness; dried if it’s what you have on hand.
• Salt & Black Pepper – Essential for enhancing the dish flavor; adjust to taste.
For the Sandwich
• Bread – Choose your favorite; sourdough or whole grain elevate the sandwich.
• Butter – Softened helps achieve that crispy and golden crust on the bread.
• White Cheddar Cheese – Melted goodness that adds richness; experiment with Gouda or Monterey Jack if desired.
• Tomato (optional) – Juicy addition that brings extra freshness; feel free to omit if not to your liking.
With these ingredients, your Easy Tuna Melt will be a delicious and fulfilling creation—perfectly comforting for lunch or dinner!
Step‑by‑Step Instructions for Easy Tuna Melt
Step 1: Preheat the Oven
Begin by preheating your oven to 400°F (204°C). This is essential for achieving that perfect, golden-brown crust. As the oven warms up, gather your ingredients and prepare your baking sheet so that everything is ready for assembly.
Step 2: Make the Tuna Salad
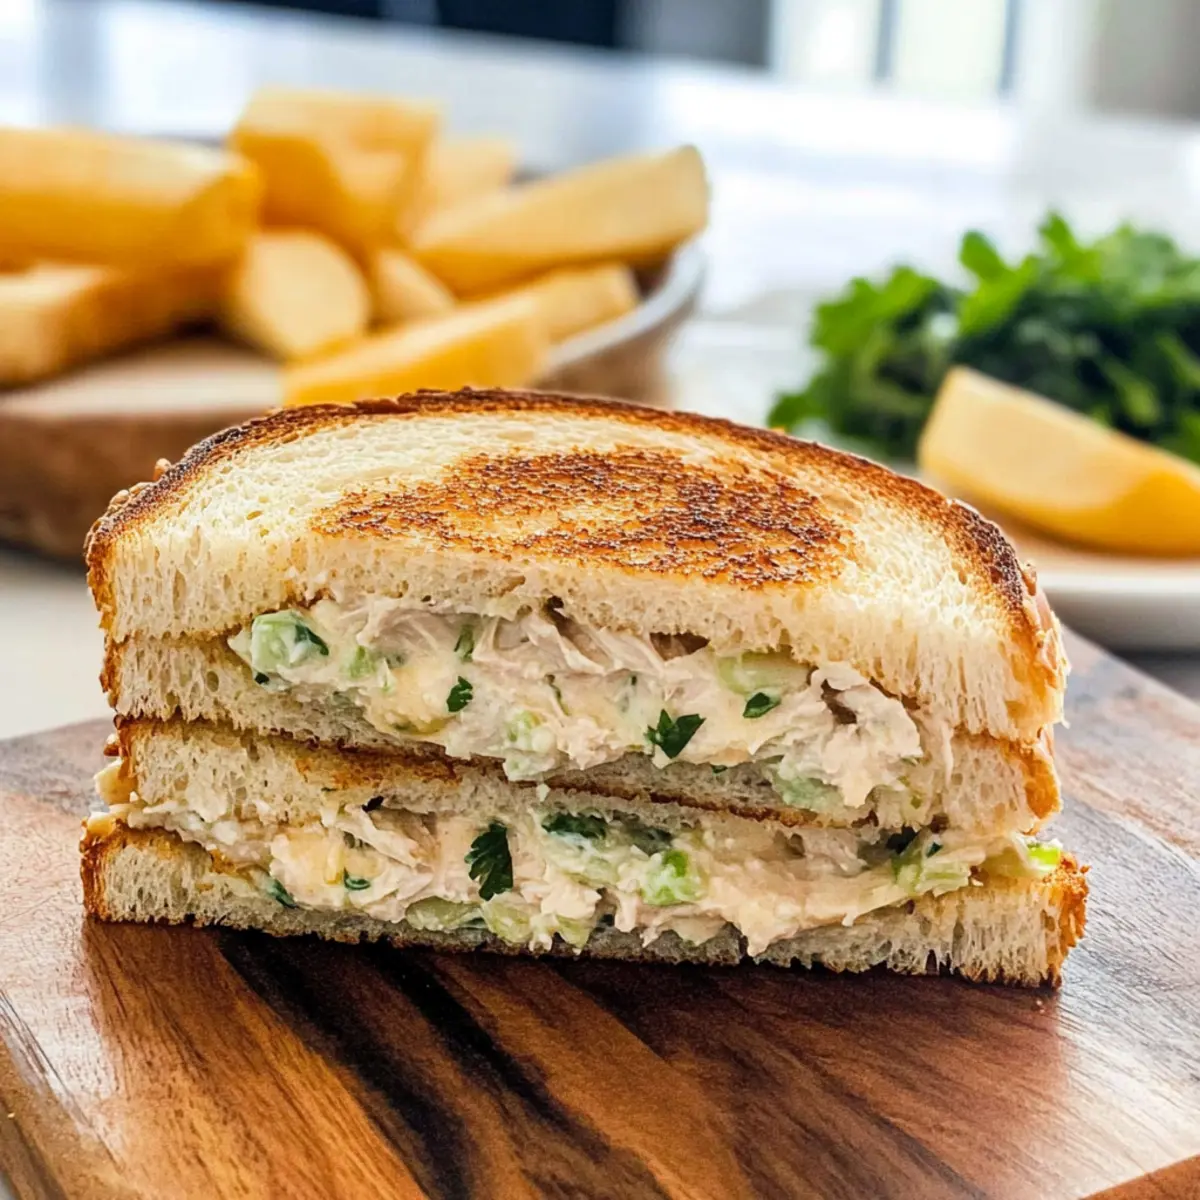
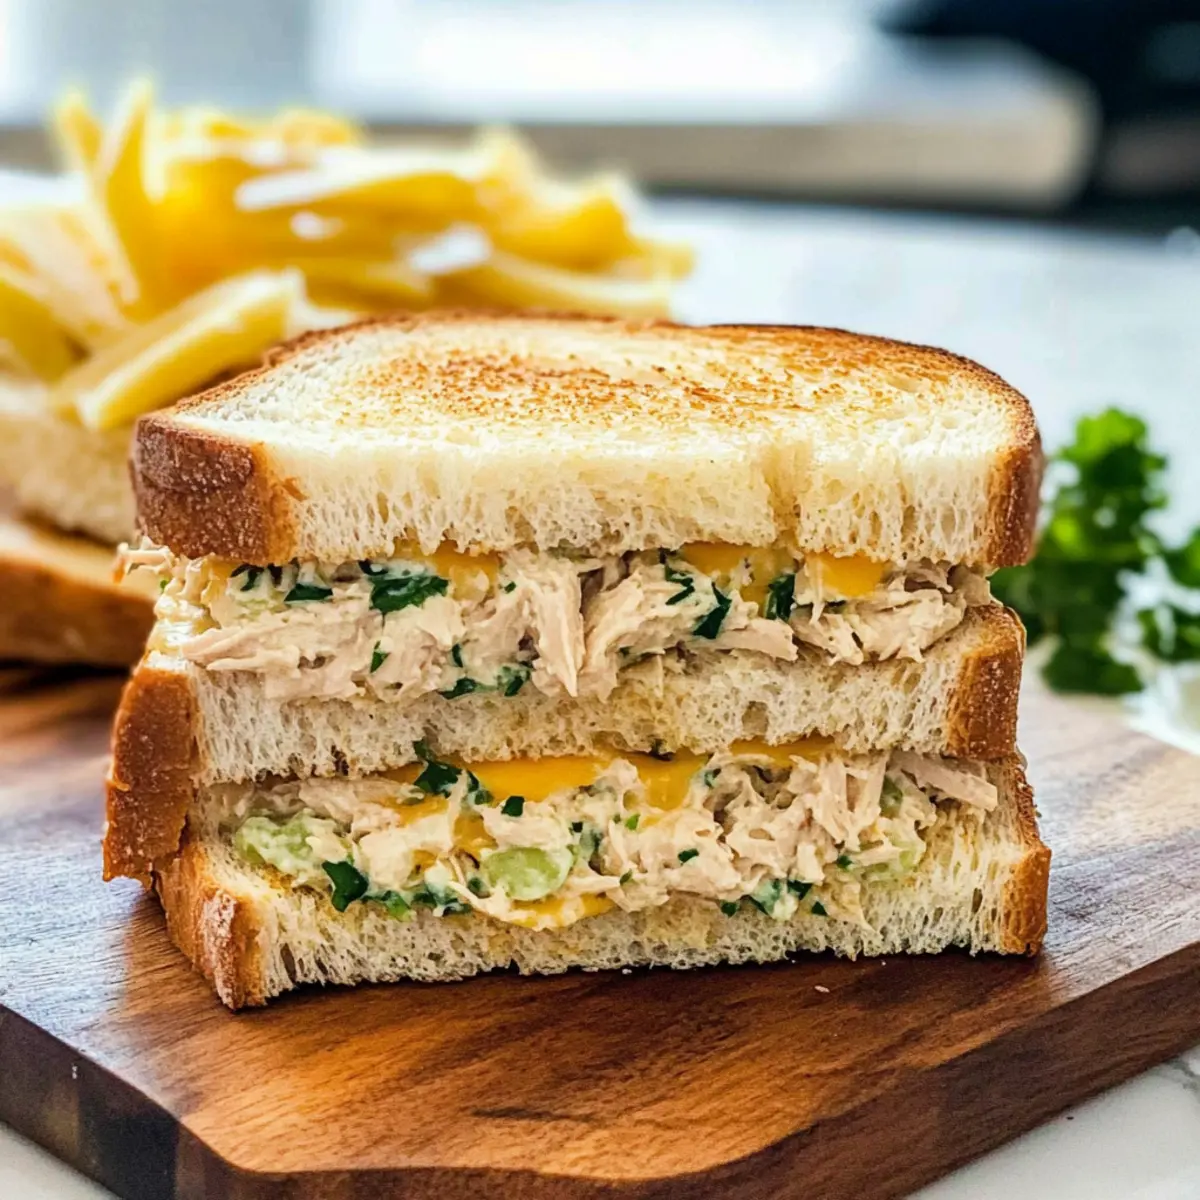
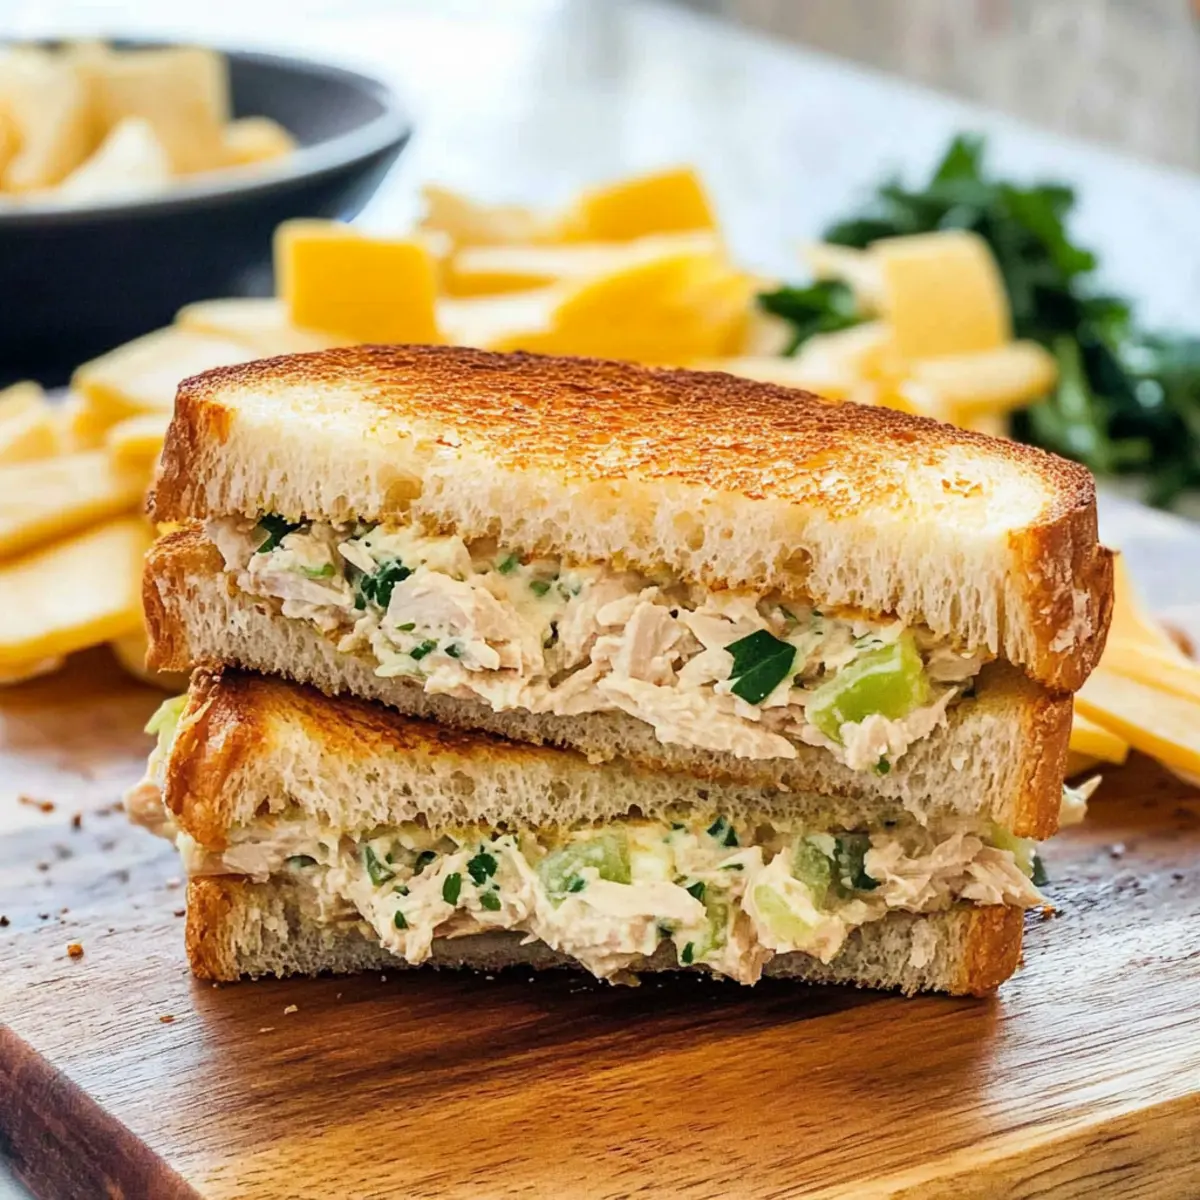
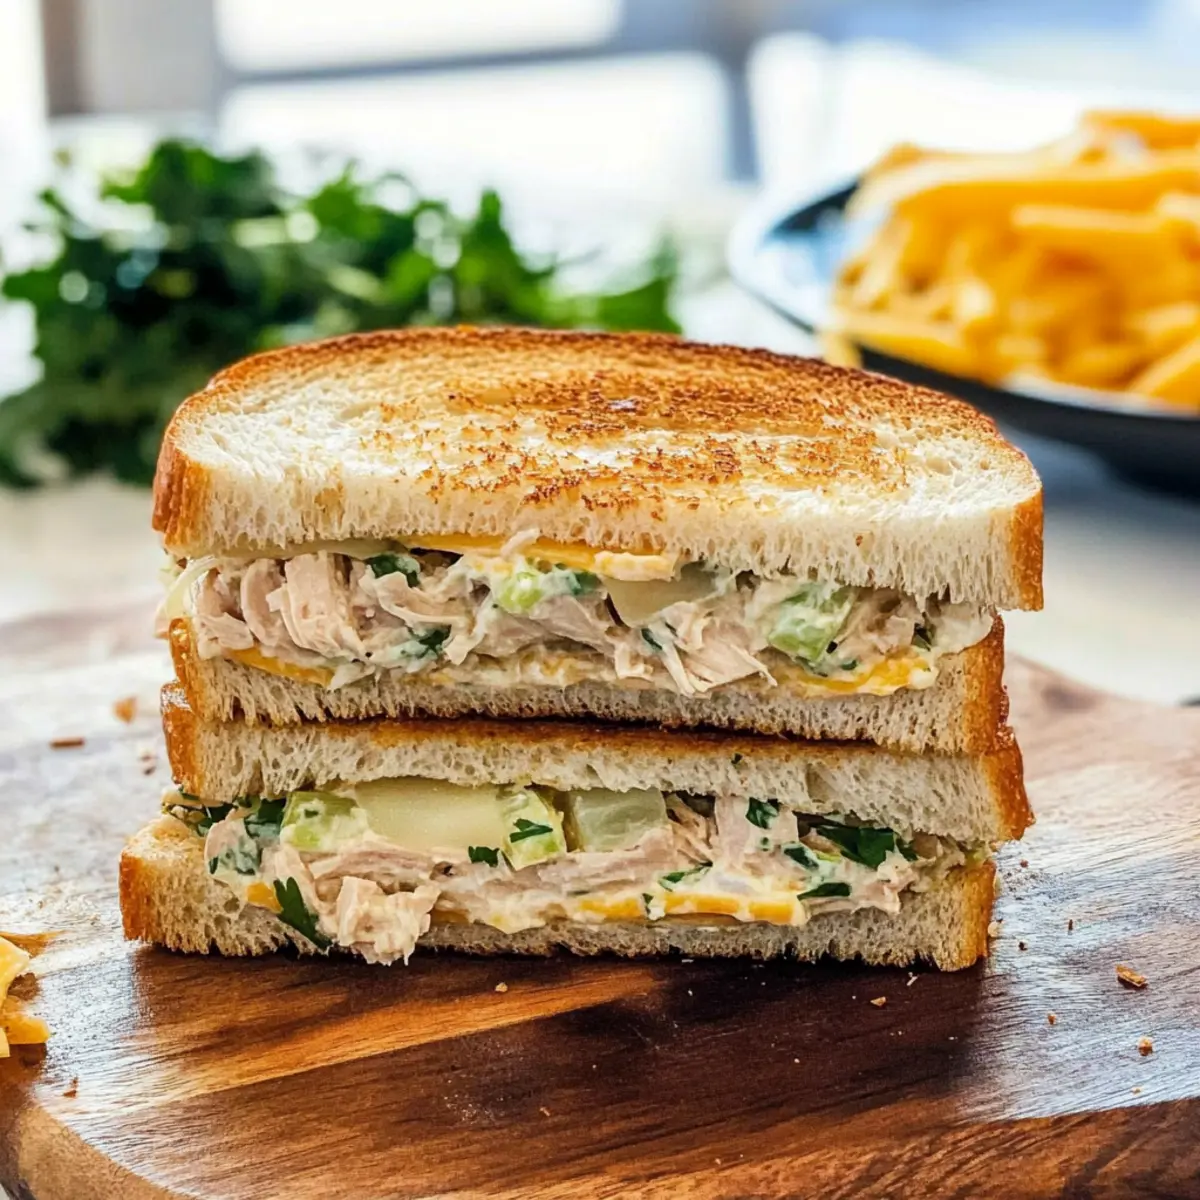
In a medium bowl, flake the drained white tuna with a fork until it’s nice and chunky. Mix in the mayonnaise, freshly squeezed lemon juice, finely chopped celery, sliced green onion, parsley, salt, and black pepper until all ingredients are well combined. This creamy tuna salad will be the star of your Easy Tuna Melt, so be sure to mix thoroughly!
Step 3: Prepare the Bread
Take four slices of your favorite bread and spread a generous layer of softened butter on one side of each slice. Lay them butter-side-down on a baking sheet. This will create a deliciously crispy crust on your Easy Tuna Melt, enhancing the overall comfort food experience.
Step 4: Assemble the Sandwich
Spoon an even amount of tuna salad onto each slice of bread in the baking sheet, topping them generously. Follow this by layering two slices of white cheddar cheese on each tuna mound, and add tomato slices if you desire. The cheese will melt beautifully, adding rich flavor and texture.
Step 5: Cap and Bake
Take the remaining slices of bread and place them butter-side-up on top of each assembled sandwich. This creates a cozy pocket for the filling. Now, place the baking sheet in the preheated oven. Bake for 5 to 8 minutes, keeping an eye on them as the cheese melts and the bread turns golden brown.
Step 6: Serve Warm
Once your Easy Tuna Melts are baked to perfection, remove them from the oven. Let them sit for a minute to cool slightly, then slice them in half if desired. Serve these delightful sandwiches while they’re warm, and savor the melty cheese and comforting flavors of your homemade creation!
What to Serve with Easy Tuna Melt
Savor the delightful warmth of your Tuna Melt by pairing it with dishes that complement its creamy richness and crunchy texture.
-
Air Fryer French Fries: Crispy and golden, these fries offer a satisfying crunch to balance the melt’s creaminess. A classic pairing for a casual meal.
-
Caesar Salad: Crisp romaine and creamy dressing provide a refreshing contrast. The bright flavors and crunchy texture elevate your dining experience.
-
Roasted Tomato Soup: A warm bowl of this comforting soup complements the melty goodness of the sandwich. It’s like a cozy hug on a chilly day.
-
Pickled Cucumbers: Their tangy freshness cuts through the richness, adding a delightful zing to each bite. Perfect for those who enjoy a burst of flavor!
-
Sweet Potato Wedges: These offer a hint of sweetness and a nutritious twist, making your meal satisfying and vibrant. Pair with a sprinkle of cinnamon for extra flavor!
-
Sparkling Lemonade: Refreshing and zesty, this bright drink lifts your meal. The citrus notes harmonize with the tuna’s richness, making for a delightful sip.
-
Fruit Salad: A light and fresh option, the fruity sweetness provides a lovely contrast. Plus, it adds a pop of color to your plate!
These delightful companions turn your Easy Tuna Melt into an experience that delights both the palate and the heart!
How to Store and Freeze Easy Tuna Melt
Fridge: Store leftover Easy Tuna Melt in an airtight container for up to 3 days. Be sure to separate any unassembled tuna salad if possible to maintain texture.
Make-Ahead: Prepare the tuna salad up to 2 days in advance and keep it refrigerated. Assemble the sandwiches just before baking for best freshness.
Reheating: To reheat, place the sandwiches in a toaster oven or conventional oven at 350°F (175°C) for about 10 minutes. This will crisp the bread and melt the cheese nicely.
Freezer: Avoid freezing tuna melts for best quality, as the bread may become soggy upon reheating. Enjoy freshly prepared for optimal flavor!
Helpful Tricks for Easy Tuna Melt
Choose the Right Tuna: Use tuna packed in water rather than oil to keep your melt light and avoid excess greasiness.
Perfect Butter Spread: Ensure softened butter is evenly spread on each slice of bread for that perfect crispy crust.
Watch the Timer: Keep an eye on your sandwiches; check them at the 5-minute mark to prevent burning and ensure cheese melts perfectly.
Personalize Your Melt: Don’t hesitate to experiment—add ingredients like crispy bacon or zesty pickles to make your Easy Tuna Melt unique.
Opt for Fresh Ingredients: For the best flavor, use freshly squeezed lemon juice and finely chopped vegetables, enhancing the tuna salad’s taste.
Make Ahead Options
These Easy Tuna Melt Sandwiches are fantastic for busy meal prep! You can prepare the tuna salad up to 48 hours in advance—just mix together the drained tuna, mayonnaise, lemon juice, celery, green onion, parsley, salt, and pepper, then store it in an airtight container in the refrigerator to keep it fresh and prevent browning. Another option is to fully assemble the sandwiches the night before and refrigerate them, covered, for up to 24 hours. When you’re ready to enjoy your meal, simply preheat the oven and bake the sandwiches for 5 to 8 minutes until the cheese is melty and the bread is golden brown. With these make-ahead options, you’ll have a delightful meal ready with minimal effort!
Easy Tuna Melt Variations & Substitutions
Feel free to get creative with your Easy Tuna Melt, adding delicious twists that tantalize your taste buds!
-
Healthier Swap: Use Greek yogurt instead of mayonnaise for a creamy, yet lighter tuna salad with a protein boost.
This substitution maintains the rich flavor while cutting down on calories. -
Different Cheese: Try using Gouda or Monterey Jack for a unique flavor profile instead of white cheddar.
Each cheese brings its own depth, inviting an exciting taste experience with every bite. -
Add a Crunch: Chopped pickles or crispy bacon elevate the flavor and texture of your tuna melt.
The contrast of crunch against creamy tuna takes your sandwich to the next level! -
Zesty Addition: Incorporate capers or olives in your tuna salad for a briny kick that excites the palate.
These little additions are fabulous for creating a gourmet feel right in your kitchen! -
Whole Grain Twist: Opt for whole grain or seed bread to boost nutrition and add texture.
This switch not only enhances the taste but adds lovely color and health benefits as well. -
Grilled Touch: Instead of baking, try cooking your tuna melt in a skillet for that classic grilled cheese finish.
A crisp exterior complements the gooey interior perfectly, delivering ultimate comfort each time. -
Spicy Upgrade: Add a few dashes of hot sauce or jalapeños to spice things up if you’re feeling adventurous.
This fiery twist may become your new favorite if you’re a fan of heat! -
Tomato Variation: Introduce sliced avocado as a rich, creamy layer instead of tomatoes for a different take.
This change gives your tuna melt a unique texture and flavor profile that feels indulgent!
For a delightful side, enjoy your creations with Roasted Tomato Soup Cozy for that classic comfort food vibe!
Easy Tuna Melt Recipe FAQs
What type of tuna is best for my Easy Tuna Melt?
Absolutely! Opt for white tuna packed in water rather than oil for a leaner, healthier option. This choice not only reduces greasiness but also enhances the flavor of your tuna salad.
How should I store leftovers from my Easy Tuna Melt?
Store any leftover sandwiches in an airtight container in the refrigerator for up to 3 days. If possible, keep the tuna salad separate from the bread to ensure it maintains its texture.
Can I prepare the tuna salad ahead of time?
Very! You can make the tuna salad up to 2 days in advance. Just ensure you keep it refrigerated in an airtight container. Then, assemble and bake the sandwiches just before you’re ready to enjoy them!
Can I freeze my Easy Tuna Melt?
I recommend avoiding freezing tuna melts for best quality, as freezing can make the bread soggy upon reheating. For optimal flavor and texture, please enjoy them freshly prepared!
What’s the best way to reheat my leftover Easy Tuna Melt?
For reheating, place the sandwiches in a toaster oven or conventional oven set to 350°F (175°C) for about 10 minutes. This method will crisp the bread and melt the cheese beautifully, keeping your sandwich delicious!
Are there any dietary considerations I should keep in mind?
Absolutely! If you’re concerned about allergies, keep an eye out for gluten in your bread and any potential fish allergies with the tuna. You can always substitute Greek yogurt for mayonnaise for a lighter option, which could also be a consideration for those watching fat intake.
Irresistibly Easy Tuna Melt for Quick Comfort Food Delight
Ingredients
Equipment
Method
- Preheat your oven to 400°F (204°C). Gather your ingredients and prepare your baking sheet.
- In a bowl, flake the drained tuna and mix in mayonnaise, lemon juice, celery, green onion, parsley, salt, and pepper until combined.
- Spread butter on one side of each bread slice and lay them butter-side-down on a baking sheet.
- Spoon tuna salad onto each slice of bread and add cheddar cheese on top, adding tomato if desired.
- Place remaining bread slices butter-side-up on top of each sandwich. Bake for 5 to 8 minutes until cheese melts and bread is golden brown.
- Remove from oven, let sit briefly, slice if desired, and serve warm.
Leave a Reply