
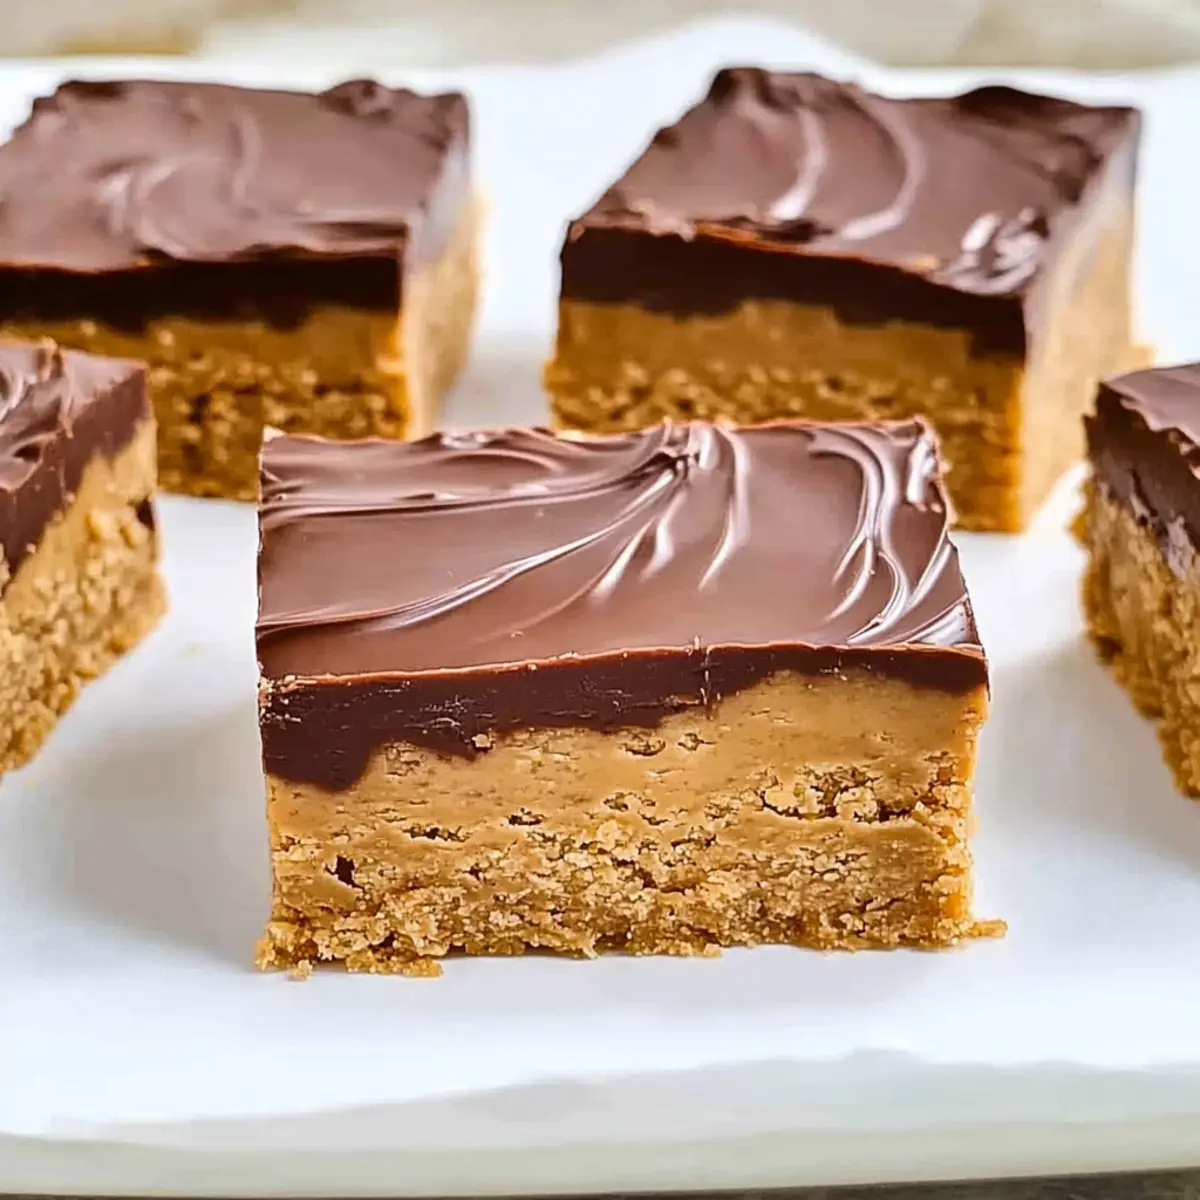
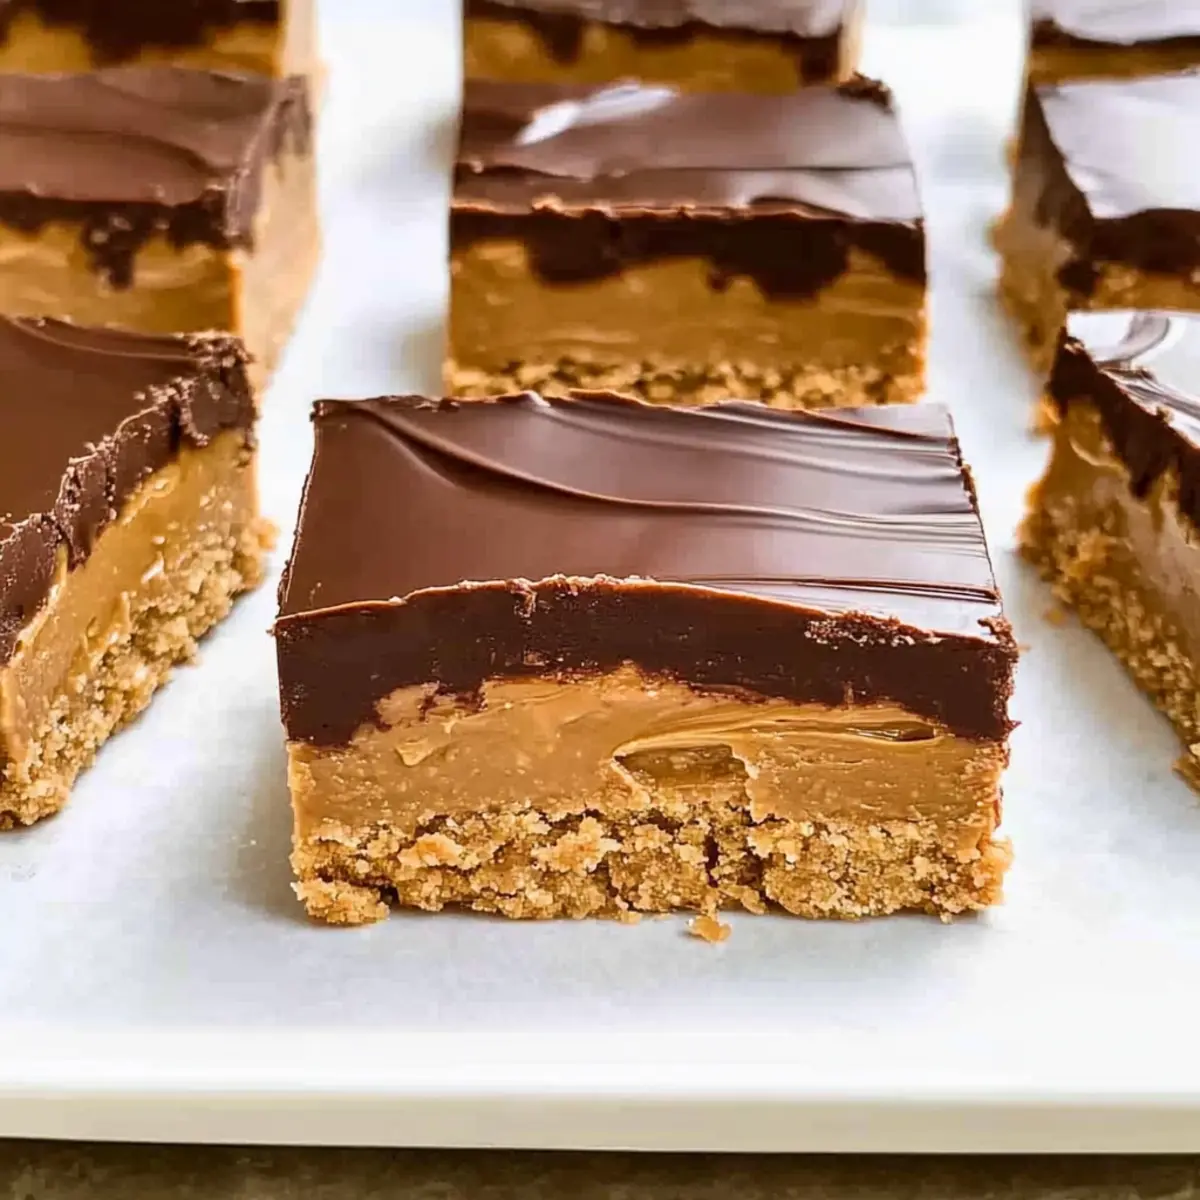
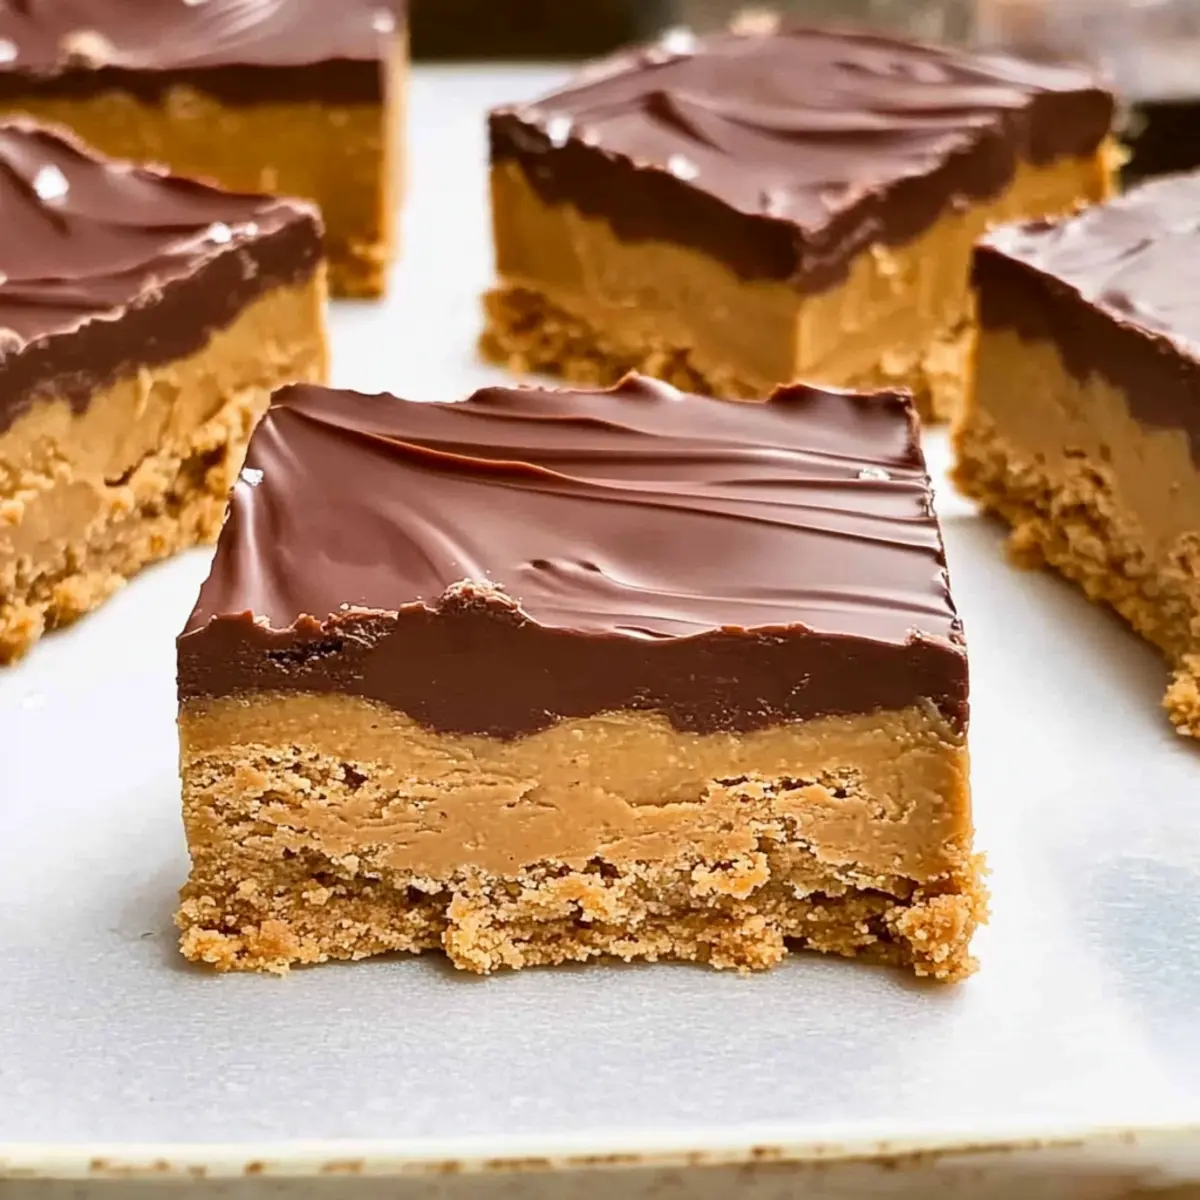
As I rummaged through my pantry one lazy afternoon, I stumbled upon a small jar of peanut butter and a bag of chocolate chips—an unexpected duo that sparked a sweet idea. These Easy No-Bake Peanut Butter Bars are an absolute game-changer when it comes to satisfying dessert cravings, expertly combining the creamy goodness of peanut butter with a rich chocolate topping. Best of all, they only require five ingredients and mere minutes of prep time, making them a perfect solution for busy evenings or last-minute gatherings. Not only are they a delightful way to indulge yourself, but they’re also incredibly versatile; you can customize them to suit any palate. Curious about how to whip up these mouthwatering bars? Let’s dive in!
Why Are These Peanut Butter Bars So Amazing?
Simplicity at Its Best: With just five ingredients, you can whip up these no-bake peanut butter bars in no time.
Richly Flavorful: The combination of creamy peanut butter and rich chocolate creates a mouthwatering indulgence that’s hard to resist.
Crowd-Pleasing Treat: Whether you’re hosting friends or just treating yourself, these bars are guaranteed to impress. They evoke the nostalgia of childhood classic desserts, making them perfect for sharing!
Customizable and Versatile: Feel free to mix in your favorite ingredients. Consider substituting peanut butter with almond or cashew butter, or adding toppers like crushed nuts or dried fruits for a personal twist.
Perfect for Any Occasion: Ideal as a last-minute dessert or a sweet snack. They’re great served chilled with a glass of milk or coffee! You might also enjoy Butterscotch Bars Deliciously for another easy sweet treat.
Peanut Butter Bars Ingredients
For the Base
• Peanut Butter – Provides richness and flavor; creamy gives a smooth texture, while chunky adds delightful crunch.
• Graham Cracker Crumbs – Serve as the foundation; crushed oats or gluten-free graham crackers can be excellent substitutes.
• Powdered Sugar – Adds sweetness without grittiness; substitute with honey or maple syrup, just adapt for moisture content.
• Butter – Binds all ingredients together and enhances richness; use unsalted for better flavor control, or opt for coconut oil as a vegan alternative.
For the Topping
• Chocolate Chips – Adds a decadent finish; choose your favorite type—dark, semi-sweet, or white chocolate based on preference.
Step‑by‑Step Instructions for Peanut Butter Bars
Step 1: Prepare the Base Mixture
In a large mixing bowl, combine 1 cup of graham cracker crumbs with 1 cup of powdered sugar until well blended. Next, pour in 1 cup of creamy peanut butter and ½ cup of melted unsalted butter. Mix with a spatula until the ingredients come together into a smooth, thick batter that holds shape when pressed. This base will serve as the foundation of your delightful peanut butter bars.
Step 2: Press into the Dish
Line an 8×8 inch baking dish with parchment paper for easy removal. Scoop the peanut butter mixture into the prepared dish and use your hands or a spatula to press it evenly into the bottom, ensuring it’s densely packed. Aim for a smooth surface, as this will give your peanut butter bars a polished look. Set aside to prepare for the chocolate topping.
Step 3: Melt the Chocolate
In a microwave-safe bowl, add 1 cup of chocolate chips. Microwave in 30-second intervals, stirring between each, until the chocolate is completely melted and smooth, which should take about 1 to 2 minutes. Be careful not to overheat, as this can lead to a grainy texture. Once melted, pour the chocolate over the pressed peanut butter mixture, spreading it evenly with a spatula to cover the entire surface.
Step 4: Chill to Set
Place the baking dish in the refrigerator and let it chill for at least 1 hour, or until the chocolate is firm to the touch. This chilling step helps the layers set and makes cutting easier. Keep an eye on the chocolate; it should be glossy and firm when ready, indicating your peanut butter bars are perfect for enjoying.
Step 5: Cut and Serve
Once chilled and set, remove the dish from the refrigerator. Using the parchment paper, lift the entire slab out of the dish and place it on a cutting board. With a sharp knife, cut the peanut butter bars into squares or rectangles, maintaining the shape and structure for delightful pieces. Serve chilled as a perfect treat for any occasion!
Peanut Butter Bars Twists & Turns
Feel free to get creative and tailor these bars to suit your taste buds with these delightful adjustments!
- Nutty Substitute: Swap out peanut butter for almond or cashew butter for a unique flavor twist; each option brings its own richness.
- Sweetener Switch: Replace powdered sugar with honey or maple syrup to add a subtle caramel flavor; just be sure to adjust for moisture.
- Flavorful Sprinkle: Add a sprinkle of flaky sea salt on top before chilling for that perfect sweet-and-savory balance; it elevates the taste immensely.
- Nutty Toppings: Enhance texture by adding toppings like crushed nuts or seeds; walnuts or sunflower seeds bring both crunch and healthy fats.
- Fruit Flash: Mix in dried fruits such as cranberries or apricots into the base for a chewy surprise. They bring bursts of natural sweetness!
- Chocolate Variety: Experiment with white chocolate or dark chocolate for the topping; each choice adds a different depth to your bars.
- Spicy Kick: Incorporate a pinch of cayenne pepper or chili powder into the peanut butter mix for a surprising heat that contrasts beautifully with the sweetness, making each bite exciting.
- Vegan Delight: For a completely vegan-friendly option, use coconut oil instead of butter and opt for dairy-free chocolate chips; no one will miss the dairy!
With these variations, you’re all set to embark on a delicious journey of flavor and fun, much like you would when making Danish Butter Cookies or Yogurt Peanut Butter. Enjoy crafting your new favorites!
How to Store and Freeze Peanut Butter Bars
Refrigerator: Store your peanut butter bars in an airtight container in the fridge for up to one week. This keeps them fresh and perfectly creamy!
Freezer: For longer storage, freeze the bars in a single layer, wrapped tightly in plastic wrap or foil, for up to 3 months. Thaw them in the fridge when you’re ready to indulge.
Cutting: If you plan to freeze, consider slicing the bars into individual pieces before freezing. This makes it easy to grab a quick snack whenever the craving hits!
Reheating: If desired, you can let the bars sit at room temperature for a few minutes to soften slightly before serving, enhancing their delightful texture.
Make Ahead Options
These Easy No-Bake Peanut Butter Bars are fantastic for meal prep, making them perfect for busy weeks! You can prepare the base mixture—combining the graham cracker crumbs, powdered sugar, peanut butter, and melted butter—up to 24 hours in advance; simply store it in the refrigerator, tightly wrapped or in an airtight container, to keep it fresh. Additionally, the bars can be assembled and stored in the fridge for up to 3 days before serving. When you’re ready to finish, just melt the chocolate chips, pour over the chilled base, and let them set. This way, you can ensure they’re just as delicious, ready to impress at a moment’s notice!
Expert Tips for Perfect Peanut Butter Bars
-
Press Firmly: Ensure the base mixture is pressed down tightly in the baking dish; this prevents the bars from crumbling when cut.
-
Mix with Care: Incorporate the peanut butter and butter slowly into the graham cracker crumbs and powdered sugar for an even, cohesive texture.
-
Chocolate Technique: Melt chocolate in short intervals to avoid overheating, which can cause a grainy finish. Keep stirring until smooth!
-
Storage Tips: Store your finished peanut butter bars in an airtight container in the refrigerator for up to a week, keeping them fresh and delicious.
-
Flavor Boost: For an extra flavor kick, add a pinch of salt or a splash of vanilla extract to the peanut butter mixture before forming the bars.
What to Serve with Easy No-Bake Peanut Butter Bars?
Indulging in these creamy peanut butter bars is a delicious event, but why not elevate your experience with perfect pairings?
- Cold Glass of Milk: The classic pairing creates a nostalgic, comforting experience, balancing the richness of the bars beautifully.
- Coffee or Espresso: A warm cup will contrast well with the sweetness, enhancing the chocolate flavor while adding a lovely depth to your dessert.
- Fresh Berries: Their tartness cuts through the sweetness and adds a refreshing contrast, bringing a pop of color to your plate.
- Ice Cream: A scoop of vanilla or chocolate ice cream provides a luscious creaminess, making each bite an indulgent treat.
- Chocolate Drizzle: For an additional layer of flavor and elegance, drizzle some melted chocolate over the bars before serving.
- Chopped Nuts: Offering a crunchy texture, sprinkle peanuts or almonds on top for a delightful contrast to the creamy bars.
- Sea Salt Sprinkle: A touch of flaky sea salt on top enhances the flavors, marrying the sweet and salty notes beautifully.
- Fruit Salad: A light fruit salad will cleanse the palate and provide a refreshing burst of flavor, perfect for summer gatherings.
- Nut Butter Dip: Serve with a side of creamy almond or cashew butter for an extra hit of nutty goodness that complements the bars perfectly.

Easy No-Bake Peanut Butter Bars Recipe FAQs
What type of peanut butter should I use?
I recommend using creamy peanut butter for a smooth, melt-in-your-mouth texture. However, if you prefer a bit of crunch, opt for chunky peanut butter instead. Just ensure it’s a brand that you love and works well in desserts!
How should I store leftover peanut butter bars?
Store your peanut butter bars in an airtight container in the refrigerator for up to a week. This helps to keep them fresh and maintains the creamy texture that makes them so irresistible!
Can I freeze peanut butter bars for later?
Absolutely! Freeze the bars in a single layer, tightly wrapped in plastic wrap or foil, for up to 3 months. When you’re ready to enjoy them, simply thaw them in the fridge overnight. If you’d like, slice them into individual pieces before freezing to make grabbing a snack even easier!
What can I do if the chocolate topping becomes grainy?
If your chocolate becomes grainy, it’s likely that it was overheated. In the future, melt your chocolate chips in short 30-second intervals, stirring frequently until smooth. If you do end up with grainy chocolate, you might try adding a teaspoon of vegetable oil or shortening; it may help smooth out the consistency slightly.
Are these peanut butter bars suitable for anyone with nut allergies?
It’s best to avoid this recipe if you or anyone you’re serving has a nut allergy, as it contains peanut butter. However, you could substitute the peanut butter with sunflower seed butter to create a nut-free alternative, but keep in mind that the flavor will differ slightly! Always double-check your ingredients for potential allergens.
Can I use granulated sugar instead of powdered sugar?
You could, but I recommend sticking to powdered sugar for the best texture. Granulated sugar can create a gritty consistency in the bars. If you want to use a liquid sweetener, consider honey or maple syrup, but you’ll need to adjust the amount of butter slightly to maintain the right consistency.
Irresistibly Creamy Peanut Butter Bars in Just 5 Steps
Ingredients
Equipment
Method
- In a large mixing bowl, combine graham cracker crumbs and powdered sugar until well blended. Pour in creamy peanut butter and melted unsalted butter. Mix until smooth and thick.
- Line an 8x8 inch baking dish with parchment paper. Scoop the mixture into the dish and press it evenly, ensuring a smooth, packed surface.
- In a microwave-safe bowl, add chocolate chips. Microwave in 30-second intervals until melted and smooth. Pour over the peanut butter mixture and spread evenly.
- Chill the dish in the refrigerator for at least 1 hour, or until the chocolate is firm.
- Once set, lift the bars from the dish using parchment paper and cut into squares. Serve chilled.
Leave a Reply