
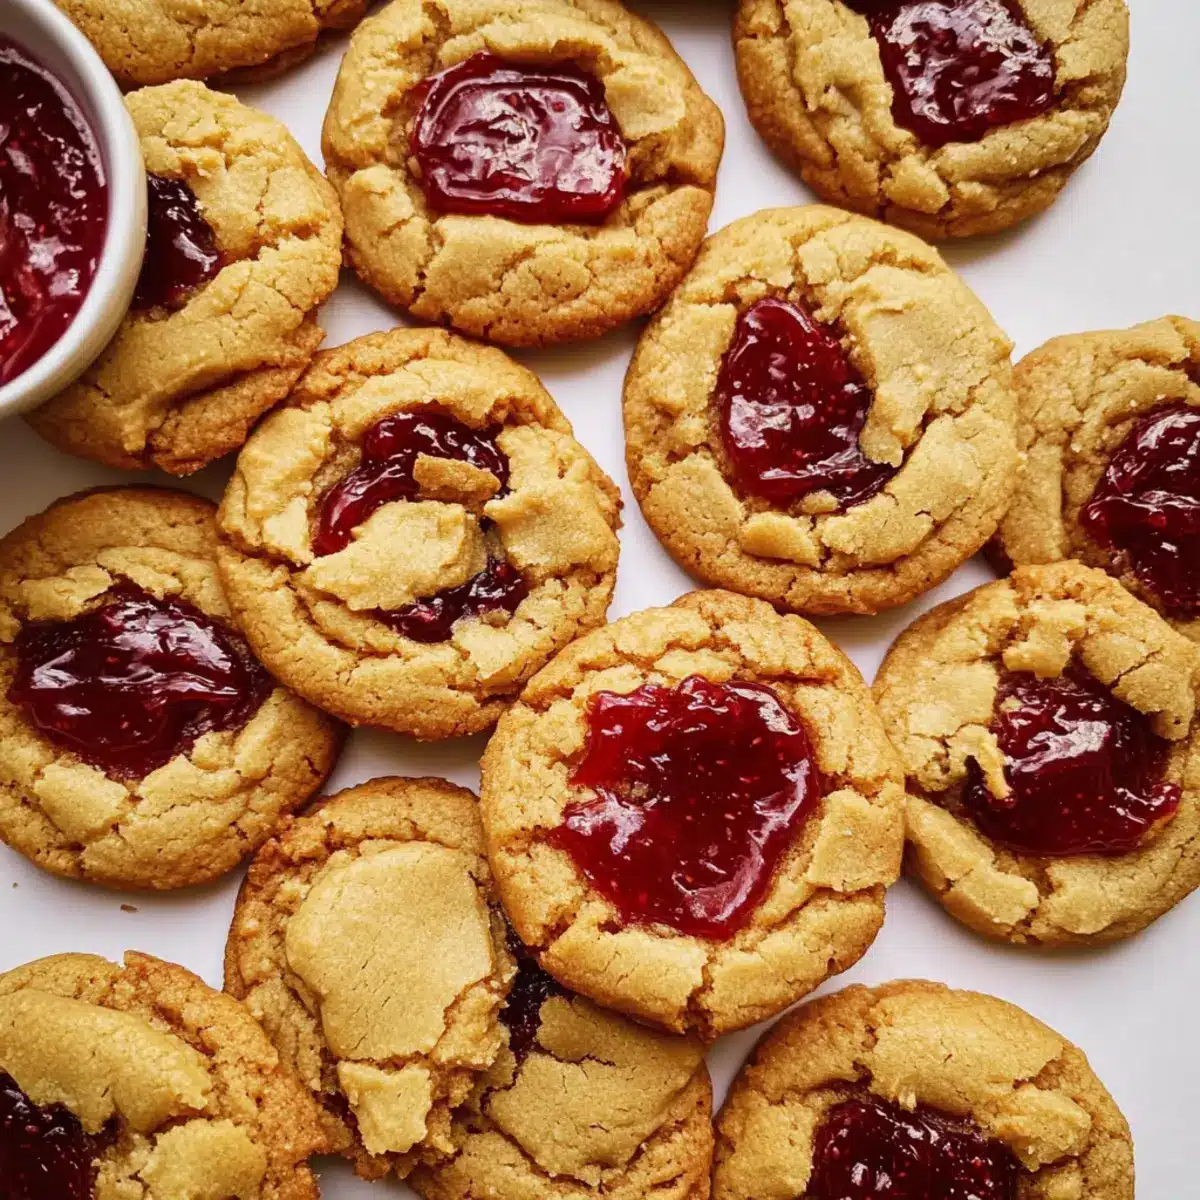
As I sat with my morning coffee, the comforting aroma of baking cookies wafted through the air, taking me right back to childhood. There’s something irresistibly nostalgic about Peanut Butter & Jelly Cookies. This classic American comfort food fuses the beloved PB&J sandwich into a delightful, soft, and chewy cookie. With rich peanut butter flavor complemented by sweet bursts of strawberry jam, these cookies not only satisfy those cravings but also promise quick prep—no mixer needed! Whether you’re looking to whip up a treat for your family or just want to indulge in a little homemade goodness, these cookies are perfect for busy bakers and nostalgic souls alike. Are you ready to take a bite out of this sweet slice of nostalgia?
Why You’ll Crave These Cookies?
Nostalgic Flavor: The beloved combination of peanut butter and jelly transports you back to carefree childhood days.
Easy Prep: With no mixer required, these cookies are perfect for quick baking sessions, making them a go-to for busy weekdays.
Soft and Chewy: Each cookie offers a delightful texture that’s soft and chewy, with jam peeking out for an extra burst of flavor.
Versatile Treat: Swap in different jams or nut butters to create unique variations that keep things exciting—try Yogurt Peanut Butter for a twist!
Crowd-Pleasing Snack: Ideal for after-school treats, BBQs, or holiday gatherings, these cookies will surely delight everyone.
These Peanut Butter & Jelly Cookies are a sweet remedy for your dessert cravings!
Peanut Butter & Jelly Cookies Ingredients
For the Cookie Dough
- Unsalted Butter (1 stick, 113 grams) – Provides moisture and richness for the cookie’s texture.
- Natural Peanut Butter (1 cup, 270 grams) – Delivers a bold peanut flavor; must be well-stirred to avoid oily pockets or dry bits.
- Light Brown Sugar (1 cup, 200 grams) – Adds sweetness and moisture, making cookies soft.
- Granulated Sugar (3/4 cup, 150 grams) – Contributes sweetness and helps create a crisp exterior.
- Bleached All-Purpose Flour (2 ¾ cups, 349 grams) – Ensures a soft, tender dough; unbleached flour may yield dry and crumbly cookies.
- Baking Soda (3/4 teaspoon) – Acts as a leavening agent, helping the cookies to rise.
- Baking Powder (1/2 teaspoon) – Complements baking soda for a tall, fluffy cookie.
- Fine Sea Salt (1/2 teaspoon) – Balances sweetness and enhances flavor.
- Large Eggs (2) – Binds the ingredients and adds moisture; should be at room temperature for even mixing.
- Milk (1 tablespoon) – Adds moisture to the dough.
- Vanilla Extract (2 teaspoons) – Introduces a warm flavor note.
For the Jam Filling
- Strawberry Jam or Jelly (3/4 cup, 240 grams) – Provides bursts of fruity sweetness; should be chilled for best results.
These Peanut Butter & Jelly Cookies are crafted with simple ingredients that come together to create a delightful treat that will surely spark joy and nostalgia!
Step‑by‑Step Instructions for Peanut Butter & Jelly Cookies
Step 1: Preheat the Oven
Begin by preheating your oven to 350°F (175°C). While the oven is warming up, line two baking sheets with parchment paper to ensure your Peanut Butter & Jelly Cookies won’t stick during baking. This prep step is essential for creating a perfectly baked cookie with minimal cleanup.
Step 2: Melt the Butter
Next, melt one stick of unsalted butter in a large microwave-safe bowl. This should take about 30 seconds to a minute in the microwave, depending on your appliance. Once melted, stir in one cup of well-stirred natural peanut butter until the mixture is smooth and fully combined, creating a rich and creamy base for the cookie dough.
Step 3: Mix in the Sugars
Add one cup of light brown sugar and three-quarters cup of granulated sugar to the peanut butter mixture. Whisk vigorously for about one minute until the sugars are seamlessly blended, and the mixture appears smooth and glossy. Allow this base to cool slightly, ensuring it’s warm but not hot, to incorporate the eggs without cooking them.
Step 4: Combine the Wet Ingredients
Once the mixture has cooled, add two large eggs (preferably at room temperature), one tablespoon of milk, and two teaspoons of vanilla extract. Stir with a spatula until everything is well-mixed and the dough appears creamy and inviting. This is the moment where your Peanut Butter & Jelly Cookies begin to take shape.
Step 5: Add the Dry Ingredients
Sift together two and three-quarters cups of bleached all-purpose flour, three-quarters teaspoon of baking soda, half a teaspoon of baking powder, and half a teaspoon of fine sea salt into the wet mixture. Gently fold everything together using a spatula until no dry flour is visible, creating a soft and slightly sticky dough that promises delightful taste and texture.
Step 6: Scoop the Dough
Using a 3-tablespoon cookie scoop, form dough balls, rolling them smooth with your hands. This helps to ensure your Peanut Butter & Jelly Cookies maintain a nice shape during baking. Place each ball on the lined baking sheets, leaving about three inches of space between them to allow for spreading.
Step 7: Fill with Jam
Press your thumb gently into the center of each dough ball to create a small well. Fill this well with about one heaping teaspoon of chilled strawberry jam, ensuring it is slightly visible on top. This step adds a sweet surprise to every bite, making your cookies truly special.
Step 8: Bake the Cookies
Carefully place the baking sheets in the preheated oven and bake for 12-14 minutes. Look for the edges to turn golden brown while the centers remain soft—this ensures your Peanut Butter & Jelly Cookies come out chewy and delicious. After baking, allow the cookies to rest on the baking sheets for about 5 minutes.
Step 9: Cool and Enjoy
Finally, transfer the cookies to a cooling rack to let them cool completely. This will enhance their soft texture and allow the jam to set slightly. Once thoroughly cooled, these delightful Peanut Butter & Jelly Cookies are ready to be enjoyed, perfect for sharing or savoring yourself!

What to Serve with Peanut Butter & Jelly Cookies?
Imagine a warm gathering where laughter intertwines with enticing aromas—these delightful cookies are just the beginning of a perfect meal!
- Cold Glass of Milk: A classic pairing that enhances the cookies’ sweet richness and balances the peanut butter flavor.
- Fresh Fruit Salad: Bright, juicy fruits like strawberries and blueberries add a refreshing contrast to the sweet, chewy cookies.
- Rich Hot Chocolate: This creamy, chocolatey drink complements the nutty notes while satisfying your sweet tooth.
- Vanilla Ice Cream: A scoop of ice cream adds a delightful creaminess and is a perfect match when the cookies are warm.
- Chips Ahoy Milkshake: Blend chocolate chip cookies with ice cream and milk for a decadent twist to make dessert even more delightful!
- Coffee: A warm cup of coffee cuts through the sweetness, making it a cozy afternoon treat that brings nostalgia.
- Chocolate-Dipped Pretzels: Sweet and salty snacks bring an exciting crunch, contrasting with the soft texture of the cookies.
With these pairings, you’re on your way to crafting a memorable encounter that celebrates the timeless joy of homemade treats!
Peanut Butter & Jelly Cookies Variations
Feel free to add your unique twist to these delightful cookies, enhancing the experience with exciting flavors and textures!
-
Almond Butter: Swap peanut butter for almond butter to impart a different nutty flavor that pairs wonderfully with the jelly.
-
Jam Variations: Substituting strawberry jam for raspberry or grape can deliver a refreshing twist, giving you a whole new cookie experience. Experimenting with various jams can elevate your treats and encourage new favorites.
-
Nut-Free Alternative: For a nut-free version, use sunflower seed butter. This swap ensures you savor the same delightful texture and taste without the nuts.
-
Dairy-Free Option: Replace the unsalted butter with vegan butter or coconut oil to make these cookies dairy-free and just as scrumptious.
-
Add Chococo Chips: Toss in semi-sweet or dark chocolate chips to the dough for a deliciously indulgent chocolate-berry flavor profile.
-
Add Spice: Sprinkle in a dash of cinnamon or nutmeg to the dough for a warm, aromatic note that compliments the sweetness.
-
Crunchy Texture: For a delightful contrast, fold in crushed nuts, like walnuts or pecans, to provide a satisfying crunch in every bite.
-
Extra Chewy: To heighten chewiness, consider adding an extra tablespoon of milk or a spoonful of honey to the dough—it brings a fantastic moist quality to these cookies.
Don’t forget to pair them with a glass of milk or explore delightful cookie platters that include classics like Gooey Butter Cookies and Cherry Shortbread Cookies for unforgettable gatherings!
Expert Tips for Peanut Butter & Jelly Cookies
Use the Right Peanut Butter: Choose creamy natural peanut butter that’s well-stirred, as this ensures a consistent flavor without oily pockets.
Measure Flour Accurately: Spoon and level your flour to avoid packing it down. Too much flour can lead to dry, crumbly cookies instead of the soft texture you desire.
Cool Dough Before Baking: Let your cookie dough rest in the fridge for at least 30 minutes before baking. This helps prevent spreading, giving you thicker, chewier Peanut Butter & Jelly Cookies.
Watch Your Baking Time: Keep an eye on your cookies as they bake. Remove them from the oven once the edges are golden but the centers still look soft; they will continue to cook slightly as they cool.
Experiment with Jams: While strawberry jam is classic, don’t hesitate to try raspberry or grape for varied flavors. A twist on the filling can make your Peanut Butter & Jelly Cookies unique each time!
How to Store and Freeze Peanut Butter & Jelly Cookies
Airtight Container: Store the cookies in an airtight container at room temperature for up to 2 days. This helps retain their soft and chewy texture while allowing the flavors to deepen.
Refrigeration: If you wish to keep them longer, you can refrigerate the cookies for up to a week. Just ensure they’re sealed well to prevent drying out.
Freezing Dough: For fresh cookies anytime, freeze formed dough balls on a baking sheet until solid. Transfer them to a zip-top bag and freeze for up to 3 months; bake from frozen, adding a few extra minutes to the baking time.
Reheating: To enjoy warm Peanut Butter & Jelly Cookies, reheat them in a preheated oven at 350°F (175°C) for 5-7 minutes until they are warmed through and the jam is slightly gooey. Enjoy!
Make Ahead Options
These Peanut Butter & Jelly Cookies are perfect for meal prep, allowing you to save time on busy days! You can prepare the cookie dough and refrigerate it for up to 48 hours. To do this, simply mix all the ingredients as instructed, then form the dough balls without adding the jam. Place them on a baking sheet, cover tightly with plastic wrap, and refrigerate. When you’re ready to bake, simply fill the wells with chilled strawberry jam and bake as directed, adjusting the time slightly if they are very cold. This way, you’ll have fresh and delicious cookies just as if they were made on the spot, keeping them soft and chewy!
Peanut Butter & Jelly Cookies Recipe FAQs
What kind of peanut butter should I use?
Absolutely use creamy natural peanut butter! It’s essential to ensure it’s well-stirred before measuring, as this avoids oily pockets or dry crumbs in your dough. The smoothness of creamy peanut butter translates beautifully into soft, chewy cookies.
How should I store my Peanut Butter & Jelly Cookies?
Store your cookies in an airtight container at room temperature for up to 2 days to maintain their delightful soft texture. If you wish to keep them longer, you can refrigerate them for up to a week. Just be sure they’re well-sealed to avoid becoming dry!
Can I freeze the cookie dough?
Yes, you can! To freeze the dough, scoop out the formed dough balls and place them on a baking sheet lined with parchment paper. Freeze until solid, then transfer to a zip-top bag. They can be stored in the freezer for up to 3 months. When you’re ready to bake, no need to thaw—just add a few extra minutes to the baking time.
What if my cookies spread too much while baking?
If you notice your cookies spreading excessively, it may be due to warm dough or too much flour. Letting the dough chill in the refrigerator for at least 30 minutes prior to baking can help prevent this issue. Additionally, ensure you measure your flour accurately; spoon and level it, rather than packing it down.
Can I use other types of jam?
Very! While strawberry jam is a classic choice, feel free to experiment with flavors like raspberry, grape, or even apricot for a twist. Just make sure your substitute jam is thick enough to hold its shape inside the cookie!
Are Peanut Butter & Jelly Cookies safe for kids with nut allergies?
No, they are not. If you are baking for someone with a nut allergy, it’s best to avoid this recipe altogether. However, you can consider using sun butter, which is made from sunflower seeds and is often safe for those with nut allergies, creating an alternative that mimics the same flavors!
Peanut Butter & Jelly Cookies: Your Softest Sweet Craving
Ingredients
Equipment
Method
- Preheat your oven to 350°F (175°C) and line two baking sheets with parchment paper.
- Melt one stick of unsalted butter in a microwave-safe bowl, then stir in one cup of well-stirred natural peanut butter until smooth.
- Mix in one cup of light brown sugar and three-quarters cup of granulated sugar until smooth and glossy.
- Add two large eggs, one tablespoon of milk, and two teaspoons of vanilla extract. Stir until well-mixed.
- Sift together two and three-quarters cups of flour, three-quarters teaspoon of baking soda, half a teaspoon of baking powder, and half a teaspoon of salt into the wet mixture. Fold gently.
- Scoop dough balls with a 3-tablespoon scoop, rolling them smooth and placing them on baking sheets.
- Press your thumb into the center of each dough ball to create a well, then fill with about one heaping teaspoon of chilled strawberry jam.
- Bake in the preheated oven for 12-14 minutes until edges are golden, then allow to rest on baking sheets for 5 minutes.
- Transfer cookies to a cooling rack to cool completely before enjoying.
Leave a Reply