
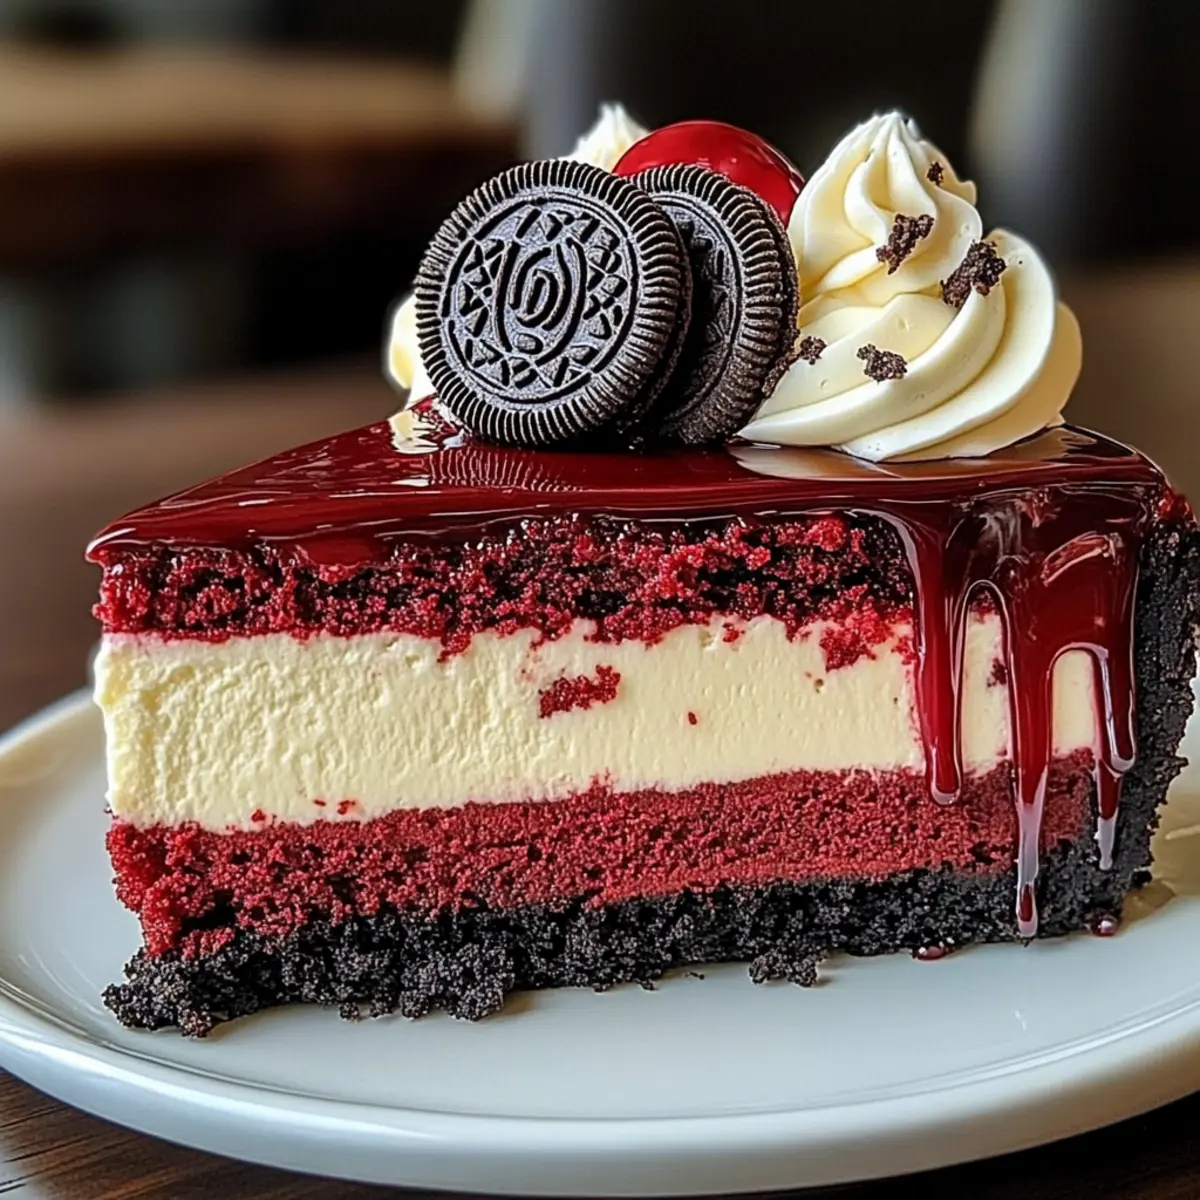
“Can you believe I finally nailed it?” I exclaimed, looking at the masterpiece before me: a Decadent Red Velvet Oreo Cheesecake, the very definition of indulgence. This showstopper combines layers of rich red velvet cake and creamy cheesecake atop a crunchy Oreo crust, making it the ultimate dessert for any special occasion—or just a reason to treat yourself. Not only is it visually stunning, but it also boasts an irresistible flavor combination that is sure to delight your taste buds. With quick prep and make-ahead potential, this recipe fits perfectly into our busy lives without sacrificing that homemade quality we all crave. Ready to dive into this dreamy creation and make it a star at your next gathering?
Why is this cheesecake a must-try?
Decadent Indulgence: This Red Velvet Oreo Cheesecake is the ultimate treat, blending the luxurious flavor of red velvet with the creamy satisfaction of cheesecake. Easy Preparation: Whipping this masterpiece together requires minimal effort, making it perfect for both novice and seasoned bakers. Versatile Delight: Whether for a birthday bash or a cozy family dinner, this dessert fits any celebration. Make-Ahead Magic: Prepare it a day in advance to enhance the flavors without the last-minute stress. Visual Appeal: Its stunning presentation not only delights the eyes but guarantees to impress your guests. Elevate your dessert game with this indulgent recipe that echoes the charm of Strawberry Cheesecake Protein and the fun of Orange Creamsicle Cheesecake!
Red Velvet Oreo Cheesecake Ingredients
For the Oreo Crust
- Oreo Cookies – crush these cookies for a rich, chocolatey base that complements the flavors beautifully.
- Butter – melted unsalted butter binds the crust together, providing a delightful richness.
For the Red Velvet Layer
- Red Velvet Cake Mix – this gives your cheesecake its iconic color and flavor; if desired, use beetroot powder as a natural dye.
- Vegetable Oil – contributes to the cake’s moist texture; melted coconut oil is a good substitution.
- Water – necessary to bring the cake mix to life; you can also use buttermilk for added richness.
- Eggs – ensure the cake is light and fluffy; be sure to use fresh large eggs for the best result.
For the Cheesecake Layer
- Cream Cheese – the star of the cheesecake layer, providing a creamy texture that melts in your mouth; avoid substitutions here for optimal results.
- Granulated Sugar – sweetens the mixture; adjust to your taste for the perfect balance.
- Sour Cream – enhances the creaminess and adds a slight tang; Greek yogurt can work in its place if needed.
- Eggs – essential for binding the cheesecake together; no vegan substitutions are noted for this recipe.
For the Toppings
- Red Velvet Glaze – adds a beautiful finish to your cheesecake, combining sweetness and color for visual appeal.
- Whipped Cream – adds a light, airy touch; consider using homemade for the best flavor.
- Crushed Oreos – sprinkle for an extra crunch and to tie in the Oreo flavor profile with each bite.
With these ingredients at hand, you’re ready to embark on the delicious journey of preparing your Red Velvet Oreo Cheesecake!
Step‑by‑Step Instructions for Red Velvet Oreo Cheesecake
Step 1: Prepare the Crust
Begin by preheating your oven to 350°F (175°C). In a mixing bowl, crush about 24 Oreo cookies until they resemble fine crumbs. Combine these crumbs with 5 tablespoons of melted unsalted butter until fully incorporated. Press the mixture firmly into the bottom of a 9-inch springform pan to form a solid crust. Bake for 10 minutes, then remove and let it cool while you prepare the next layers.
Step 2: Make the Red Velvet Cake Layer
In a large mixing bowl, combine the red velvet cake mix with the required wet ingredients as per the package instructions—usually water, vegetable oil, and eggs. Mix until just combined and pour the batter into a separate greased baking dish. Bake for 20-25 minutes or until a toothpick inserted into the center comes out clean. Allow it to cool completely before placing it atop the cooled Oreo crust.
Step 3: Prepare Cheesecake Layer
Meanwhile, in a large bowl, beat 16 ounces of cream cheese with an electric mixer until smooth and creamy. Gradually add in 1 cup of granulated sugar, continuing to mix until fully combined. Then, mix in 1 cup of sour cream until the texture is silky. Add in 3 large eggs, one at a time, and beat just until combined to maintain that light, airy texture ideal for your Red Velvet Oreo Cheesecake.
Step 4: Assemble and Bake
Once the red velvet cake layer is cool, carefully pour the cheesecake mixture over the top of the cake, spreading evenly with a spatula. Place the filled springform pan back in the oven and bake for about 50-60 minutes or until the cheesecake is just set in the center but still has a slight jiggle. This step is crucial for enjoying a perfectly creamy cheesecake.
Step 5: Cool Gradually
After baking, turn off the oven and crack the door open slightly. Allow the cheesecake to cool in the oven for about 1 hour, which helps prevent surface cracking as it sets. Once cooled, transfer to the fridge and chill for at least 4 hours, or overnight if possible, to allow the flavors to meld beautifully in your Red Velvet Oreo Cheesecake.
Step 6: Decorate
Once chilled and ready to serve, take the cheesecake out of the springform pan. Drizzle your prepared red velvet glaze on top, followed by a generous amount of whipped cream. For the finishing touch, sprinkle crushed Oreos over the whipped cream to enhance the dessert’s visual appeal and elevate its flavor profile with delightful crunch.
Make Ahead Options
These Red Velvet Oreo Cheesecakes are perfect for meal prep, allowing you to indulge in this delightful dessert without the last-minute rush. You can prepare the Oreo crust and the red velvet cake layer up to 24 hours in advance, simply wrap them tightly in plastic wrap and refrigerate to maintain freshness. Additionally, the cheesecake layer can be prepared and assembled, then cooked the day before serving. After baking, allow it to cool and refrigerate to let the flavors meld beautifully overnight. Just remember, for the best quality, add your toppings—like the red velvet glaze and whipped cream—right before serving to keep everything looking fresh and delectable!
What to Serve with Red Velvet Oreo Cheesecake
Savoring a slice of this cheesecake alone is divine, but pairing it with the perfect accompaniments elevates the experience!
-
Chocolate Dipped Strawberries: Their fresh sweetness and slight tartness balance the richness, creating a harmonious flavor contrast. The vibrant colors will also beautify your dessert table!
-
Classic Vanilla Ice Cream: A scoop of creamy vanilla adds a delightful contrast to the cheesecake’s texture, cooling each bite and enhancing the overall indulgent experience.
-
Fresh Berries Medley: Raspberries, blueberries, and strawberries provide a refreshing burst of flavor that cuts through the density of the cheesecake, making each bite more vibrant and lively.
-
Whipped Cream Topping: A cloud of freshly whipped cream enhances the dessert’s creaminess while adding a light, airy texture—a classic that never disappoints.
-
Sweet Tea or Lemonade: Sipping on a glass of freshly brewed sweet tea or homemade lemonade brings a refreshing twist, its acidity balancing the dessert’s richness beautifully.
-
Chocolate Ganache Drizzle: A rich, glossy ganache adds a touch of decadence. It complements the chocolate crust and luscious cheesecake, enhancing every bite with its melt-in-your-mouth texture.
-
Coffee or Espresso: A warm cup of coffee creates a delightful pairing, the bold flavors of the brew contrasting sweet layers, making for a comforting end to any meal.
-
Mini Fruit Tarts: Their light, zesty flavors and flaky crust balance the cheesecake’s richness, adding variety to your dessert spread. They’re not only delicious but eye-catching, too!
Indulge in these pairing ideas to create a memorable and delightful dessert experience that celebrates the indulgence of your Red Velvet Oreo Cheesecake!
Expert Tips for Red Velvet Oreo Cheesecake
-
Temperature Matters: Ensure all ingredients are at room temperature, especially cream cheese, to guarantee a smooth and lump-free cheesecake layer.
-
Avoid Overmixing: Overmixing can lead to a dense texture. Mix just until combined, especially when incorporating the eggs into the cheesecake.
-
Correct Cooling Technique: Gradually cooling the cheesecake in the oven is essential to prevent cracks on the surface. Keep the door ajar during cooling.
-
Chill for Flavor: For the best taste, chill your Red Velvet Oreo Cheesecake overnight. This resting time enhances the flavors and allows it to set perfectly.
-
Garnish Ideas: Get creative with toppings! Fresh berries or a drizzle of chocolate sauce can provide a beautiful contrast while enhancing flavor.
Red Velvet Oreo Cheesecake Variations
Feel free to let your creativity shine and make this delectable cheesecake your own with some fun variations!
-
Graham Cracker Crust: Swap the Oreo crust for a graham cracker crust for a lighter, less sweet base that adds a crunchy twist.
-
Natural Color: Use beetroot powder in place of traditional food coloring for the red velvet layer to achieve a beautiful hue without artificial additives.
-
Layered Surprise: Fold crushed Oreos into the cheesecake batter for an unexpected crunchy delight in each creamy layer.
-
Chocolate Drizzle: Drizzle melted dark chocolate over the top before serving to intensify the indulgence and add a luscious finish.
-
Nutty Crunch: Incorporate chopped walnuts or pecans into the crust for extra texture and a delightful nutty flavor. Consider toasting them beforehand for a deeper taste.
-
Spicy Kick: For a warm kick, add a pinch of cinnamon or cayenne pepper to the cheesecake layer; it adds a surprising depth of flavor!
-
Mini Cheescakes: Create individual mini cheesecakes using muffin tins; just adjust the baking time for a perfect bite-sized treat.
-
Whipped Cream Topping: Try flavored whipped cream, such as vanilla bean or chocolate, to complement the rich cheesecake and add an extra layer of delight!
Each of these ideas can help you customize your dessert experience, whether you want to go for a classic taste or something innovative! If you’re feeling adventurous, why not also explore the creamy delight of Cherry Pistachio Cheesecake or the fun twist of Sugar Cookie Cheesecake? Happy baking!
How to Store and Freeze Red Velvet Oreo Cheesecake
Fridge: Store covered in the refrigerator for up to 5 days to maintain the freshness and creamy texture of your cheesecake.
Freezer: For longer storage, freeze slices wrapped tightly in plastic wrap and then in aluminum foil for up to 3 months. Thaw in the fridge overnight before serving.
Reheating: While this cheesecake is best served chilled, if you prefer slightly warmed cheesecake, microwave individual slices for about 10-15 seconds.
Make-Ahead: Prepare your Red Velvet Oreo Cheesecake a day in advance; this allows the flavors to meld beautifully while saving you time on the day of your celebration.
Red Velvet Oreo Cheesecake Recipe FAQs
How do I know if my red velvet cake mix is fresh?
Look for a date on the package; it should be used before that. If it’s close to the expiration date, check for any clumps or off smell. A fresh cake mix will have a pleasant aroma and a uniform texture.
Can I store leftover Red Velvet Oreo Cheesecake, and for how long?
Absolutely! You can store it in the refrigerator for up to 5 days. Just make sure to keep it covered to maintain its freshness. If you have any toppings like whipped cream, add those just before serving for optimal texture.
How do I freeze my Red Velvet Oreo Cheesecake?
To freeze, slice the cheesecake into individual pieces and wrap each slice tightly in plastic wrap. Then, place the wrapped slices in a freezer-safe container or bag and store them in the freezer for up to 3 months. When you’re ready to enjoy, simply thaw in the fridge overnight.
What should I do if my cheesecake cracks?
If you notice cracks, don’t worry! This can happen from sudden temperature changes. To avoid it next time, cool the cheesecake gradually in the oven with the door slightly ajar for about an hour. Cooling slowly helps the cheesecake to set nicely without cracking.
Are there any allergy considerations for this recipe?
Yes, this cheesecake contains dairy and eggs, which are common allergens. If you’re making it for guests, check for any food allergies they may have. For a vegan option, there are egg replacements available, though substitutions can impact the final texture.
Can I make variations of the cheesecake?
The more the merrier! You can definitely experiment. Try using beetroot powder for natural coloring instead of food dye or add crushed Oreos directly into the cheesecake layer for a fun texture twist. Enjoy getting creative!
Irresistible Red Velvet Oreo Cheesecake for Every Celebration
Ingredients
Equipment
Method
- Preheat your oven to 350°F (175°C). Crush about 24 Oreo cookies until fine crumbs. Combine with 5 tablespoons of melted butter and press into the bottom of a 9-inch springform pan. Bake for 10 minutes and cool.
- Combine the red velvet cake mix with water, vegetable oil, and eggs, mix and pour into a greased baking dish. Bake for 20-25 minutes, allow to cool completely.
- Beat 16 ounces of cream cheese until smooth, gradually add 1 cup sugar, then 1 cup sour cream. Add 3 eggs one at a time, mixing just until combined.
- Pour the cheesecake mixture over the cooled red velvet layer and bake for 50-60 minutes until just set. Turn off the oven, crack the door and let it cool for 1 hour.
- Transfer the cheesecake to the fridge and chill for at least 4 hours or overnight for optimal flavor.
- Once chilled, drizzle with red velvet glaze, add whipped cream, and sprinkle crushed Oreos on top.
Leave a Reply