
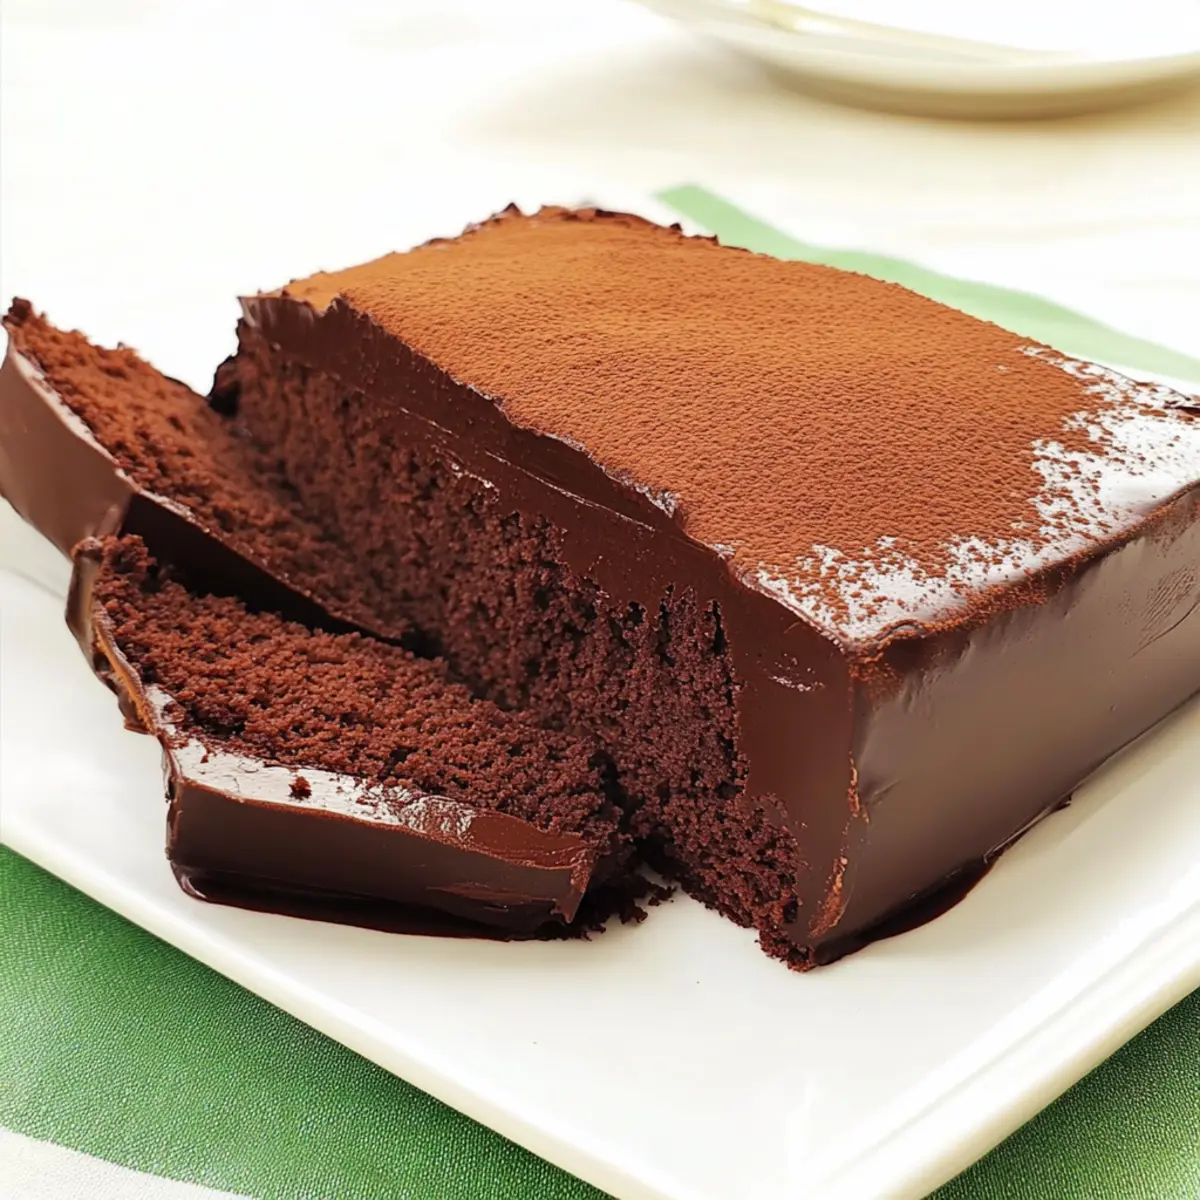
As I took a bite of the warm Chocolate Pudding Cake, I was instantly transported to the sweet memories of family gatherings and laughter around the table. This indulgent dessert masterfully combines the rich, velvety texture of chocolate pudding with moist cake layers, making it an irresistible treat for any chocolate lover. Not only is this Chocolate Pudding Cake easy to whip up, but it also transforms mundane weeknights into something special, promising to charm anyone you share it with. With its delightful fudgy texture—like a luxurious brownie kissed by pudding—this dessert is a must-try for anyone craving a comforting experience. What’s your go-to recipe for impressing guests?
Why Is This Chocolate Pudding Cake Special?
Decadence in Every Bite: This Chocolate Pudding Cake melds smooth, creamy pudding with delightful cake layers for a dessert that feels truly indulgent.
Quick and Easy: With simple ingredients and straightforward steps, you can have this cake ready in no time—perfect for unexpected guests or cozy family dinners.
Versatile Delights: Customize it with nuts, flavored extracts, or by serving with whipped cream or fresh berries for an extra flair.
Crowd-Pleasing Success: Whether it’s a holiday gathering or a casual weeknight, this cake is sure to be the star of the show, loved by kids and adults alike!
Satisfying Texture: Enjoy a luscious, fudgy creation that rivals traditional brownies; it’s rich enough to satisfy even the strongest chocolate cravings.
This recipe is all about comfort and joy—why not treat yourself to a classic, like Eggnog Bread Pudding, alongside it?
Chocolate Pudding Cake Ingredients
• Dive into the delight of Chocolate Pudding Cake with these essential ingredients that ensure a rich, velvety experience.
For the Cake Base
- Cooking Spray – Prevents sticking; you can also use butter or vegetable oil as substitutes.
- Whole Milk – Adds creaminess and moisture; almond milk serves as a great non-dairy alternative.
- Granulated Sugar – Provides sweetness and balance; swap it for brown sugar for a deeper flavor.
- Heavy Cream – Enriches the texture; coconut cream is a wonderful non-dairy substitute.
For the Chocolate Mixture
- Dark Cocoa Powder – Delivers an intense chocolate flavor; unsweetened cocoa can be used in its place if needed.
- Cornstarch – Acts as a thickening agent; arrowroot starch works well as an alternative.
- Kosher Salt – Enhances the overall flavor; you can use sea salt as a substitute.
- Semisweet Chocolate Chips – Adds bursts of chocolate flavor; feel free to use milk chocolate or dark chocolate chips based on your preference.
Step‑by‑Step Instructions for Chocolate Pudding Cake
Step 1: Preheat the Oven and Prepare the Dish
Begin by preheating your oven to 350°F (175°C). While it warms up, grab a baking dish and lightly grease it with cooking spray to prevent the chocolate pudding cake from sticking. Make sure to cover the bottom and sides well, as this will help achieve a beautifully served dessert.
Step 2: Mix the Ingredients
In a large saucepan, combine the whole milk, granulated sugar, heavy cream, dark cocoa powder, cornstarch, and kosher salt. Whisk these ingredients together until smooth and free of lumps, ensuring everything is well incorporated. This creamy mixture forms the base of your decadent chocolate pudding cake, so take your time to mix thoroughly.
Step 3: Heat the Mixture
Place the saucepan over medium heat and continually stir the mixture. Keep a close eye on it, as it will begin to thicken in about 5-7 minutes. Look for the mixture to start bubbling gently; this indicates that your chocolate pudding is coming together beautifully.
Step 4: Incorporate the Chocolate Chips
Once the mixture has thickened and is bubbling, remove the saucepan from heat. Immediately stir in the semisweet chocolate chips, mixing until they are fully melted and integrated into the pudding. The warmth of the mixture will help achieve a silky texture, making your chocolate pudding cake even more decadent.
Step 5: Pour into the Baking Dish
Carefully pour the chocolate pudding mixture into your prepared baking dish. Using a spatula, gently smooth the top to create an even surface. This step is crucial, as it prepares the pudding cake for baking, ensuring a lovely finish when it’s fully cooked.
Step 6: Bake the Cake
Place the baking dish in the preheated oven and bake for about 40 minutes. Keep an eye on it; the top should appear set with a slight jiggle in the center, indicating that your chocolate pudding cake is perfectly cooked. Avoid overbaking to maintain that delightful, fudgy texture.
Step 7: Cool and Serve
Once baked, remove the chocolate pudding cake from the oven and let it cool for at least 15 minutes. This will help the cake set further before slicing. You can serve it warm or chilled, topped with whipped cream or fresh berries for an added touch of indulgence.
Make Ahead Options
These Chocolate Pudding Cakes are perfect for meal prep enthusiasts! You can prepare the pudding mixture (steps 2-4) up to 24 hours in advance, allowing it to chill overnight in the refrigerator. Be sure to cover the saucepan tightly to maintain its velvety texture and prevent a skin from forming. When you’re ready to bake, simply pour the chilled mixture into the prepared baking dish, smooth the top, and follow the baking instructions (step 5-7). This way, you’ll have a rich, indulgent dessert with minimal effort on the day you serve it, making busy weeknights a breeze!
What to Serve with Decadent Chocolate Pudding Cake
Indulge in a delightful spread that beautifully complements each rich bite of your chocolate treat.
-
Whipped Cream: A dollop of freshly whipped cream adds a lightness that balances the cake’s density. The fluffy texture enhances every slice, inviting you to savor more.
-
Fresh Berries: Juicy strawberries or tart raspberries provide a refreshing contrast and a pop of color. Their natural sweetness cuts through the richness, making each forkful a balanced delight.
-
Vanilla Ice Cream: Cool, creamy vanilla ice cream is a classic pairing that melts into the warm cake, creating a delightful combination that feels indulgent and comforting. The ice cream’s sweetness complements the chocolate without overpowering it.
-
Chocolate Sauce: Drizzling warm chocolate sauce over your cake intensifies the flavors and adds an extra layer of decadence. It encourages a delightful dance of flavors that chocolate lovers will adore.
-
Coffee: A steaming cup of coffee offers a hint of bitterness that wonderfully contrasts the cake’s sweetness. Sipping coffee alongside this dessert creates a truly gourmet experience.
-
Nutty Biscotti: Crunchy biscotti, particularly almond or hazelnut, provides a satisfying texture contrast. Dipping them into the pudding cake heightens the enjoyment of each bite, blending flavors seamlessly.
-
Mint Leaves: Garnishing with fresh mint leaves not only adds a pop of color but also a refreshing bite. Their coolness complements the rich chocolate, making each serving a little more special.
How to Store and Freeze Chocolate Pudding Cake
Fridge: Store your Chocolate Pudding Cake covered in the refrigerator for up to 3 days. This keeps it fresh while allowing the flavors to meld beautifully.
Freezer: If you want to keep it longer, wrap the cake tightly in plastic wrap and aluminum foil before freezing—good for up to 2 months. Let it thaw in the fridge overnight before serving.
Reheating: For a warm treat, reheat individual servings in the microwave for about 20-30 seconds. Be careful not to overheat, as it can alter the texture.
Airtight Storage: Always use airtight containers or wraps to keep your cake moist and prevent it from absorbing unwanted odors from the refrigerator.
Chocolate Pudding Cake Variations
Feel free to make this Chocolate Pudding Cake your own with these fun and delightful twists!
-
Nuts Galore: Mix in walnuts or pecans for a crunchy texture that contrasts beautifully with the creamy cake.
-
Flavor Infusions: Add a splash of vanilla or peppermint extract to elevate the chocolate flavor and create a unique tasting experience. The subtle hint can transform each bite into a mini celebration.
-
Fresh Toppings: Top with whipped cream or fresh berries like raspberries or strawberries for a refreshing note. The fruit adds brightness, making each slice even more tempting.
-
Dairy-Free Delight: Swap whole milk and heavy cream for almond milk and coconut cream to make this a decadent dairy-free treat that everyone can enjoy.
-
Chocolate Trio: Use a mix of semisweet, milk, and dark chocolate chips to create layers of chocolate flavor that’ll have your taste buds dancing with joy.
-
Spice it Up: Add a teaspoon of cinnamon or a dash of cayenne pepper to the batter for a warm kick that complements the richness of chocolate wonderfully.
-
Cake Layering: Transform this pudding cake into a multi-layer dessert by baking individual layers, filling them with ganache or whipped cream in between for a show-stopping presentation.
-
Chilled Bliss: Serve it chilled as a parfait with layers of pudding cake and mousse for an elegant dessert, reminiscent of an indulgent chocolate mousse cake.
With these variations, you can turn a simple chocolate dessert into a gourmet experience! Don’t forget to try accompanying your cake with a scoop of Protein Pudding Indulge for a satisfying, multi-texture dessert adventure.
Expert Tips for Chocolate Pudding Cake
-
Melt the Chocolate: Ensure chocolate chips melt completely by stirring them in right after removing from heat for a silky texture.
-
Avoid Sticking: Use enough cooking spray or butter to grease the baking dish—this ensures your cake comes out easily for elegant serving.
-
Watch the Bake Time: Monitor closely while baking. Overbaking can make the cake dry and less fudgy; aim for a slight jiggle in the center.
-
Chill Before Slicing: Let your cake cool for at least 15 minutes before slicing to achieve cleaner cuts and better presentation.
-
Custom Flavor Boost: Experiment with flavored extracts like vanilla or almond to enhance the richness of your chocolate pudding cake.
Chocolate Pudding Cake Recipe FAQs
What type of milk works best for this Chocolate Pudding Cake?
I recommend using whole milk for that creamy texture, but if you’re looking for a non-dairy alternative, almond milk works wonderfully too!
How should I store my Chocolate Pudding Cake?
Store your cake covered in the refrigerator for up to 3 days. This not only keeps it fresh but also allows the delightful flavors to meld beautifully!
Can I freeze Chocolate Pudding Cake?
Absolutely! Wrap your cake tightly with plastic wrap, followed by aluminum foil, to prevent freezer burn. It can be frozen for up to 2 months. When ready to enjoy, simply thaw it in the refrigerator overnight.
What’s the best way to reheat leftovers?
To reheat, place individual slices in the microwave and warm them for about 20-30 seconds. Just be cautious not to overheat, as this may change its deliciously fudgy texture.
Are there any dietary considerations for this recipe?
Yes! This cake contains ingredients like dairy and sugar, so it’s important to consider any allergies. For non-dairy options, you can use almond milk and coconut cream as substitutes. Make sure to check any chocolate products for potential allergens, especially if you’re serving it to guests with food sensitivities.
What should I do if my pudding cake doesn’t set properly?
If your cake doesn’t set as expected, double-check that you didn’t overlook the baking time or overmix the ingredients. It’s crucial to allow the pudding cake to cool and set before slicing. If it’s still too runny after cooling, you might need to bake it a bit longer next time—aim for that slightly jiggly center as your sign of perfection!
Irresistibly Creamy Chocolate Pudding Cake Delight
Ingredients
Equipment
Method
- Preheat the oven to 350°F (175°C) and grease a baking dish with cooking spray.
- In a large saucepan, combine the whole milk, granulated sugar, heavy cream, dark cocoa powder, cornstarch, and kosher salt. Whisk until smooth.
- Place the saucepan over medium heat, continually stirring until the mixture thickens, about 5-7 minutes.
- Remove from heat and stir in the semisweet chocolate chips until fully melted.
- Pour the mixture into the prepared baking dish and smooth the top with a spatula.
- Bake for about 40 minutes until the top appears set with a slight jiggle in the center.
- Let it cool for at least 15 minutes before slicing. Serve warm or chilled with whipped cream or fresh berries.
Leave a Reply