
The moment I took my first crunch of these Crispy Zucchini Chips, I felt like a whole new snacking world had opened up. These might just be the perfect solution for anyone looking to ditch the greasy bags of chips and savor a more wholesome, satisfying treat. The Crispy Zucchini Chips recipe is not only gluten-free and keto-friendly, but it’s also incredibly easy to customize with your favorite seasonings. Plus, they’re low-calorie, making them a guilt-free option for any time of day. Whether you need a crunchy snack to munch on during movie night or a delightful side to elevate your lunch, these chips have got you covered. Are you ready to whip up something that’s both delicious and nutritious? Let’s dive into the recipe!
Why Are Crispy Zucchini Chips a Must-Try?
Irresistible Crunch: These crispy zucchini chips deliver a satisfying crunch that rivals any store-bought snack, making them perfect for guilt-free snacking.
Customizable Flavors: With endless seasoning options like garlic powder or smoked paprika, you can tailor them to your taste!
Healthy Choice: Loaded with vitamins A, C, and K, they are low-calorie, making them a fantastic guilt-free alternative to fried chips.
Quick & Easy: Whip up a batch in just a couple of hours, providing a nutritious option anytime hunger strikes. If you enjoy experimenting with snacks, you might also love my Energy Bites Healthy for a quick energy boost.
Perfect Pairing: Serve these chips with your favorite dips, like hummus or guacamole, for a delightful appetizer that will impress your guests!
Crispy Zucchini Chips Ingredients
-
For the Chips
-
Zucchini – The star ingredient; choose firm, fresh zucchinis for the best texture.
-
Olive Oil – Helps achieve that perfect crispiness; feel free to substitute with avocado oil for a different flavor.
-
Salt – Essential for seasoning and moisture extraction; sea salt works wonderfully.
-
Garlic Powder – Adds a savory kick; omit if you prefer a milder taste.
-
Smoked Paprika – Introduces a delightful smoky flavor; swap for chili powder if you’re craving heat.
-
Black Pepper – Enhances overall taste; adjust to your preference for spice.
-
Grated Parmesan (optional) – For those wanting a cheesy finish; try nutritional yeast for a vegan alternative.
-
For Seasoning Variations
-
Chili Flakes – Spice things up with a bit of heat!
-
Onion Powder – Adds a sweet savory flavor that compliments the zucchini nicely.
-
Ranch Seasoning – For a classic twist that pairs perfectly with dips.
These Crispy Zucchini Chips are a delightful way to satisfy your snack cravings without the guilt, and they can easily be customized to suit your palate!
Step‑by‑Step Instructions for Crispy Zucchini Chips Recipe
Step 1: Preheat the Oven
Begin by preheating your oven to 250°F (120°C). This low temperature is key to achieving that perfect crispy texture for your zucchini chips. Make sure your oven rack is positioned in the center for even baking. As the oven heats up, gather your ingredients and prepare to transform zucchini into a scrumptious snack.
Step 2: Prepare the Zucchini
Wash and dry the zucchinis thoroughly to remove any dirt or residue. Using a sharp knife or mandoline, slice the zucchinis into 1/8-inch thick rounds. Aim for consistency in thickness to ensure even cooking. Lay your slices flat on a clean surface and admire the fresh, vibrant color of the vegetables—they’re about to become crispy zucchini chips!
Step 3: Draw Out Moisture
Arrange the zucchini slices on paper towels in a single layer, sprinkling them generously with salt. Allow them to sit for about 10 minutes; this step helps draw out excess moisture, making your chips crispier once baked. After the time is up, pat each slice dry with another paper towel to remove any released moisture and salt.
Step 4: Season the Slices
In a large mixing bowl, toss the dried zucchini slices with a drizzle of olive oil and your chosen seasonings—consider garlic powder, smoked paprika, black pepper, and a sprinkle of Parmesan for an extra kick. Mix well until all slices are evenly coated; you’ll notice the fragrant aroma as the spices blend with the oil and zucchini.
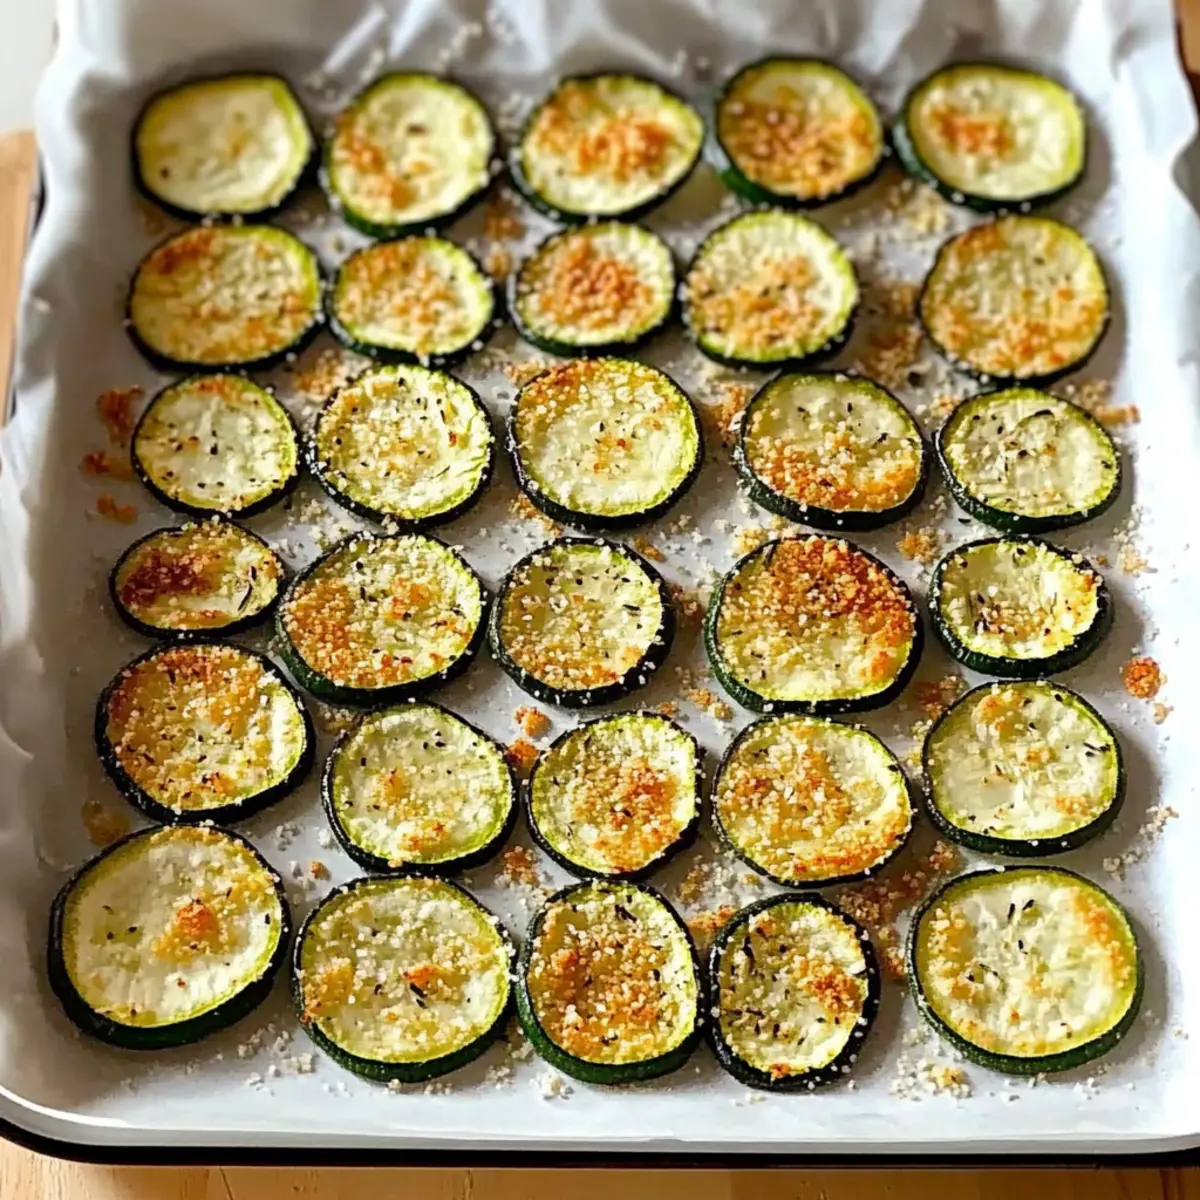
Step 5: Arrange on Baking Sheet
Line a baking sheet with parchment paper to prevent sticking and create a crisp base for your chips. Lay the seasoned zucchini slices flat on the sheet in a single layer, ensuring they aren’t overlapping. This is crucial; overcrowding can lead to steaming instead of crisping, so give your chips room to breathe as they bake.
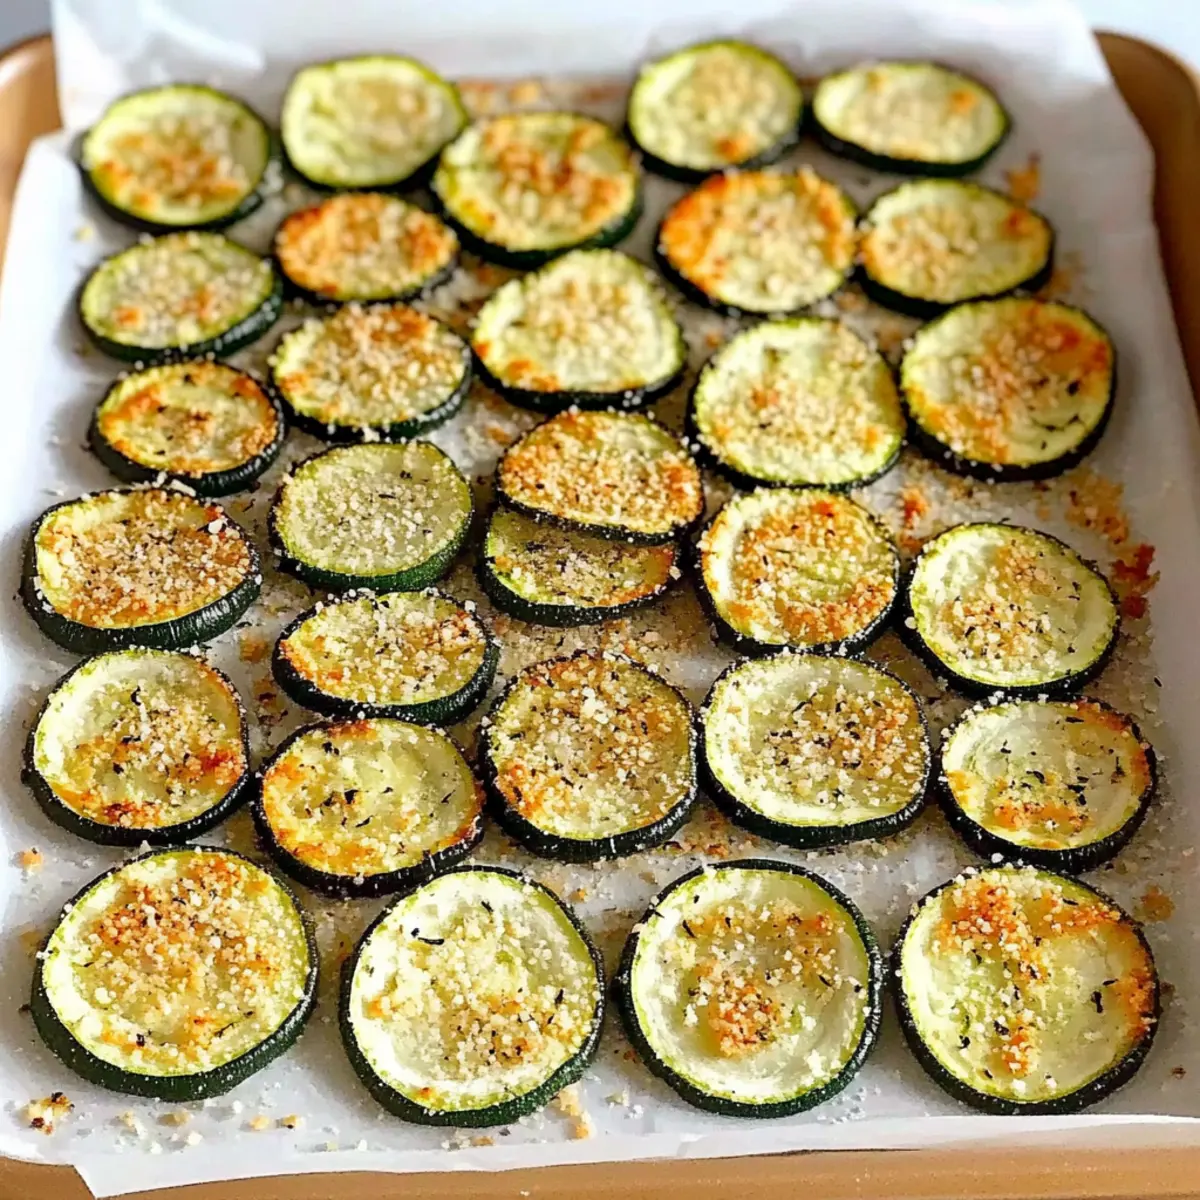
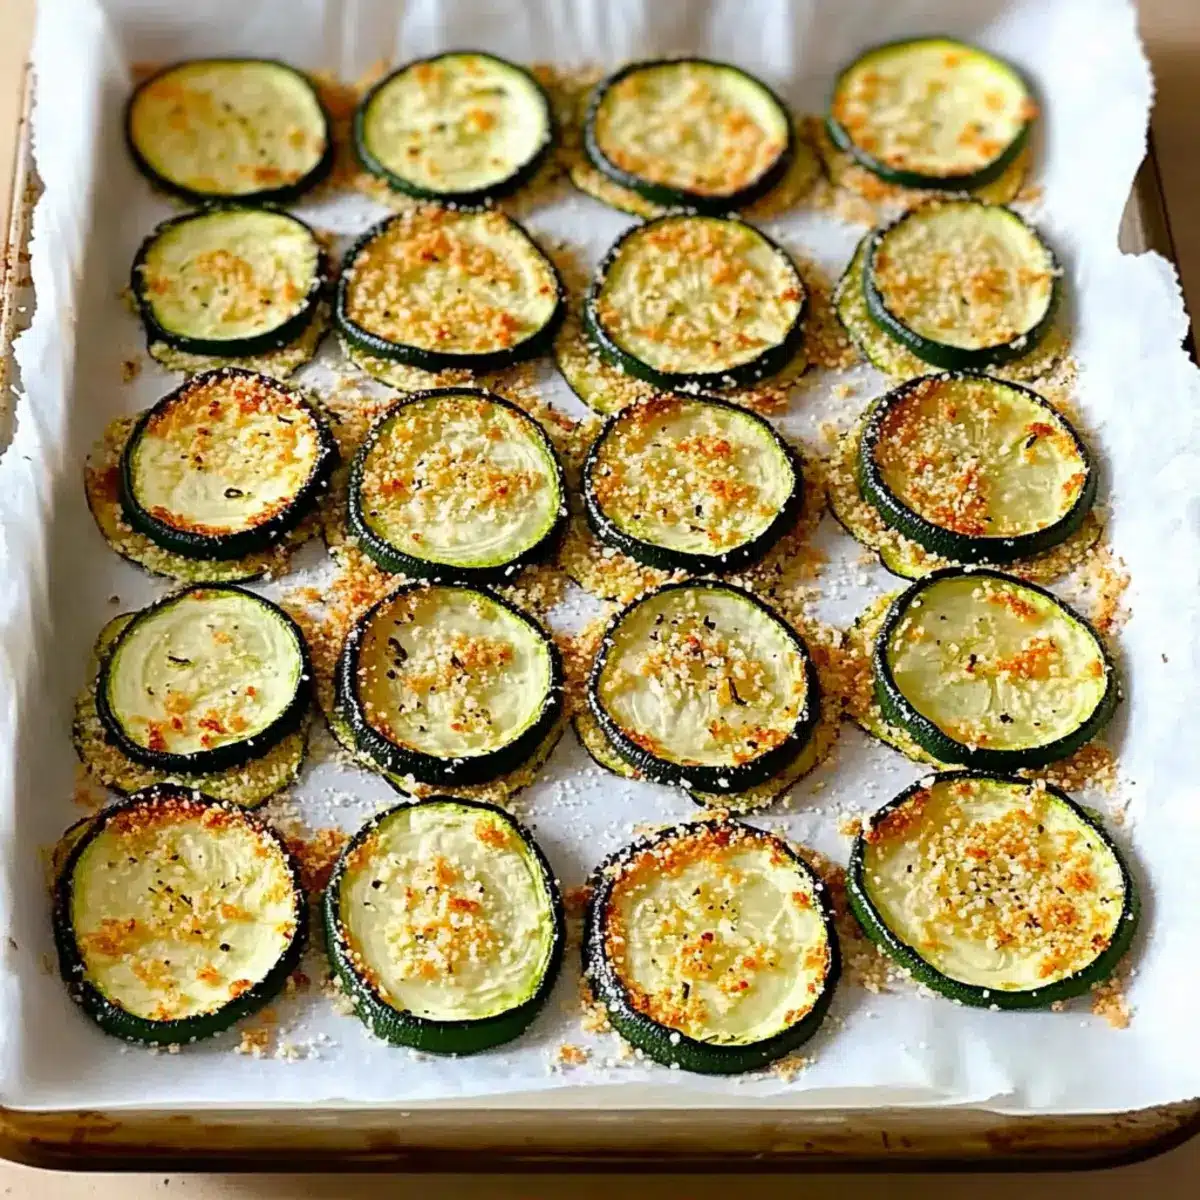
Step 6: Bake to Perfection
Place the baking sheet in the preheated oven and bake your crispy zucchini chips for 1.5 to 2 hours. Halfway through, carefully flip the slices to promote even crisping. Keep an eye on them, checking at the 90-minute mark for that golden-brown color and crispy texture—to get the perfect result, patience is key!
Step 7: Cool and Serve
Once your zucchini chips are beautifully crispy and golden, remove them from the oven and allow them to cool on the baking sheet for about 5 minutes. This cooling period helps them to firm up even more, enhancing their crunchiness. After they’ve cooled, they’re ready to be served—a delightful and healthy snack awaits!
What to Serve with Crispy Zucchini Chips?
Elevate your snacking experience by pairing these crispy delights with complementary flavors and textures that will tantalize your taste buds.
- Creamy Hummus: This smooth dip adds a rich, nutty flavor that perfectly contrasts the chips’ crunch, making every bite delightful.
- Guacamole: The creaminess of ripe avocados with a touch of lime is a refreshing counterpart, enhancing the fresh taste of zucchini.
- Greek Yogurt Dip: Light and tangy, a yogurt-based dip can add a cooling element, perfect for balancing the spices you choose for your chips.
- Fresh Salsa: This zesty blend of tomatoes, onions, and cilantro brings a vibrant, fresh touch, making your snacking experience lively and tasty.
- Mozzarella Sticks: Pairing these crispy chips with gooey, melty cheese creates a delicious contrast that brings comfort to your plate.
- Roasted Chickpeas: For additional crunch, serve seasoned roasted chickpeas as a protein-packed snack that complements the zucchini chips’ flavors perfectly.
- Bell Pepper Strips: These are crunchy and sweet, offering a refreshing taste and a colorful addition to your snacking tray.
- Sparkling Water with Lime: A refreshing beverage that cleanses the palate, making each bite of zucchini chips even more enjoyable.
- Dark Chocolate Dipped Strawberries: For a sweet finish, the slight bitterness of dark chocolate paired with the sweetness of strawberries can elevate your snack time!
Expert Tips for Crispy Zucchini Chips
- Slice Evenly: Consistent thickness is crucial. Use a mandoline slicer to achieve uniform 1/8-inch slices for even cooking and perfect crunch.
- Salt Wisely: Sprinkle salt generously while letting the slices sit to draw out moisture, but ensure to pat them dry afterward to prevent sogginess.
- Don’t Overcrowd: Place the zucchini slices in a single layer on the baking sheet. Overlapping can lead to steaming instead of crisping, compromising your crispy zucchini chips recipe.
- Be Patient: Low-temperature baking is vital. Resist the urge to crank up the heat; allow the chips to bake slowly for the ultimate crispiness.
- Storage Smartly: Keep any leftover chips in an airtight container at room temperature for up to 3 days to maintain their crunch. Avoid refrigeration, which can make them soggy.
How to Store and Freeze Crispy Zucchini Chips
Room Temperature: Keep leftover crispy zucchini chips in an airtight container for up to 3 days at room temperature to preserve their crunch. Avoid exposure to moisture.
Reheating: If chips lose their crispness, simply reheat them in the oven at 250°F (120°C) for about 10 minutes to restore their delightful crunchiness.
Freezer: For longer storage, freeze layers of crispy zucchini chips separated by parchment paper in an airtight container. They can last up to 2 months but may lose some texture.
Thawing: To enjoy frozen chips, let them thaw at room temperature for about 30 minutes before reheating, ensuring a tasty crunch as if freshly baked.
Make Ahead Options
These Crispy Zucchini Chips are perfect for busy home cooks looking to save time without sacrificing flavor! You can prep the zucchini slices up to 24 hours in advance by washing, drying, and slicing them into 1/8-inch rounds. After slicing, layer them on paper towels, sprinkle with salt, and then refrigerate in an airtight container. When you’re ready to bake, simply toss the chilled slices with olive oil and your desired seasonings before arranging them on a baking sheet. This method ensures they maintain their crispiness during baking, resulting in deliciously crunchy chips that will satisfy your snack cravings anytime!
Crispy Zucchini Chips Recipe Variations
Customize your crispy zucchini chips with these delightful twists that will keep your taste buds guessing!
- Spicy Kick: Mix in chili flakes for an extra zing that will awaken your palate. A little heat can elevate your snacking experience to new heights!
- Savory Onion: Use onion powder for a sweet and savory combo that beautifully complements the zucchini’s flavor. The addition of this essential seasoning adds depth and joy to each bite.
- Classic Ranch: Sprinkle on some ranch seasoning for a familiar and beloved taste that pairs perfectly with dips like hummus or guacamole. It’s like having a party in your mouth!
- Cheesy Delight: Try Parmesan cheese strips before baking for a richer and creamier texture. If you’re leaning toward a dairy-free version, nutritional yeast is a fantastic alternative to provide that cheesy flavor without the cheese.
- Italian Twist: Add Italian herbs such as oregano or basil to evoke the warmth of the Mediterranean. These herbs create an aromatic flavor sensation that transports you straight to a sunlit terrace.
- Vegetable Swap: Go wild and substitute zucchini with sweet potatoes or carrots for an additional sweetness and texture. This way, you can create a vibrant chip platter that caters to all kinds of cravings.
- Crunchy Seeds: Add in sesame or sunflower seeds for a delightful crunch and nutty flavor. Not only does this variation enhance the texture, but it adds a nutritious boost as well.
- Maple Glaze: For a sweet-savory treat, drizzle a bit of maple syrup over the zucchini before adding seasonings. It’s an exciting twist that’s bound to be a hit during brunch or gatherings!
These variations best suit your needs, whether you’re enjoying a cozy night in or putting together a vibrant snack platter for guests. If you indulge in other snacks as well, you might also enjoy my Cereal Bars for a wholesome munch! Enjoy personalizing your crispy zucchini chips experience!

Crispy Zucchini Chips Recipe FAQs
What should I look for when selecting zucchini?
Choose firm, fresh zucchinis without any dark spots or blemishes for the best results. Look for a smooth skin texture that feels slightly glossy. Smaller zucchinis tend to be sweeter and less watery, which enhances the chip-making process.
How should I store leftover crispy zucchini chips?
Store leftover chips in an airtight container at room temperature for up to 3 days. To maintain their crispiness, avoid storing them in the fridge, as moisture can make them soggy. If they lose their crunch, you can pop them back in the oven to revive them!
Can I freeze crispy zucchini chips?
Absolutely! To freeze, layer your crispy zucchini chips in an airtight container separated by parchment paper to prevent sticking. They can last up to 3 months in the freezer. When you’re ready to enjoy them, let them thaw at room temperature for about 30 minutes before reheating in the oven for that fresh crunch.
What if my zucchini chips are not crispy enough after baking?
If your chips aren’t crispy enough, it might be due to uneven slicing or overcrowding on the baking sheet. Make sure slices are uniformly cut, and only place them in a single layer while baking. If they still lack crunch after cooling, simply return them to the oven for an additional 10-15 minutes at the same low temperature.
Are zucchini chips safe for pets?
While zucchini is generally safe for pets, it’s best to stick to sharing raw or lightly cooked zucchini without seasonings or salt. For zucchini chips, the added spices and salt aren’t suitable for pets, so it’s a good idea to keep those as a human-only snack!
What dietary restrictions do these crispy zucchini chips accommodate?
This crispy zucchini chips recipe is not only gluten-free and low-calorie, but it’s also keto-friendly, making it a versatile snack choice! For those with dairy restrictions, simply omit the Parmesan or substitute with nutritional yeast for a vegan option. Enjoy guilt-free snacking that fits a healthy lifestyle!
Crispy Zucchini Chips Recipe: Guilt-Free Crunchy Delight
Ingredients
Equipment
Method
- Preheat your oven to 250°F (120°C) and position the oven rack in the center.
- Wash and dry the zucchinis, then slice them into 1/8-inch thick rounds.
- Arrange the zucchini slices on paper towels, sprinkle them with salt, and let sit for 10 minutes.
- Pat each slice dry with another paper towel after 10 minutes.
- In a mixing bowl, toss the dried slices with olive oil and seasonings until evenly coated.
- Line a baking sheet with parchment paper, arrange the zucchini slices in a single layer.
- Bake for 1.5 to 2 hours, flipping halfway through until golden brown and crispy.
- Allow the chips to cool on the baking sheet for about 5 minutes before serving.
Leave a Reply