
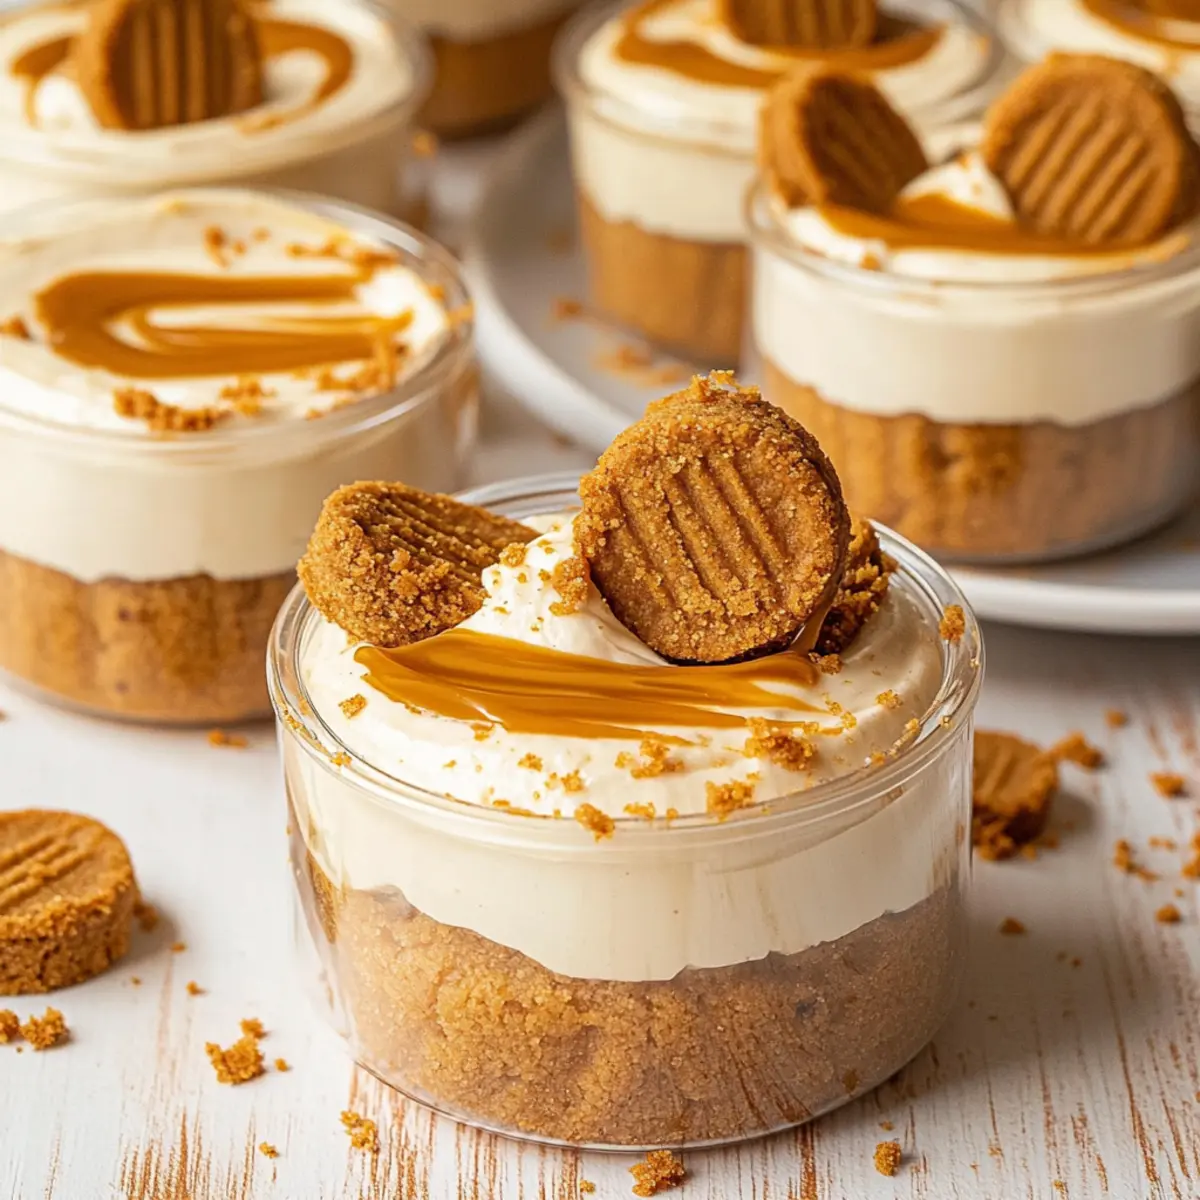
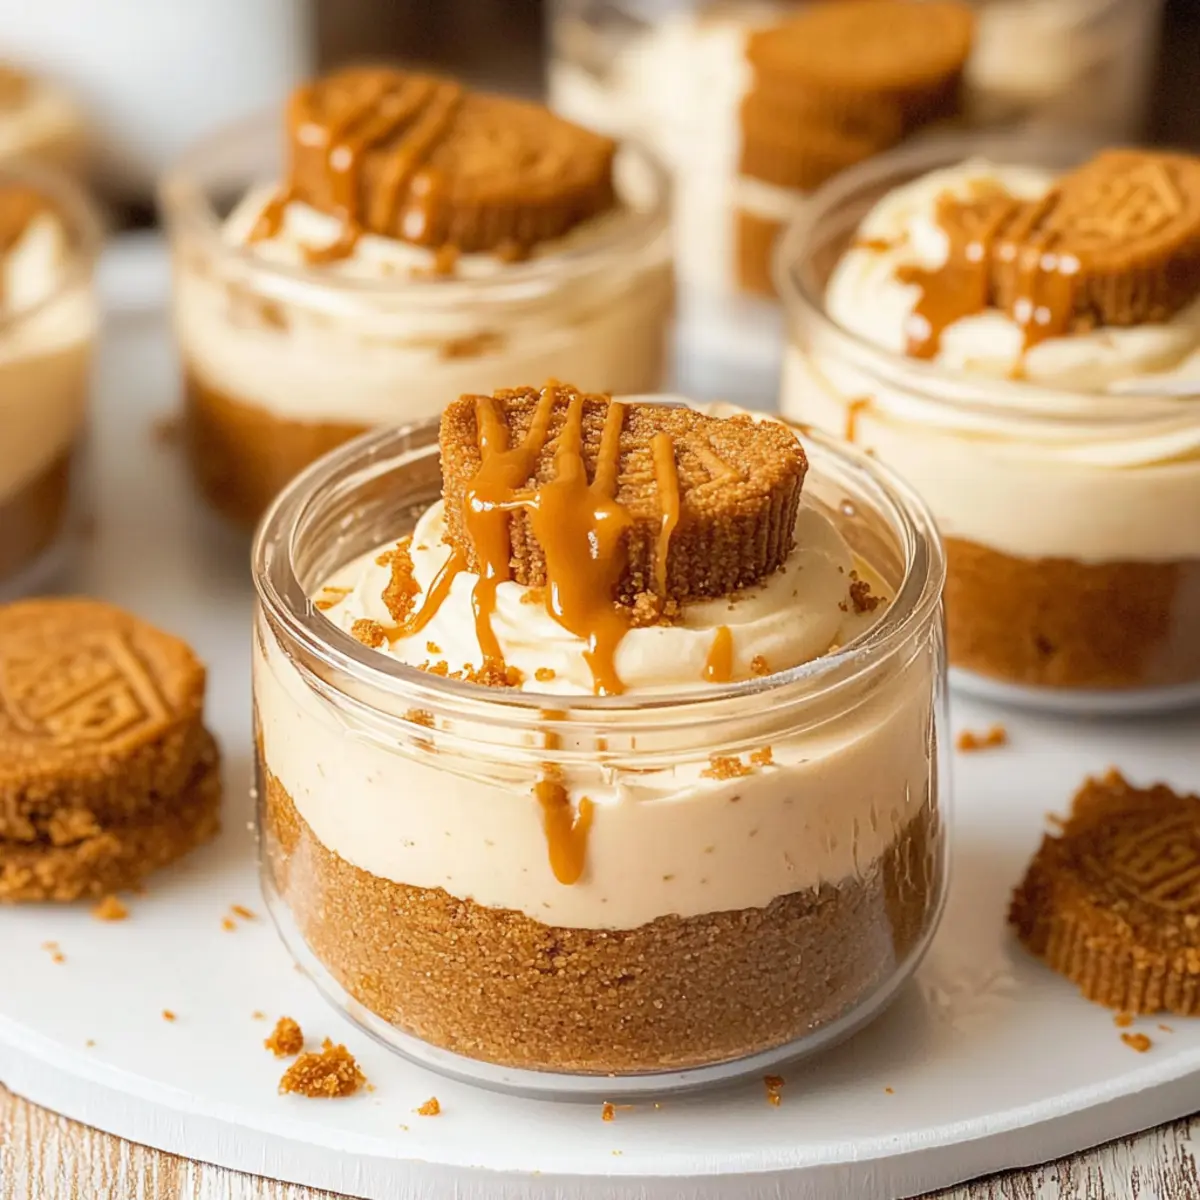
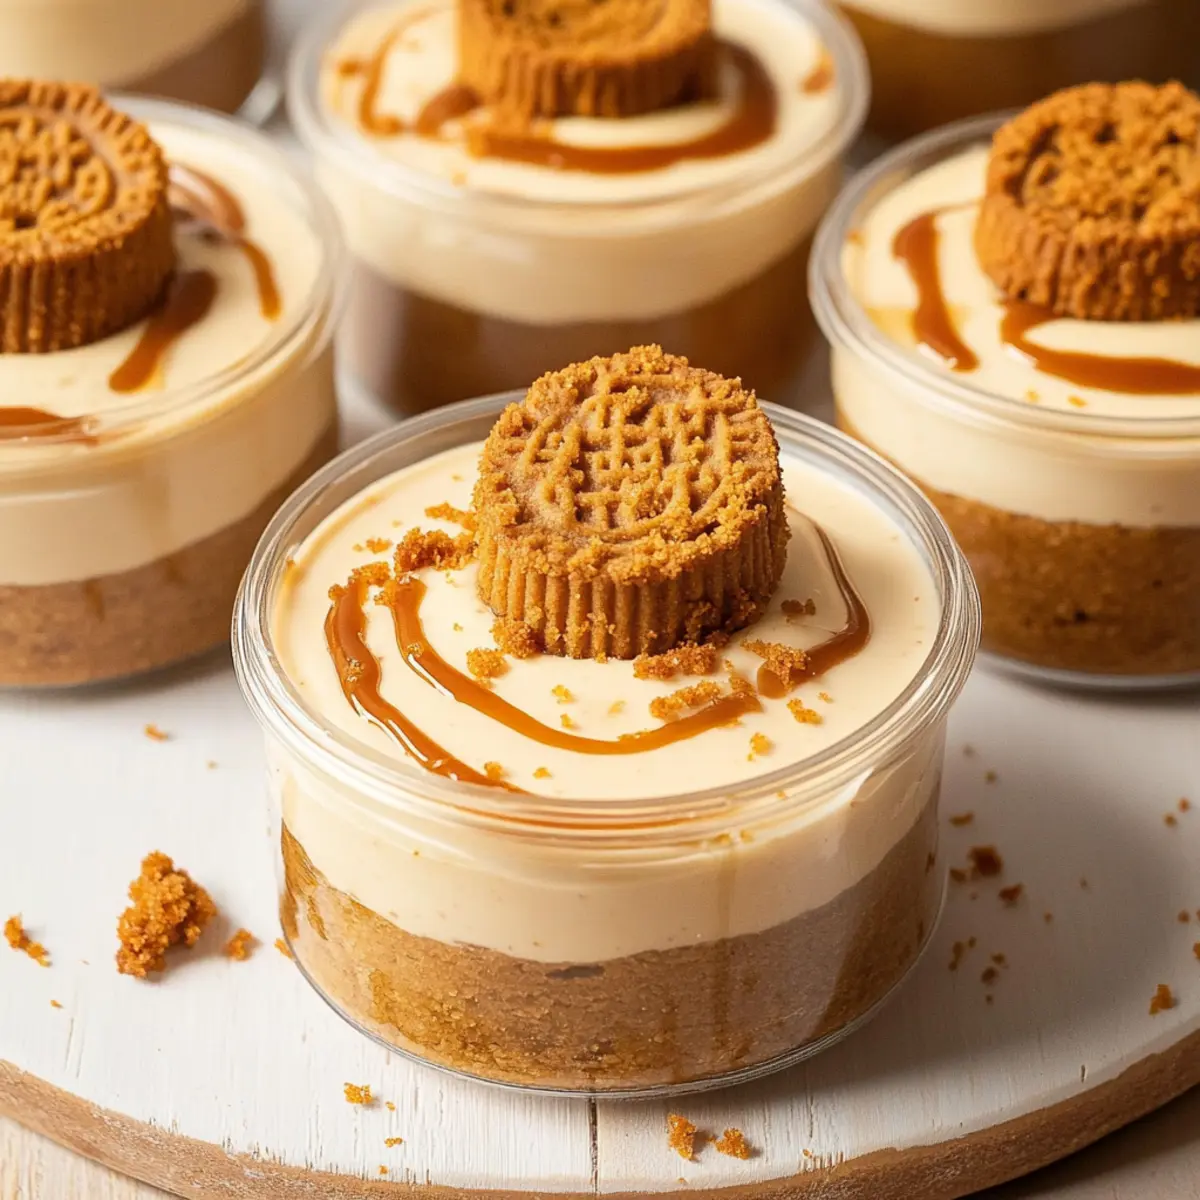
The kitchen was filled with the comforting aroma of caramel and spices as I prepared to whip up an indulgent treat. Enter the Easy No-Bake Biscoff Cheesecake Cups—your new favorite dessert that effortlessly marries convenience with delightful flavors. These charming cups are not only a joy to create, but they also deliver a rich, creamy cheesecake filling atop a crunchy Biscoff cookie crust that will leave your taste buds dancing with delight. Perfect for busy evenings or last-minute gatherings, this no-bake recipe makes it easy to impress your family and friends without any stress. Whether enjoyed as a sweet ending to a dinner or as a tempting snack, these cups are bound to become a crowd-pleaser. Curious how to bring this heavenly dessert to life? Let’s dive in!
Why Are These Dessert Cups So Irresistible?
Convenience at its finest: These No-Bake Biscoff Cheesecake Cups require minimal effort, making them perfect for busy schedules or spontaneous gatherings. Luscious texture: Enjoy a silky cheesecake filling that playfully contrasts with the crunchy cookie base. Versatile flavors: Feel free to customize with chocolate ganache or alternative cookie spreads to suit your taste. Crowd-pleaser appeal: Their charming individual portions are sure to delight guests of all ages. Whether served at a family dinner or special event, these cups will be a hit, much like our Easy No-Bake Cheesecake!
Biscoff Cheesecake Cups Ingredients
• Get ready to create a delicious treat!
-
For the Crust
-
Lotus Biscoff Biscuits – These provide the perfect crunchy base and irresistible flavor. Substitution Note: Use similar caramel-flavored cookies if unavailable.
-
Unsalted Butter – This binds the cookie crumbs together for a cohesive crust. Prep Note: Melt before combining.
-
For the Filling
-
Heavy Cream (16 oz) – Essential for achieving that light and airy cheesecake texture. No substitutions; important for texture.
-
Cream Cheese (8 oz) – Adds richness and stability to the filling. Must be at room temperature for easy mixing.
-
Powdered Sugar (1/2 cup) – Provides the necessary sweetness to balance the flavors. Alternate: Granulated sugar may be used, but texture may differ slightly.
-
Biscoff Spread (1/2 cup) – Elevates the cookie butter flavor in the filling. Can use any cookie butter as an alternative; adjust to taste.
-
Vanilla Extract (1 tsp) – Introduces warmth and depth of flavor, making the cheesecake even more delicious. Only pure vanilla is recommended for best taste.
-
For the Garnish
-
Biscoff Cookies (for garnish) – Adds a charming touch and extra crunch on top. Optional: Use any similar cookies for decoration.
Step‑by‑Step Instructions for Biscoff Cheesecake Cups
Step 1: Prepare the Crust
Start by crushing the Lotus Biscoff biscuits into fine crumbs using a food processor or a rolling pin, achieving a sandy texture. In a mixing bowl, combine the crumbs with melted unsalted butter until evenly moistened. Reserve a small portion of the crumb mixture for garnish later. Press the crumb mixture firmly into the bottoms of dessert cups, ensuring they hold together well.
Step 2: Make the Cheesecake Filling
In a large mixing bowl, whip the heavy cream with an electric mixer until stiff peaks form, which should take about 3–5 minutes. In another bowl, mix the softened cream cheese, powdered sugar, Biscoff spread, and vanilla extract until the mixture is smooth and creamy. Gently fold the whipped cream into the cream cheese mixture until fully combined, creating a luscious filling for your Biscoff Cheesecake Cups.
Step 3: Assemble the Cups
Using a piping bag or a spoon, transfer the creamy cheesecake filling into the prepared cups, layering it on top of the cookie crust. Melt the remaining Biscoff spread in the microwave for about 20-30 seconds until smooth and warm. Drizzle this melted Biscoff spread over the filled cups, allowing it to beautifully cascade down the sides.
Step 4: Chill
Cover the assembled Biscoff Cheesecake Cups with plastic wrap and refrigerate them for at least 4 hours, or until the filling is set and firm. This chilling process allows the flavors to meld and the textures to solidify, ensuring a delightful bite when ready to serve.
Make Ahead Options
These No-Bake Biscoff Cheesecake Cups are a fantastic option for meal prep and can be made up to 2 days in advance! You can prepare the Biscoff cookie crust and the cheesecake filling ahead of time; simply layer them in the cups when you’re ready to serve. For the crust, mix the crushed Biscoff biscuits with melted butter and press into the cups, then store in the refrigerator. Keep the filling in an airtight container until the day of serving to maintain its creamy consistency. When it’s time to enjoy, simply fill the cups with the cheesecake mixture, drizzle with melted Biscoff spread, and garnish with cookie halves. This saves you precious time during busy weeknights while ensuring your dessert is just as delightful!
Biscoff Cheesecake Cups Variations & Substitutions
Feel free to let your creativity shine with these delightful twists on the classic Biscoff Cheesecake Cups!
- Dairy-Free: Replace cream cheese with a vegan cream cheese alternative and use coconut cream in place of heavy cream for a dairy-free delight.
- Chocolate Lovers: Drizzle melted chocolate ganache over the cheesecake filling for a rich chocolatey layer that will satisfy your sweet cravings.
- Nutty Flavor: Incorporate crushed walnuts or pecans into the cookie crust for an extra crunch and a delightful nutty flavor contrast.
- Fruit Forward: Top the cheesecake with a layer of fresh fruit, like berries or sliced bananas, to add a refreshing burst of flavor and color.
- Spiced Up: Add a dash of cinnamon or pumpkin spice to the cheesecake filling for a warmly spiced version of these cups that’s perfect for fall.
- Speculoos Twist: Switch out the Biscoff cookies and spread for speculoos cookies to create a slightly different flavor profile that’s equally delicious.
- Almond Extract: Swap out the vanilla extract for almond extract to lend a unique, nutty aroma that beautifully complements the cookies.
- Chili Chocolate: For a spicy kick, add a pinch of cayenne pepper or chili powder to the melted chocolate drizzle, giving your dessert an exciting heat.
Enjoy experimenting with these variations, and they might just surprise you! For more dessert inspiration, check out our delightful Cherry Pistachio Cheesecake or the refreshing Orange Creamsicle Cheesecake.
Expert Tips for Biscoff Cheesecake Cups
-
Room Temperature Cream Cheese: Ensure the cream cheese is at room temperature to prevent lumps in your filling, creating a smooth and creamy texture.
-
No Freezing, Please: Avoid freezing the cups, as this will lead to a grainy texture when thawed, ruining the luxurious mouthfeel of your Biscoff Cheesecake Cups.
-
Use the Right Cups: For mini servings, consider using shot glasses or small dessert cups. This will yield 20-24 servings, making them perfect for gatherings.
-
Chill Time Matters: Allow the cheesecake cups to chill for at least 4 hours. This step helps the flavors develop and ensures a firm, delightful experience.
-
Garnish Wisely: Don’t skip the reserved crumbs and cookie halves for garnish, as they enhance both the presentation and add a satisfying crunch to each bite!
How to Store and Freeze Biscoff Cheesecake Cups
- Fridge: Store these No-Bake Biscoff Cheesecake Cups in an airtight container in the refrigerator for up to 2 days. This keeps them fresh and ready for indulgence.
- Freezer: While it’s not recommended to freeze these dessert cups due to the cream texture, you can freeze the crust and filling separately for up to 1 month, then assemble fresh when you’re ready.
- Reheating: There’s no need for reheating. Simply enjoy them cold straight from the fridge for the best flavor and texture experience!
- Garnish Storage: Keep any leftover Biscoff crumbs and cookie garnishes stored separately to maintain their crunch, adding them just before serving for optimal presentation.
What to Serve with Easy No-Bake Biscoff Cheesecake Cups
Elevate your dessert experience by pairing these creamy delights with complementary flavors and textures.
- Fresh Berries: Juicy strawberries or raspberries provide a tart contrast to the rich cheesecake, adding a burst of freshness with each bite.
- Chocolate Drizzle: A silky chocolate sauce cascading over each cup introduces an indulgent sweetness that enhances the overall flavor experience.
- Whipped Cream: Light and airy whipped cream served on top offers a delightful creaminess that makes this dessert even more decadent.
- Coffee: A cup of rich, brewed coffee complements the sweet and spiced notes of the Biscoff, creating a perfect pairing for after-dinner enjoyment.
- Nutty Biscotti: Crunchy almond or hazelnut biscotti brings a nutty flavor and additional crunch, making for a delightful textural contrast with the cheesecake cups.
- Ice Cream: A scoop of vanilla or caramel-flavored ice cream adds a cool creaminess that beautifully balances the rich cheesecake’s sweetness.
These pairings will leave your guests, and you, absolutely enchanted by this delicious dessert experience!

Biscoff Cheesecake Cups Recipe FAQs
What kind of Biscoff biscuits should I use?
Absolutely! Use Lotus Biscoff biscuits for the best flavor and crunch. If you can’t find them, similar caramel-flavored cookies will work just as well. Just ensure they have a good balance of sweetness and spice.
How should I store the cheesecake cups?
You can store the No-Bake Biscoff Cheesecake Cups in an airtight container in the refrigerator for up to 2 days. Ensuring they are well covered not only keeps them fresh but also prevents them from absorbing any odors from other foods.
Can I freeze Biscoff Cheesecake Cups?
While it’s not recommended to freeze the assembled cheesecake cups due to potential texture changes, you can freeze the crust and filling separately for up to 1 month. To do this, prepare the crust and filling as usual, then place them in airtight containers. When ready to enjoy, simply thaw in the fridge overnight and assemble the cups fresh before serving.
What should I do if my filling is too runny?
Very! If your cheesecake filling is too runny, it may be due to the heavy cream not being whipped to stiff peaks, or the cream cheese not being at room temperature. To fix this, return to step 2: whip the heavy cream longer until it reaches stiff peaks. If your cream cheese was too cold, gently re-mix the filling until it smooths out and thickens, then carefully fold in the whipped cream again.
Are Biscoff Cheesecake Cups safe for those with allergies?
It’s important to note that these cheesecake cups contain dairy (heavy cream, cream cheese) and may not be suitable for individuals with lactose intolerance or dairy allergies. Additionally, check that the Biscoff cookies and spread you use are free from any allergens specific to your needs, such as gluten, if necessary. Always consult packaging for allergen information.
Decadent Biscoff Cheesecake Cups That Wow Every Time
Ingredients
Equipment
Method
- Crush the Lotus Biscoff biscuits into fine crumbs using a food processor or rolling pin, achieving a sandy texture.
- Combine the crumbs with melted unsalted butter until evenly moistened. Reserve a small portion for garnish.
- Press the crumb mixture into the bottoms of dessert cups, ensuring they hold together well.
- Whip the heavy cream with an electric mixer until stiff peaks form (about 3-5 minutes).
- In another bowl, mix the softened cream cheese, powdered sugar, Biscoff spread, and vanilla extract until smooth.
- Gently fold the whipped cream into the cream cheese mixture until fully combined.
- Transfer the creamy cheesecake filling into the prepared cups, layering it on top of the cookie crust.
- Melt the remaining Biscoff spread in the microwave for 20-30 seconds until smooth, then drizzle over the filled cups.
- Cover with plastic wrap and refrigerate for at least 4 hours, until set and firm.
Leave a Reply