
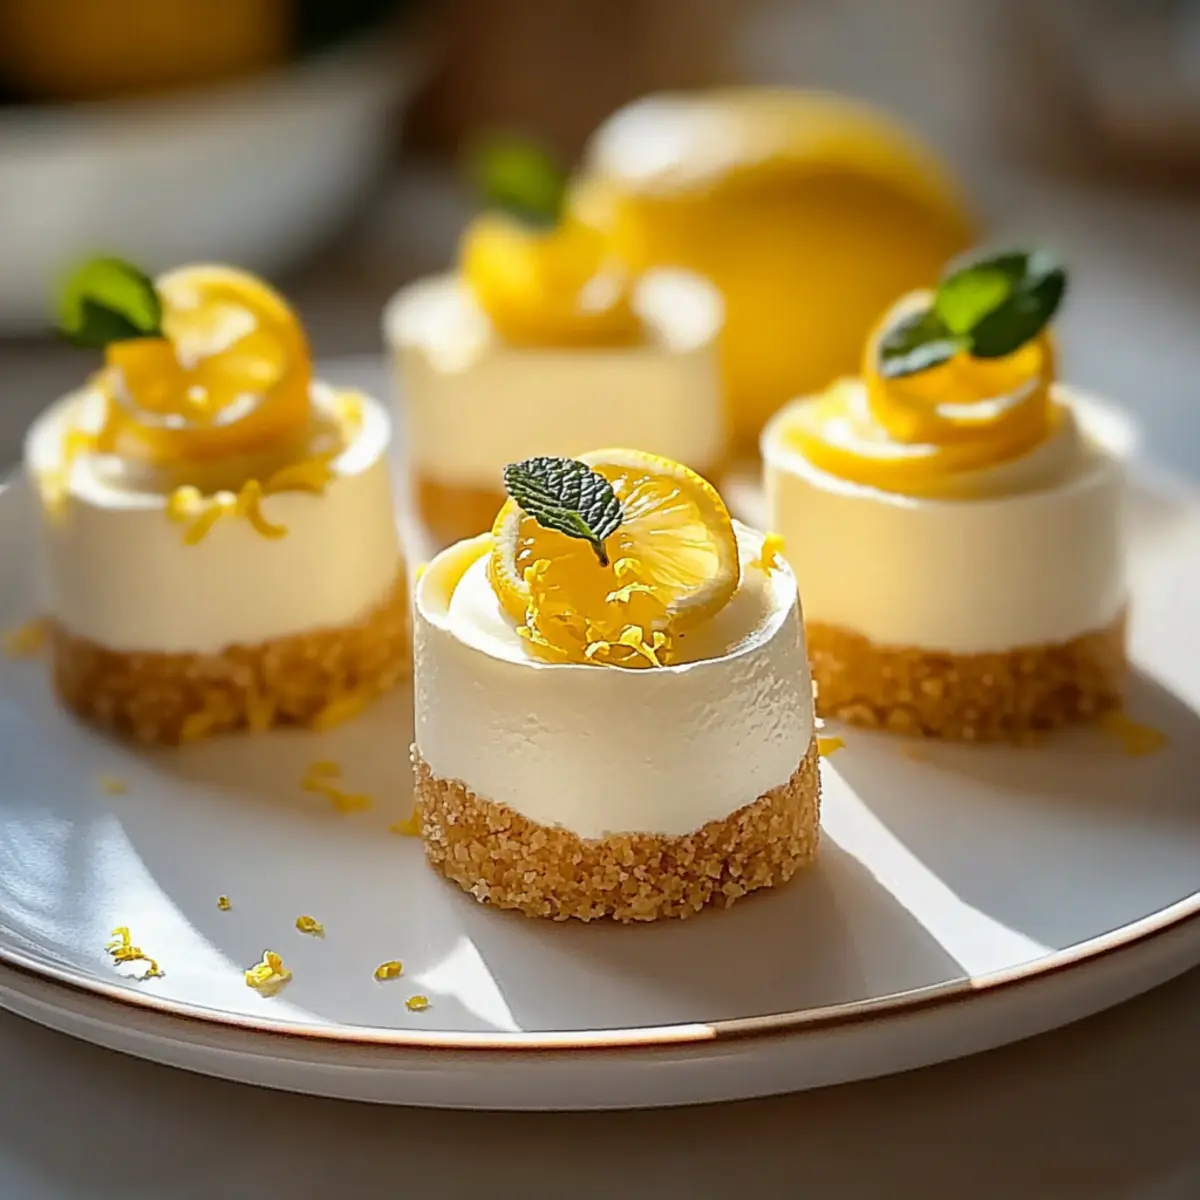
As I carefully zest a lemon, the bright, citrusy aroma fills the kitchen, sparking memories of summer gatherings and sunlit afternoons. Today, I’m excited to share one of my favorite creations: Mini Lemon Cheesecakes. These creamy, tangy bites of delight are not only easy to make, but they also provide a fresh twist on classic dessert. Whether you’re hosting friends or treating yourself to something sweet, these little gems offer a charming presentation that’s sure to impress. Plus, their customizable nature means you can jazz them up with your favorite toppings or flavors! Ready to brighten up your dessert game? Let’s dive into this delightful recipe!
Why Are Mini Lemon Cheesecakes So Irresistible?
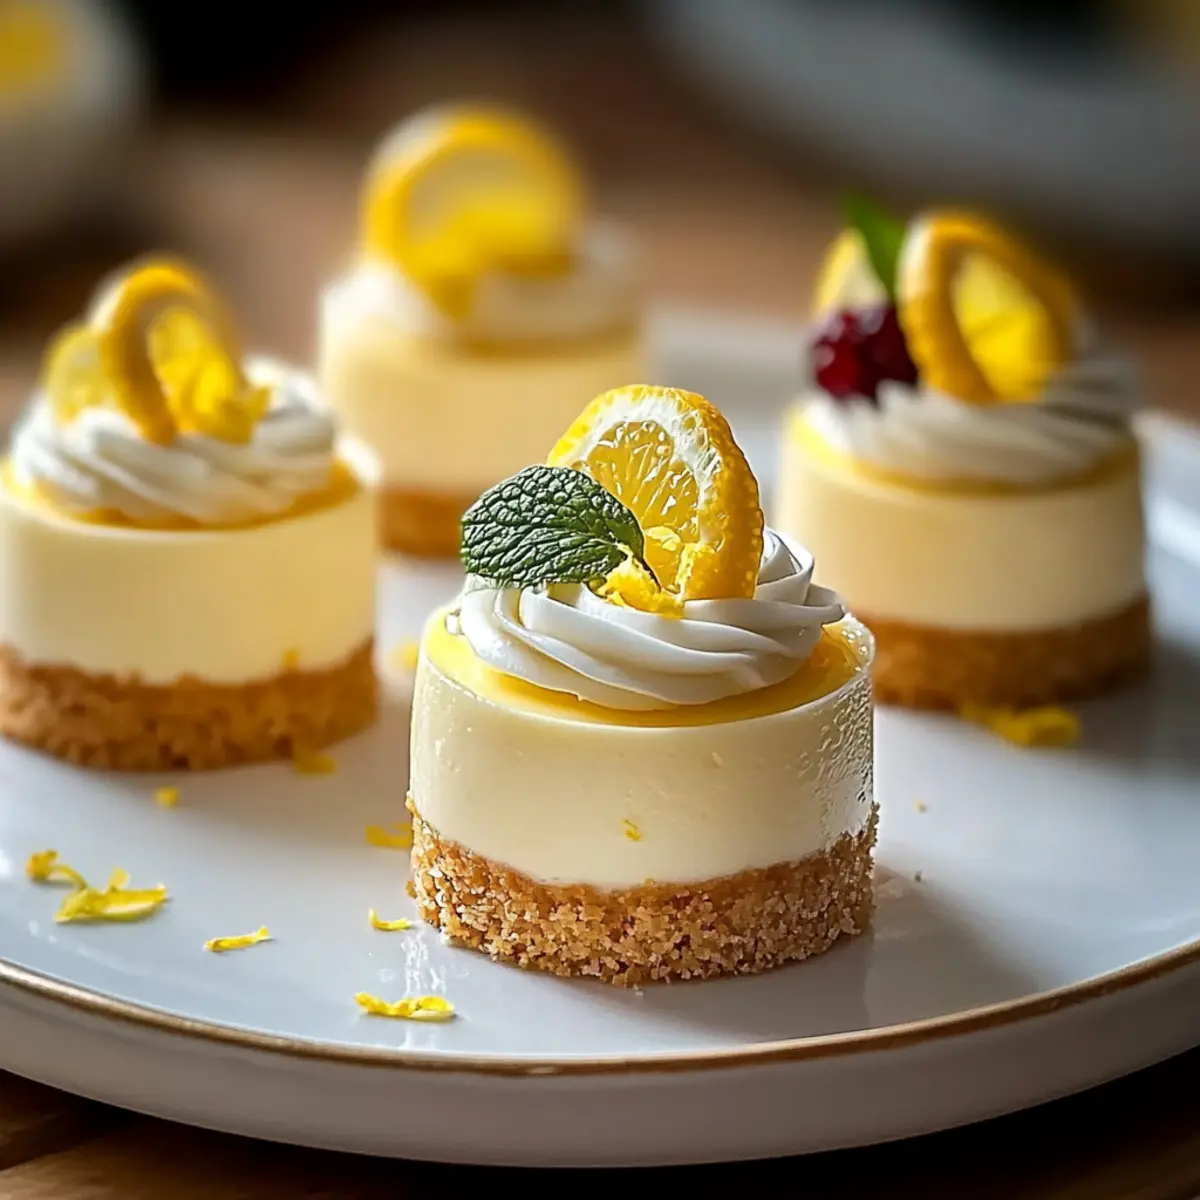
Bite-Sized Bliss: These mini lemon cheesecakes pack a punch of flavor in an adorable, easy-to-eat size. Perfect for entertaining or a little indulgent moment alone!
Lemon Love: The zesty lemon flavor shines through, providing a refreshing contrast to the sweet, buttery crust—ideal for those craving a bright, citrusy treat.
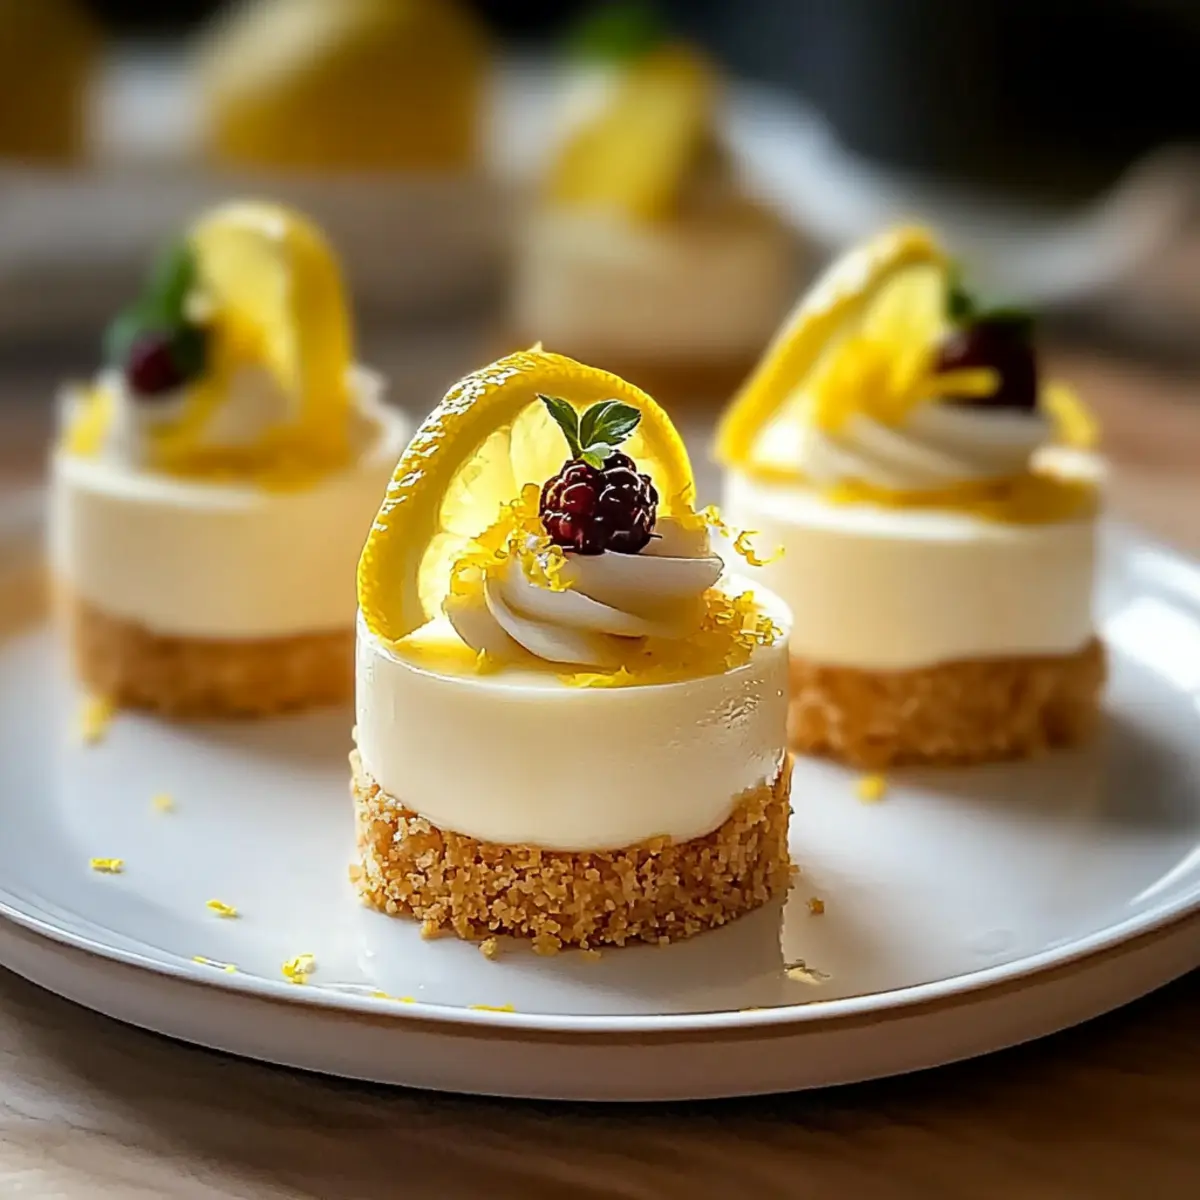
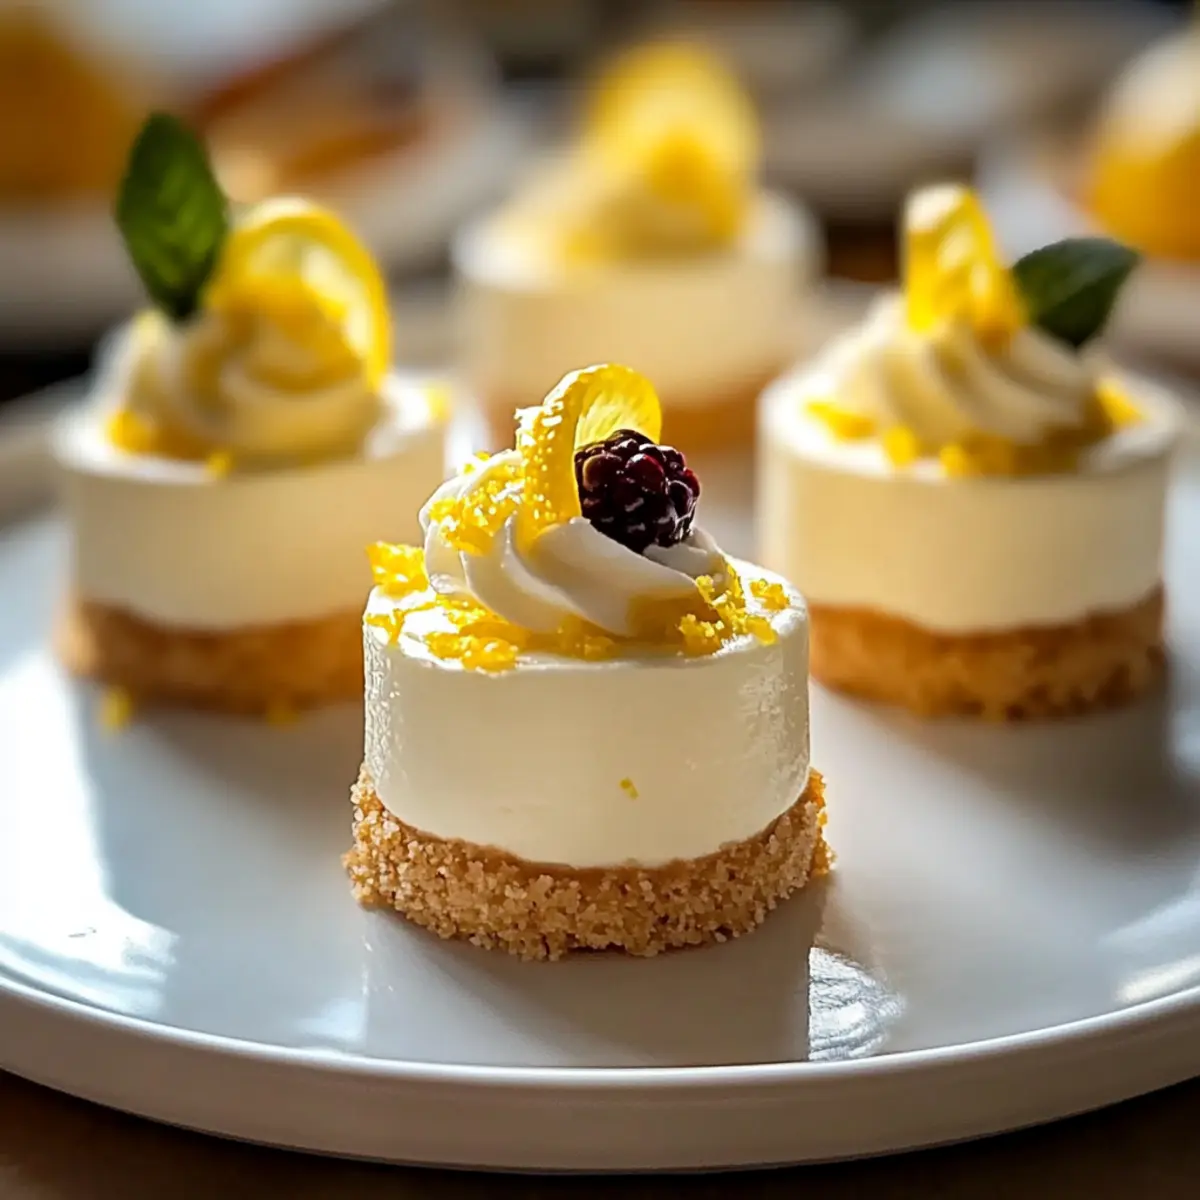
Customizable Joy: Whether you top them with fresh berries or a drizzle of chocolate sauce, their versatility ensures everyone can enjoy them their way.
Time-Saving Treat: With simple ingredients and quick prep, you’ll have these delicious bites ready in no time! Pair them with a refreshing drink, like Lemon Shrimp Avocado for a delightful experience.
Crowd-Pleasing Delight: These delicate cheesecakes are guaranteed to be a hit at any gathering, leaving your guests asking for more! Perfect for those tired of mundane desserts.
Easy Storage: Made ahead? No problem! They can last in the fridge for up to 5 days, making them a convenient option for sweet cravings.
Mini Lemon Cheesecakes Ingredients
For the Crust
• Graham Cracker Crumbs – Base for the crust; provides sweetness and crunch. Substitution: Can use digestive biscuits for a different flavor profile.
• Melted Butter – Binds the crust together and adds richness. Note: Ensure butter is fully melted to combine evenly.
For the Filling
• Cream Cheese – Main component of the filling; provides creaminess and structure. Must be softened for a smooth mixture.
• Sugar – Sweetens the filling to balance the tartness of lemon. Substitution: Use coconut sugar for a lower glycemic index.
• Eggs – Adds structure and stability to the cheesecake. Tip: Use room temperature eggs for easier blending.
• Sour Cream – Enhances creaminess and adds a slight tang. Substitution: Greek yogurt can be used for a healthier alternative.
• Lemon Juice – Provides the key tangy flavor element. Substitution: Fresh juice preferred over bottled for the best taste.
• Lemon Zest – Intensifies the lemon flavor; adds aromatic oils. Tip: Use a microplane for fine zesting.
• Vanilla Extract – Adds warmth and depth of flavor. Note: Use pure vanilla extract for a cleaner taste.
With these simple ingredients, your Mini Lemon Cheesecakes will come to life, delivering creamy, tangy bites that are simply irresistible!
Step‑by‑Step Instructions for Mini Lemon Cheesecakes
Step 1: Preheat the Oven
Begin by preheating your oven to 325°F (163°C). This will ensure that your Mini Lemon Cheesecakes bake evenly. As the oven warms up, gather your baking equipment, including a muffin tin and mixing bowls, to prepare for the next steps.
Step 2: Prepare the Crust
In a mixing bowl, combine graham cracker crumbs and melted butter until well mixed. Spoon the mixture into a muffin tin, pressing it down firmly to create an even crust. Bake the crust for 8 minutes, or until it’s lightly golden and aromatic, then remove it from the oven and allow it to cool.
Step 3: Make the Filling
In a large bowl, beat the softened cream cheese and sugar together until the mixture is smooth and creamy. Then, incorporate the eggs one at a time, blending well after each addition. Mix in the sour cream, fresh lemon juice, lemon zest, and vanilla extract, creating a luscious filling that perfectly complements your Mini Lemon Cheesecakes.
Step 4: Bake Cheesecakes
Once the filling is ready, gently spoon it over the cooled crusts in the muffin tin, filling each about three-quarters full. Bake the cheesecakes for 18-20 minutes, just until the centers jiggle slightly but are set around the edges. Keep an eye on them to avoid overbaking, which can lead to cracks.
Step 5: Cool
After baking, allow the Mini Lemon Cheesecakes to cool in the muffin tin for about 10 minutes. This gentle cooling period will help prevent them from cracking. Once cooled, transfer them to the refrigerator to chill for at least 2 hours, ensuring a perfectly creamy texture before serving.
What to Serve with Mini Lemon Cheesecakes
As you prepare to indulge in these delightful treats, consider these pairing options that will elevate your dessert experience to new heights.
-
Fresh Berries: A vibrant mix of raspberries and blueberries adds a pop of color and a tangy sweetness that balances the cheesecake’s richness.
-
Whipped Cream: Light and airy, a dollop of freshly whipped cream enhances the creaminess of the cheesecakes, making each bite even more indulgent.
-
Sparkling Lemonade: The effervescence and citrusy notes in sparkling lemonade perfectly complement the tartness of the lemon cheesecakes, creating a refreshing pairing.
-
Chocolate Drizzle: A subtle drizzle of melted dark chocolate adds a luxurious touch. The bittersweet contrast with the lemony flavor creates an irresistible marriage of tastes.
-
Mint Garnish: Fresh mint leaves not only make for a beautiful presentation but also introduce a refreshing aromatic note, brightening the overall dessert experience.
-
Iced Tea: Serve these mini lemon cheesecakes with a chilled glass of sweetened iced tea, balancing the sweet and tangy dessert with a refreshing sip.
For an unforgettable treat, consider these suggestions, and watch as they bring your gathering or personal dessert moment to life!
Make Ahead Options
These Mini Lemon Cheesecakes are perfect for meal prep and can be made up to 3 days in advance! You can prepare the crust and filling the day before: simply combine the graham cracker crumbs with melted butter, press into the muffin tin, and bake for 8 minutes. Once cooled, you can store the crusts at room temperature. For the filling, mix the softened cream cheese, sugar, eggs, and lemon ingredients, and refrigerate until you’re ready to bake. On baking day, just pour the filling into the cooled crusts and bake for 18-20 minutes. This prep method ensures they remain just as delicious and creamy, making your dessert planning effortless and enjoyable!
Mini Lemon Cheesecakes Variations & Substitutions
Feel free to let your creativity soar by customizing these mini lemon cheesecakes with delightful variations that suit your taste preferences.
-
Dairy-Free: Substitute cream cheese with a vegan cream cheese alternative for a creamy dairy-free treat without sacrificing taste.
-
Low-Carb: Use almond flour mixed with butter instead of graham crackers for a low-carb crust option. Perfect for those watching their carbs!
-
Freshly Zested: Amp up the citrus flavor by using lime or orange zest along with the lemon, refreshing your cheesecake with a twist of sunshine.
-
Coconut Cream: Swap sour cream for coconut cream, giving a tropical flair and luscious texture that pairs beautifully with the lemon.
-
Chocolate Lovers: Drizzle melted dark chocolate on top or mix cocoa powder into the crust for a delightful chocolatey contrast.
-
Fruit Toppings: Top your cheesecakes with fresh berries like strawberries or blueberries for an added burst of flavor and vibrant color.
-
Zesty Curd: Slather a layer of lemon curd on top before serving for an extra layer of tangy pleasure, accentuating the lemony goodness beautifully.
-
Nutty Crust: Substitute half of the graham cracker crumbs with ground nuts, such as almonds or pecans, for a nutty twist that adds depth and texture.
For more tasty ideas and combinations, check out my delightful recipes for Lemon Shrimp Avocado that pairs well with your mini cheesecakes or indulge in these flavors with some Lemon Dill Butter for a complete sense of lemon bliss!
How to Store and Freeze Mini Lemon Cheesecakes
Fridge: Store mini lemon cheesecakes in an airtight container in the refrigerator for up to 5 days. This keeps them fresh and ready to enjoy whenever you crave a sweet bite.
Freezer: To freeze, place the cheesecakes on a baking sheet in a single layer and freeze for 2 hours. Then transfer them to a freezer-safe container, where they can stay fresh for up to 3 months.
Thawing: When ready to enjoy, simply transfer frozen mini lemon cheesecakes to the fridge to thaw overnight. This ensures they maintain their creamy texture and delightful flavor.
Serving Again: For the best experience, serve the cheesecakes chilled and consider topping with fresh fruit or a light dusting of powdered sugar before serving. Enjoy the sweetness!
Expert Tips for Mini Lemon Cheesecakes
-
Room Temperature Cream Cheese: Ensure your cream cheese is at room temperature for a smoother filling, preventing lumps and achieving that perfect creamy texture.
-
Don’t Overmix: Avoid overmixing the filling once the eggs are added. This helps prevent cracks in your Mini Lemon Cheesecakes during baking.
-
Proper Cooling: After baking, let your cheesecakes cool completely in the muffin tin before refrigerating. This technique enhances texture and taste.
-
Use Fresh Ingredients: Opt for fresh lemon juice and zest instead of bottled products to maximize flavor. Your cheesecakes will burst with bright lemony goodness!
-
Experiment with Toppings: Feel free to customize with toppings like fresh berries or chocolate drizzle. This adds an extra layer of flavor to your Mini Lemon Cheesecakes!
Mini Lemon Cheesecakes Recipe FAQs
What type of lemons should I use for the best flavor?
Absolutely! For the freshest and zestiest flavor, always opt for organic, unwaxed lemons. Look for lemons that are bright yellow without dark spots. They’re ideal for both juicing and zesting!
How should I store my mini lemon cheesecakes?
To keep your mini lemon cheesecakes fresh, store them in an airtight container in the refrigerator for up to 5 days. This way, they stay creamy and delicious, ready for whenever you’re in the mood for a treat!
Can I freeze the mini lemon cheesecakes?
Yes, you can freeze them! Start by placing the mini lemon cheesecakes on a baking sheet in a single layer and freeze for 2 hours. Once frozen, transfer them to a freezer-safe container. They’ll keep well for up to 3 months. When you’re ready to enjoy, let them thaw in the fridge overnight.
Why did my mini cheesecakes crack during baking?
The main culprit for cracking is usually overmixing the filling once the eggs are added or baking at too high a temperature. To avoid this, mix just until combined after adding the eggs. Also, make sure your oven is correctly calibrated and stick to the suggested baking time to keep the centers slightly jiggly.
Are these mini lemon cheesecakes suitable for those with dietary restrictions?
While this recipe doesn’t have specific dietary restrictions, feel free to modify it! For lower sugar options, swap regular sugar with coconut sugar or a sugar substitute. If you have a gluten sensitivity, using gluten-free graham cracker crumbs will work beautifully, ensuring everyone can enjoy these creamy delights!
Can I make these mini cheesecakes ahead of time?
Yes! In fact, making them ahead is a fantastic idea. You can prepare them a day in advance, store them in the fridge, and serve them chilled. They taste even better when the flavors have melded overnight!
Mini Lemon Cheesecakes: Sweet, Creamy Bites of Sunshine
Ingredients
Equipment
Method
- Preheat your oven to 325°F (163°C).
- In a mixing bowl, combine graham cracker crumbs and melted butter until well mixed. Spoon the mixture into a muffin tin, pressing it down firmly to create an even crust. Bake the crust for 8 minutes until lightly golden, then allow to cool.
- In a large bowl, beat the softened cream cheese and sugar together until smooth and creamy. Incorporate the eggs one at a time, blending well after each addition. Mix in sour cream, fresh lemon juice, lemon zest, and vanilla extract.
- Spoon the filling over the cooled crusts in the muffin tin, filling each about three-quarters full. Bake for 18-20 minutes until centers jiggle slightly but are set around the edges.
- Allow the cheesecakes to cool in the muffin tin for about 10 minutes. Transfer them to the refrigerator to chill for at least 2 hours before serving.
Leave a Reply