
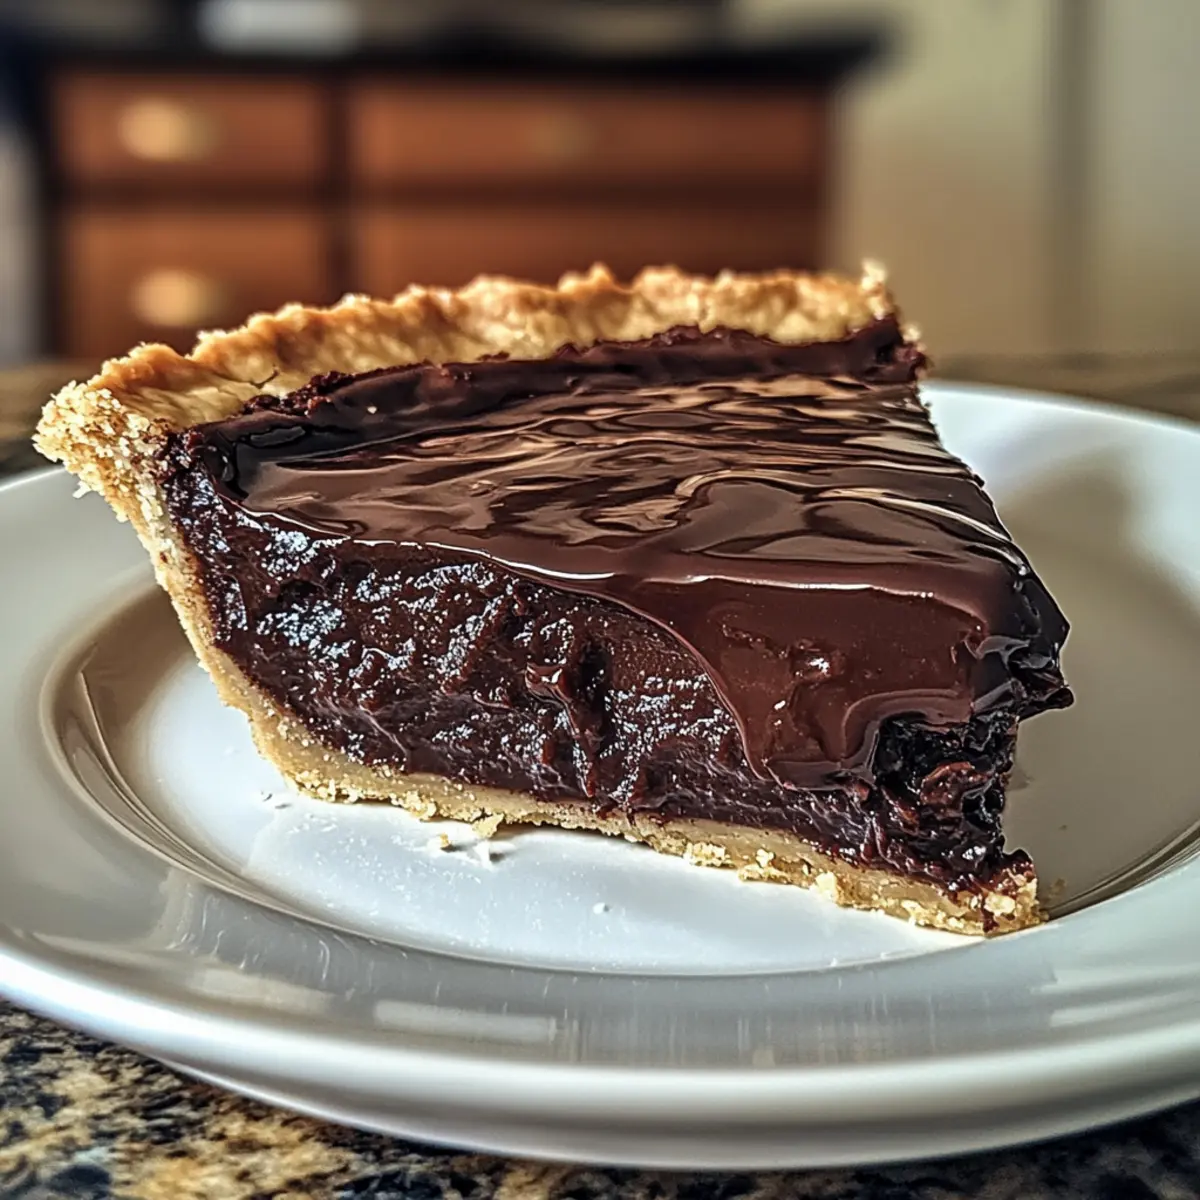
“Can you believe this used to be my go-to dessert?” As I shared a slice of Grandma’s Chocolate Pie with friends last week, I felt a delightful wave of nostalgia wash over me. This classic chocolate pie recipe is more than just a dessert—it’s a heartwarming reminder of family gatherings filled with laughter and love. With its silky filling and buttery crust, this pie is not only easy to make but also a guaranteed crowd-pleaser. Whether it graces your dinner table for a special occasion or simply serves as a sweet escape from the everyday hustle, each bite is an invitation to savor life. Are you ready to create your own memories with this timeless classic? Let’s get baking!
Why Is This Chocolate Pie Special?
Simplicity at its Finest: The recipe is easy to follow, requiring minimal baking skills while delivering impressive results.
Nostalgic Comfort: Each slice evokes cherished memories of family celebrations, making it more than just a dessert—it’s a connection to the past.
Rich, Decadent Flavors: The silky chocolate filling combined with a buttery crust creates an indulgent experience that everyone will adore.
Perfect for Any Occasion: Whether it’s a birthday party, holiday celebration, or a casual family dinner, this chocolate pie is a guaranteed crowd-pleaser, just like my Energy Bites for a sweet treat on-the-go.
Make-Ahead Friendly: Prepare this pie a day in advance to save time and impress your guests, allowing you to enjoy more moments together.
Serve with Style: Complement it with whipped cream or berries to elevate its presentation, as suggested with my Cereal Bars Homemade for delightful contrast.
Chocolate Pie Recipe Ingredients
For the Filling
- Semi-Sweet or Dark Chocolate Chips – Provides the rich chocolate flavor; opt for high-quality chocolate for the best results.
- Large Eggs (3, room temperature) – Adds structure and richness to the filling; ensure they are at room temperature for even mixing.
- Granulated Sugar (1 cup) – Sweetens the pie and balances the richness of the chocolate; adjust to taste as needed.
- Whole Milk (1 cup) – Contributes to a creamy texture in the filling; can substitute with heavy cream for a richer pie.
- Pure Vanilla Extract (2 tsp) – Enhances the chocolate flavor with aromatic notes; avoid imitation extract for optimal flavor.
For the Crust
- Pre-Made Pie Crust – Provides a convenient base; choose a high-quality crust or make your own for a personal touch.
This simple yet delightful chocolate pie recipe is bound to bring warmth and joy to your home!
Step‑by‑Step Instructions for Grandma’s Chocolate Pie
Step 1: Preheat Oven and Prepare Crust
Begin by preheating your oven to 350°F (175°C) to create the perfect baking environment. While the oven warms up, take your pre-made pie crust and fit it neatly into a 9-inch pie dish, ensuring there are no air bubbles. If desired, pre-bake the crust for 5–7 minutes to achieve a golden brown finish and prevent sogginess.
Step 2: Melt Chocolate Mixture
In a medium saucepan over low heat, combine the semi-sweet or dark chocolate chips with one cup of whole milk. Stir gently and continuously until the chocolate is completely melted and the mixture is smooth, which should take about 5–7 minutes. Watch for any steam rising, indicating the chocolate is ready, and remove the pan from the heat.
Step 3: Whisk Eggs and Sugar
In a separate bowl, crack three large eggs that are at room temperature, and add one cup of granulated sugar. Using a whisk, beat the eggs and sugar together until the mixture becomes pale, thick, and fluffy—this should take around 3–4 minutes. The lighter color indicates that air has been incorporated, which will contribute to the pie’s delicious texture.
Step 4: Combine Ingredients
Now, gently fold the melted chocolate mixture into the egg and sugar blend. Use a spatula to carefully combine the two mixtures until fully incorporated, ensuring a smooth and even filling. Be sure not to overmix as you want to maintain the lightness achieved with the eggs.
Step 5: Bake
Pour the silky filling into the prepared crust, ensuring it is evenly distributed. Carefully place the pie in the preheated oven and bake for 30–35 minutes. The pie is ready when the filling is set with a slight jiggle in the center. Keep an eye out for the edges to firm up while the middle remains soft—a telltale sign of the perfect chocolate pie.
Step 6: Cool and Serve
After baking, remove the chocolate pie from the oven and allow it to cool completely at room temperature. This cooling period is crucial, as it helps the pie firm up for cleaner slices. Once cooled, slice and serve with a dollop of whipped cream or fresh berries to elevate your Grandma’s Chocolate Pie experience.
Expert Tips for the Best Chocolate Pie
- Room Temperature Eggs: Ensure your eggs are at room temperature for better integration, leading to a smoother filling in your chocolate pie recipe.
- Quality Matters: Choose high-quality chocolate chips for a more intense flavor. It makes a noticeable difference in richness and taste!
- Avoid Soggy Crust: Pre-bake your pie crust for 5-7 minutes before adding the filling to prevent it from becoming soggy during baking.
- Don’t Overmix: Gently combine the chocolate and egg mixtures to keep the filling airy and light; overmixing can lead to a denser texture.
- Cool Completely: Allow the pie to cool fully before slicing—it helps with clean cuts and enhances the overall presentation.
Make Ahead Options
These Grandma’s Chocolate Pie preparations are ideal for busy home cooks looking to save time! You can prepare the chocolate filling up to 24 hours in advance by following the melting and mixing steps, then transferring the mixture into an airtight container and refrigerating. The crust can also be pre-baked and stored at room temperature to maintain its flaky texture. When you’re ready to serve, simply pour the chilled filling into the crust and bake as directed. This approach not only streamlines your day but ensures you have a luscious, nostalgic dessert waiting to impress your guests, just like Grandma intended!
How to Store and Freeze Grandma’s Chocolate Pie
Fridge: Cover the chocolate pie with plastic wrap or aluminum foil and store in the refrigerator for up to 4 days. This will keep the filling fresh and creamy.
Freezer: For longer storage, freeze the pie wrapped tightly in plastic wrap and then aluminum foil for up to 2 months. Thaw it in the fridge overnight before serving.
Reheating: If you’d like your pie warm, heat slices in the microwave for about 15 seconds. This way, you’ll enjoy the velvety chocolate filling at its best.
Serving Suggestion: Always serve your chocolate pie chilled or at room temperature with a dollop of whipped cream or seasonal berries for an elegant touch.
What to Serve with Grandma’s Chocolate Pie
Elevate your dessert experience with delightful complements that harmonize beautifully with every decadent slice of chocolate pie.
-
Whipped Cream: The light and airy texture of whipped cream enhances the richness of the pie, creating a perfect balance. A dollop adds a creamy touch that feels indulgent yet refreshing.
-
Fresh Berries: Burst of flavor from strawberries or raspberries provide a beautiful contrast to the sweet chocolate. Their tartness cuts through the richness, adding a delightful pop with every bite.
-
Vanilla Ice Cream: The classic pairing of warm chocolate pie and cold vanilla ice cream is simply irresistible. The creamy, smooth scoop contrasts beautifully with the velvety filling, creating a comforting harmony.
-
Coffee: A warm cup of coffee elevates the dessert experience, enhancing the chocolate flavor. The slight bitterness of the coffee complements the sweetness, making each bite even more satisfying.
-
Mint Leaves: Garnishing with fresh mint not only elevates presentation but also adds a refreshing note. The herbaceous taste provides a cooling contrast, enhancing the overall flavor profile.
-
Chocolate Sauce: Drizzling warm chocolate sauce over each slice will crown your dessert with an extra layer of indulgence. It enhances the already rich chocolate pie experience, pleasing every chocolate lover.
-
Caramel Sauce: A touch of caramel adds a buttery sweetness that plays well with the chocolate flavor. Swirling it over the pie can create a beautifully decadent dessert that guests will remember.
Each of these delicious accompaniments brings its unique flair, elevating Grandma’s chocolate pie from a simple dessert to an unforgettable treat!
Chocolate Pie Recipe Variations
Feel free to get creative and give this chocolate pie a personal touch that will make it your own!
-
Salted Chocolate: Add a pinch of sea salt to the filling for a delightful contrast that enhances the rich chocolate flavor. This small addition can make a world of difference.
-
Nutty Twist: Incorporate finely chopped nuts like pecans or walnuts into the filling or sprinkle them on top for added crunch. They provide a wonderful texture and flavor boost.
-
Almond Extract: For a unique flavor profile, swap in a splash of almond extract instead of vanilla. It adds a warm, nutty note that beautifully complements the chocolate.
-
Coconut Flakes: Fold in shredded coconut to the filling for a tropical twist that plays on the sweet and rich chocolate. Each slice will surprise with subtle coconut undertones, much like a piece of Cereal Bars Homemade but in pie form.
-
Spicy Chocolate: Want to add some heat? Mix in a pinch of cayenne pepper or chili powder for a surprising kick. The warmth from the spice beautifully contrasts with the sweetness of the pie.
-
Berry Delight: Top your chocolate pie with fresh raspberries or strawberries before serving for a burst of freshness and color. They add a lovely tartness that balances the richness perfectly.
-
Peanut Butter Swirl: Create creamy swirls of peanut butter throughout the filling for a decadent chocolate-peanut butter fusion. The savory notes of peanut butter can make a nostalgic experience even more exciting.
-
Mint Chocolate: Add a few drops of peppermint extract for a refreshing mint chocolate experience. This variant can transport you to summer evenings with every bite, reminiscent of a homemade peppermint treat.
Grandma’s Velvet Chocolate Pie Recipe FAQs
What type of chocolate chips should I use for this chocolate pie?
Absolutely! For the richest flavor, I recommend using semi-sweet or dark chocolate chips. Opt for high-quality chocolate, as it can greatly enhance the overall taste and texture of your pie.
How should I store leftovers of Grandma’s Chocolate Pie?
You can easily cover the chocolate pie with plastic wrap or aluminum foil and store it in the fridge for up to 4 days. Keeping it chilled will help maintain its creamy filling and delicious flavor.
Can I freeze Grandma’s Chocolate Pie?
Yes, you can! To freeze, wrap the pie tightly in plastic wrap, then cover it with aluminum foil to prevent freezer burn. It can be stored in the freezer for up to 2 months. When you’re ready to enjoy it, simply thaw the pie in the refrigerator overnight before serving.
What should I do if my pie crust gets soggy?
If you find your crust is soggy after baking, make sure to pre-bake it for 5-7 minutes before adding the filling. This extra step helps create a barrier that prevents the filling from soaking into the crust, ensuring a delightful texture.
Is this chocolate pie suitable for people with egg allergies?
Since the recipe uses three eggs for the filling, I suggest substituting them with a suitable egg replacer like a flaxseed meal or applesauce. Use 3 tablespoons of flaxseed meal mixed with 9 tablespoons of water as an alternative for one egg. This might yield a slightly different texture, but it can still be delicious!
Can I add toppings to the chocolate pie?
Very! Topping the pie with a dollop of whipped cream or some fresh berries adds a delightful contrast to the rich chocolate flavor. You could also experiment with seasonal fruits or a sprinkle of sea salt to enhance the taste even further.
Decadent Chocolate Pie Recipe – A Taste of Nostalgia
Ingredients
Equipment
Method
- Preheat your oven to 350°F (175°C) and fit the pre-made pie crust into a 9-inch pie dish.
- In a medium saucepan over low heat, combine chocolate chips and whole milk, stirring until melted and smooth.
- In a separate bowl, whisk together eggs and sugar until pale and fluffy, around 3-4 minutes.
- Gently fold the melted chocolate mixture into the egg and sugar blend until fully incorporated.
- Pour the filling into the prepared crust and bake for 30–35 minutes until set with a slight jiggle.
- Allow the pie to cool completely at room temperature before slicing and serving.
Leave a Reply