
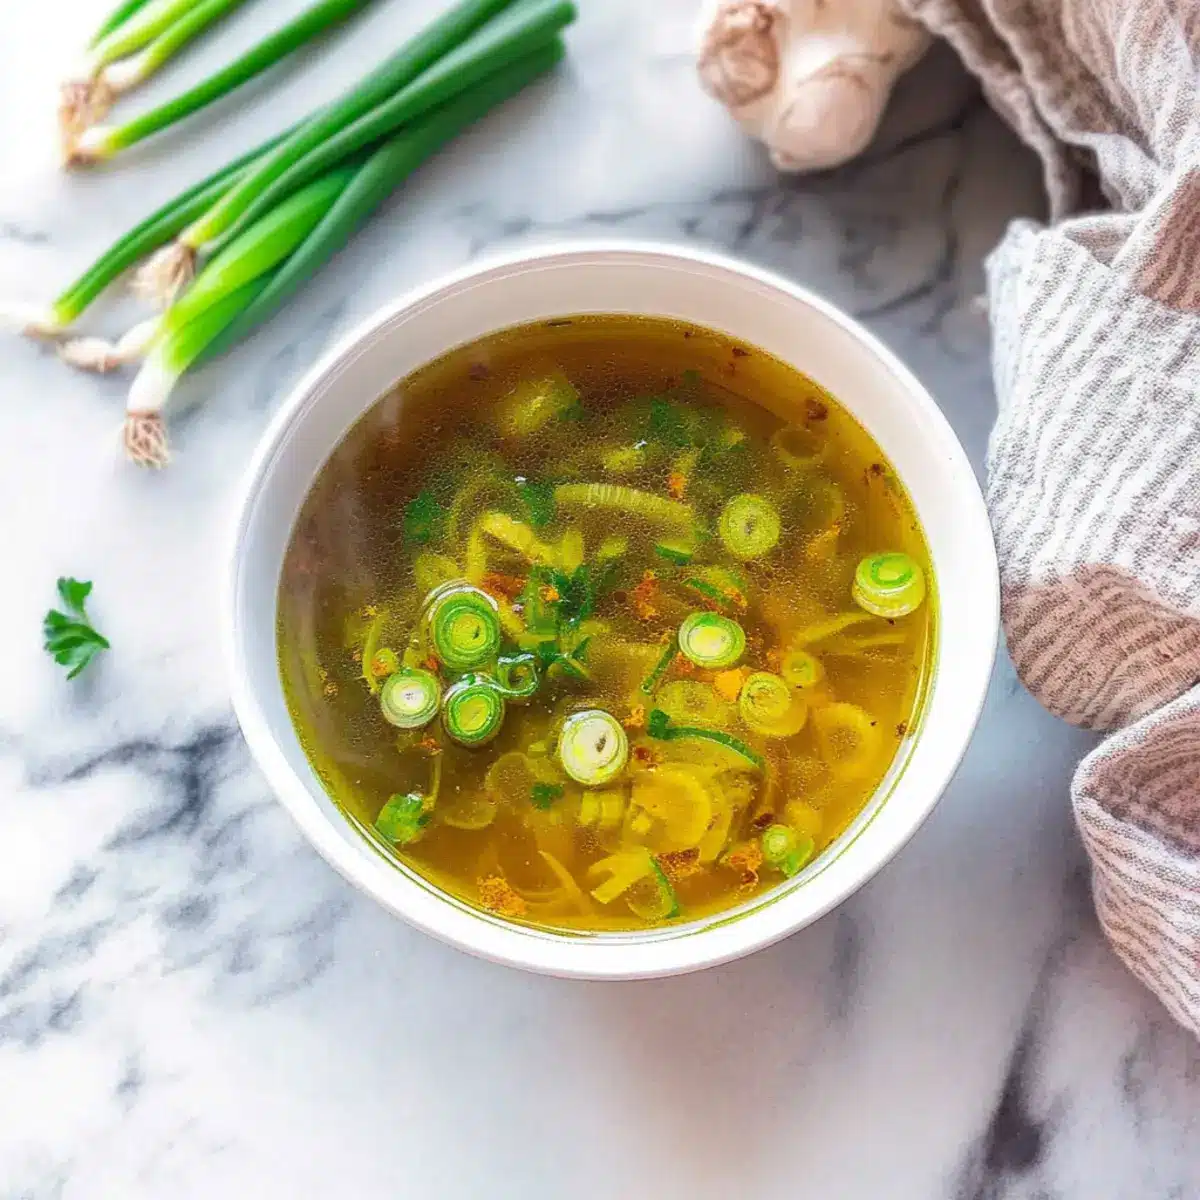
As the chilly air settles in, I find myself yearning for something warm and soothing. This is where my 10 Minute Immune Boosting Broth comes to the rescue—a delightful concoction bursting with just the right amount of zing from garlic, ginger, and turmeric. Not only is this broth a quick and easy way to bolster your immune system, but it also comes together in just ten minutes, making it a lifesaver for busy weeknights. Plus, it’s vegan and gluten-free, perfect for anyone craving a nourishing, healthful option without the fuss. Whether you’re feeling under the weather or simply want to savor a comforting bowl, this broth has got you covered. So, what will you add to personalize your immune-boosting experience?
Why is this broth a must-try?
Simplicity and Speed: This broth comes together in just 10 minutes, making it an ideal choice for busy weeknights or when you’re feeling under the weather.
Immune Boosting Power: Packed with garlic, ginger, and turmeric, each sip is a warm embrace for your immune system, delivering plenty of health benefits.
Vegan and Gluten-Free: Embrace a soup that’s suitable for everyone, accommodating dietary preferences without compromising on flavor.
Customizable Delight: Use this broth as a flavorful base—add your favorite veggies or noodles to make it your own!
Comfort in a Bowl: With its soothing warmth and vibrant taste, this broth is not just food; it’s a comforting hug on a chilly day.
Health-Conscious Choice: Low in calories yet rich in nutrients, it’s perfect for a nourishing option that never feels heavy. Enjoy it solo or as part of a larger meal!
Immune Boosting Broth Ingredients
• Here’s what you’ll need to create this cozy elixir!
For the Broth
- Water – The essential base for the broth, bringing all the flavors together.
- Gluten-free Mellow White Miso – Adds a rich, umami taste and aids digestion; for a soy-free option, substitute with chickpea miso.
- Garlic (8 cloves, grated) – Lends potent flavor and supports cold prevention with its antiviral properties.
- Ginger (2 tablespoons, peeled and grated) – Provides a warming spice and acts as a natural antifungal and antibacterial agent.
- Scallion (1, sliced) – Enhances freshness with a mild onion flavor that balances the broth.
- Horseradish (1 tablespoon, peeled and grated) – Infuses warmth and vitamin C for immune support; can be swapped for cayenne pepper if needed.
- Avocado Oil or Coconut Oil (2 teaspoons) – Adds healthy fats for richness; choose based on your preference.
- Raw Apple Cider Vinegar (2 tablespoons, with the “mother”) – Supports digestion and contributes a tangy note.
- Ground Turmeric (1 teaspoon) – Offers warmth and is a powerful anti-inflammatory agent, enhancing the broth’s health benefits.
- Salt (½ teaspoon) – Elevates the overall flavor, enriching your immune boosting broth experience.
Step‑by‑Step Instructions for Immune Boosting Broth
Step 1: Boil the Water
Begin by pouring 8 cups of water into a large pot and place it on high heat. Bring the water to a rolling boil, which should take about 5-7 minutes. You’ll know it’s ready when you see vigorous bubbles and steam rising from the surface. This base is essential for your delicious Immune Boosting Broth.
Step 2: Whisk in the Miso
Once the water is boiling, carefully remove the pot from the heat to avoid boiling the miso, which can deplete its health benefits. Whisk in the ½ cup of gluten-free mellow white miso until it fully dissolves. The mixture will become a creamy, slightly thick consistency, merging beautifully with the hot water, setting the stage for your flavorful broth.
Step 3: Add the Aromatics
Next, stir in the grated garlic, grated ginger, horseradish, and sliced scallion. Mix these ingredients well for about 1-2 minutes, allowing their fragrant aromas to fill the kitchen. You’ll notice the broth transforming into a vibrant, fragrant concoction—this step enhances the immune-boosting qualities of your broth.
Step 4: Introduce the Healthy Fats
Now, add 2 teaspoons of avocado oil or coconut oil along with 2 tablespoons of raw apple cider vinegar. Stir these ingredients into the pot for another minute. The oil adds a rich, smooth texture, while the vinegar brightens the flavor, making your Immune Boosting Broth both comforting and rejuvenating.
Step 5: Spice it Up
Sprinkle in 1 teaspoon of ground turmeric and ½ teaspoon of salt to elevate the broth. Continue to stir the mixture gently for about 1-2 minutes, ensuring all flavors meld together. The turmeric will impart a warm, golden hue, contributing to the overall vibrancy and health benefits of your immune-boosting elixir.
Step 6: Taste and Adjust
Before serving, take a moment to taste your broth. This is your opportunity to adjust the seasoning if desired. If you prefer a brighter flavor, consider adding a dash more vinegar or salt. Let the fragrant aromas guide you towards the perfect balance for your Immune Boosting Broth.
Step 7: Serve and Enjoy
Once satisfied with the flavor, ladle the hot broth into mugs or bowls. Enjoy it as a warming drink or use it as a base for adding more ingredients like vegetables or noodles. The comforting clarity of your Immune Boosting Broth is ready to nourish you, providing a delightful hug in a bowl.
Make Ahead Options
Preparing your 10 Minute Immune Boosting Broth in advance is a fantastic way to save time on busy weeknights! You can chop and store the garlic, ginger, horseradish, and scallion in an airtight container up to 24 hours ahead, keeping them refrigerated to maintain their freshness. Additionally, you can measure out the spices and miso, having everything prepped for a quicker assembly. When you’re ready to enjoy this nourishing broth, simply bring 8 cups of water to a boil, whisk in the miso, add your prepped ingredients, and follow the remaining steps. This method ensures you’ll have the same delightful flavors with minimal effort!
Helpful Tricks for Immune Boosting Broth
-
Miso Magic: To preserve the probiotics in miso, always add it off the heat. Boiling will destroy its health benefits!
-
Quality Horseradish: If using jarred horseradish, check for no additives to ensure you’re getting maximum flavor and health benefits.
-
Seasoning Adjustments: Always taste your broth before serving. Sometimes a little extra salt or vinegar can transform your immune boosting broth into a flavor powerhouse!
-
Storage Savvy: Keep leftover broth in an airtight container in the fridge for 3-5 days. Freeze portions for quick meals later!
-
Mix It Up: Feel free to personalize your broth by adding vegetables, herbs, or protein like tofu or cooked noodles for a heartier meal.
What to Serve with 10 Minute Immune Boosting Broth
As you cozy up with a steaming mug of broth, consider these delightful companions to create a wholesome meal bursting with flavor and warmth.
-
Garlicky Toast: Perfectly toasted with olive oil and a touch of garlic, it serves as a satisfying dip that elevates the broth experience.
-
Fresh Salad: A crisp, vibrant salad featuring mixed greens, cucumbers, and a zesty vinaigrette adds a refreshing contrast and lightness to your meal.
-
Quinoa Bowl: Fluffy quinoa combined with diced veggies makes a heartier addition, soaking up the broth’s flavors and enhancing the nourishing experience.
-
Stir-Fried Vegetables: Bright, colorful veggies like bell peppers, snap peas, and carrots stir-fried with a hint of sesame oil create a delightful crunch alongside your broth.
-
Rice Noodles: Soft, chewy rice noodles can be added directly into the broth for a delightful texture, creating a more filling dish.
-
Coconut Curry: A light coconut curry, rich with spices and vegetables, provides a flavorful pairing that complements the broth’s warmth beautifully.
-
Herbal Tea: A calming cup of herbal tea, like chamomile or ginger, serves as a soothing accompaniment to your meal, enhancing the healthful theme.
-
Dark Chocolate: End your meal on a sweet note with a small piece of dark chocolate, balancing the savory flavors with a touch of indulgence.
Storage Tips for Immune Boosting Broth
Fridge: Store the broth in an airtight container for up to 3-5 days. Ensure it cools completely before sealing to maintain freshness and prevent condensation.
Freezer: For longer storage, freeze the broth in portion-sized containers for up to 3 months. This makes it easy to reheat a quick immune-boosting meal.
Reheating: Thaw frozen broth in the fridge overnight, or use the microwave or stovetop. Heat gently to preserve flavors and nutrients—perfect for a soothing drink or soup base!
Leftover Tips: Always taste and adjust seasoning after reheating, as flavors may mellow over time in the fridge or freezer. Your immune boosting broth deserves that final touch!
Immune Boosting Broth Variations
Feel free to get creative with this broth and make it your own! Customize your experience with exciting twists and swaps that will elevate the flavor and nutrition of your immune-boosting delight.
-
Chickpea Miso: Substitute the mellow white miso with chickpea miso for a soy-free version packed with flavor. Perfect for those avoiding soy!
-
Spicy Cayenne: Kick up the heat by replacing horseradish with cayenne pepper. Adjust the amount to your heat preference for a warming kick!
-
Veggie Power: Add diced carrots, spinach, or mushrooms to create a heartier broth. These vegetables bring added nutrients and make the broth more filling.
-
Noodle Goodness: Incorporate cooked noodles to transform your broth into a satisfying meal. Choose your favorite noodle to make it a cozy bowl of goodness!
-
Herb Infusion: Add fresh herbs like cilantro or parsley for a delightful burst of freshness. These herbs not only add flavor but also enhance the broth’s health benefits.
-
Creamy Coconut: For a richer broth, introduce coconut milk alongside the water. It adds a luscious creaminess while keeping the dish entirely vegan!
-
Flavorful Broth Base: Replace half of the water with vegetable stock for an even deeper flavor. This enhances the broth’s taste while keeping it healthy and nourishing.
-
Ginger Boost: Increase the ginger to 3 tablespoons for an extra kick of warmth. If you love that spicy tang, this boost is sure to brighten your day!
Remember, you can always adjust based on what you have in your pantry or your personal preferences. Cozy up with a nourishing bowl of broth that speaks to your tastes! For even more inspiration, consider pairing your broth with a side of fresh vegan bread for an extra special touch or explore how to add your favorite veggies to personalize your bowl further. Enjoy the journey of custom flavors!
10 Minute Immune Boosting Broth Recipe FAQs
What type of miso should I use?
Absolutely! For this Immune Boosting Broth, I recommend using gluten-free mellow white miso for its rich, umami flavor and gut-boosting properties. If you’re looking for a soy-free alternative, chickpea miso works beautifully as well. Just keep an eye on the flavors, as chickpea miso can be slightly different in taste.
How should I store the broth?
Store any leftover broth in an airtight container in the fridge for 3-5 days. Make sure it cools completely before sealing to maintain freshness. For longer storage, you can freeze it in portion-sized containers for up to 3 months, making it super convenient for busy days!
Can I freeze the Immune Boosting Broth?
Yes, indeed! To freeze this broth, first let it cool completely. Then pour the broth into freezer-safe containers or zip-top bags, leaving some space for expansion. For easy access, consider freezing in portion sizes. When you’re ready to enjoy, simply thaw overnight in the fridge or use a microwave for a quick reheat!
What if I don’t have horseradish?
No worries! If fresh horseradish isn’t available, you can easily substitute it with cayenne pepper for a spicy kick. Start with a small amount and adjust according to your taste. The goal is to keep that zesty, warming effect without missing out on the immune-boosting benefits!
Is this broth suitable for pets?
While some ingredients like miso and garlic can be healthy for humans, they may not be safe for pets, especially garlic. Always consult your veterinarian before sharing human food with your furry friends, especially if they have dietary restrictions or health concerns.
What’s the best way to reheat the frozen broth?
To reheat, I recommend thawing the broth in the fridge overnight for the best flavor retention. You can also use a microwave on low power or gently heat it on the stovetop. Remember to taste and adjust the seasoning once it’s reheated, as flavors can mellow during storage. Enjoy your comforting bowl of Immune Boosting Broth!
Immune Boosting Broth: A Quick & Delicious Health Elixir
Ingredients
Equipment
Method
- Boil the Water: Pour 8 cups of water into a large pot and bring to a rolling boil over high heat, about 5-7 minutes.
- Whisk in the Miso: Remove the pot from heat, whisk in ½ cup of gluten-free mellow white miso until fully dissolved.
- Add the Aromatics: Stir in grated garlic, ginger, horseradish, and sliced scallion; mix well for 1-2 minutes.
- Introduce the Healthy Fats: Add 2 teaspoons of avocado oil or coconut oil and 2 tablespoons of apple cider vinegar; stir for another minute.
- Spice it Up: Sprinkle in 1 teaspoon of ground turmeric and ½ teaspoon of salt; gently stir for 1-2 minutes.
- Taste and Adjust: Taste the broth and adjust seasoning if necessary before serving.
- Serve and Enjoy: Ladle the hot broth into mugs or bowls and enjoy it as is or with added ingredients.
Leave a Reply