
As I was assembling a quick snack to fuel my busy afternoon, I stumbled upon a little twist that whisked me back to childhood treats: No-Bake Chocolate Peanut Butter Oat Bars. The marriage of creamy peanut butter and rich chocolate, all cradled by wholesome oats, creates a delightful experience that’s both comforting and energizing. With just five simple ingredients, this recipe is a lifesaver for anyone seeking an easy, gluten-free munchie without the hassle of an oven. Plus, they’re perfect for pre-prepping and storing for those on-the-go moments or satisfying a sweet tooth without the guilt. Have you ever tried crafting something so simple yet so gratifying? Let’s dive in and whip up these delightful bars together!
Why are No-Bake Bars Exceptional?
Simplicity at Its Best: With just five ingredients, you can whip up a satisfyingly sweet treat in no time.
Nutritious and Filling: Packed with protein from peanut butter and fiber from oats, these bars make a great on-the-go snack without compromising your health.
Endless Variations: Feel free to substitute ingredients like almond butter or agave syrup and add extras like dried fruit for a custom creation!
Perfect for Meal Prep: Make a batch ahead of time and store them in the fridge for a week’s worth of snacks, similar to Coconut Red Lentil soups that you can prep in advance.
Crowd-Pleasing Delight: These bars are sure to impress both kids and adults, making them a hit at parties or family gatherings.
Enjoy the freedom of no-bake cooking with these chocolatey, nutty creations that you can feel good about indulging in!
No-Bake Chocolate Peanut Butter Oat Bars Ingredients
For the Bars
- Oats – The foundation of these bars; choose rolled oats for maximum chewiness.
- Natural Peanut Butter – Provides rich creaminess; try almond butter for a nut-free option.
- Honey or Maple Syrup – A natural sweetener that binds everything together; agave syrup is a great vegan alternative.
- Cocoa Powder – Infuses a decadent chocolate flavor; carob powder can be a fun twist.
- Chocolate Chips – Adds an indulgent touch of sweetness; opt for dairy-free chips if you’re going vegan.
Step‑by‑Step Instructions for No-Bake Chocolate Peanut Butter Oat Bars
Step 1: Prepare the Mixing Bowl
In a large mixing bowl, combine 2 cups rolled oats, 1 cup natural peanut butter, ½ cup honey, and ½ cup cocoa powder. Use a sturdy spatula to mix the ingredients together until they are well-blended and smooth. The mixture should be thick and slightly sticky, resembling a dough. This step will form the base of your delicious no-bake chocolate peanut butter oat bars.
Step 2: Fold in the Chocolate Chips
Next, gently fold in ½ cup of chocolate chips into the oat mixture. Stir carefully to ensure even distribution, as you want every bite to be studded with gooey chocolate goodness. The melted chocolate will add a delightful richness to the bars. This mixture should have a nice balance of chocolate and peanut butter flavors, creating a treat both kids and adults will love.
Step 3: Press the Mixture into the Pan
Line an 8×8 inch baking pan with parchment paper, leaving some overhang for easy removal later. Transfer the chocolate peanut butter oat mixture into the pan. Using a spatula or your hands, press the mixture down firmly and evenly until it fills the pan completely. Aim for a thickness of about 1 inch, ensuring the no-bake chocolate peanut butter oat bars will hold together perfectly once chilled.
Step 4: Refrigerate Until Set
Place the pan in the refrigerator and let it chill for at least 2 hours. This cooling period allows the mixture to set and firm up, making it easier to cut into bars later. As it cools, the aroma of chocolate and peanut butter will fill your kitchen, heightening the anticipation for your delicious creation.
Step 5: Cut Into Bars
After chilling, remove the pan from the refrigerator and lift the bars out using the parchment paper. Place it on a cutting board and use a sharp knife to cut it into squares or rectangles, depending on your preferred bar shape. The bars should have a firm yet chewy texture, showcasing the lovely layers of oats, peanut butter, and chocolate.
Step 6: Store the Bars
Store the cut bars in an airtight container in the fridge to maintain their chewy texture. These no-bake chocolate peanut butter oat bars can stay fresh for up to a week, making them perfect for quick snacks or satisfying sweet cravings on busy days. You can also freeze them for longer storage, ensuring you always have a treat ready to go.
Make Ahead Options
These No-Bake Chocolate Peanut Butter Oat Bars are a dream for meal prep enthusiasts! You can prepare the entire mixture up to 24 hours in advance, simply combining the oats, peanut butter, honey, cocoa powder, and chocolate chips as instructed. After pressing the mixture into the pan, refrigerate it for at least 2 hours to set. For optimal freshness, store the bars in an airtight container in the fridge for up to a week; if you want them to last longer, feel free to freeze them for up to 3 months—just thaw overnight in the fridge before serving. By prepping ahead, you’ll always have a delicious snack ready to satisfy your cravings!
Expert Tips for No-Bake Chocolate Peanut Butter Oat Bars
-
Mixing Technique: Ensure all ingredients are well-combined to avoid dry spots. A sturdy spatula helps create a cohesive mixture for these no-bake bars.
-
Press Firmly: Properly pressing the mixture into the pan is crucial. A well-compressed base will prevent crumbling and ensure your bars hold together nicely.
-
Chill Time: Don’t rush the refrigeration! Allow at least 2 hours for the bars to set in the fridge, which will enhance their texture and flavor.
-
Ingredient Quality: Use high-quality peanut butter and chocolate chips for the best results. This will elevate the taste of your no-bake bars significantly.
-
Customization Options: Feel free to experiment! You can swap ingredients like using almond butter or adding nuts. Create a variation that suits your taste perfectly.
What to Serve with No-Bake Chocolate Peanut Butter Oat Bars
Treat your taste buds to a delightful experience by pairing these delectable bars with complementary flavors and textures.
-
Creamy Yogurt: The tangy creaminess of yogurt balances the sweetness of the bars, creating a harmonious snack that feels indulgent yet wholesome.
-
Fresh Fruit Medley: A vibrant mix of berries or slices of banana adds freshness and enhances the nutritional value of your treat. The juiciness of the fruit contrasts beautifully with the chewy texture of the bars.
-
Dairy-Free Milk: Almond or oat milk provides a smooth, refreshing drink that matches the nutty flavors of the bars and keeps it gluten-free.
-
Crunchy Nuts: A handful of mixed nuts offers an extra crunch and protein boost, making this combination perfect for a satisfying snack time treat.
-
Chocolate Drizzle: Elevate the experience by drizzling melted chocolate over the bars. This delightful addition intensifies the chocolate flavor and makes for a decadent presentation.
-
Coconut Flakes: Toasted coconut flakes sprinkled on top adds a tropical flair and texture, contrasting with the chewy oats for an exciting bite.
-
Coffee or Tea: A warm cup of your favorite brew complements the richness of the bars and offers a comforting touch, perfect for an afternoon pick-me-up.
These pairing ideas showcase a delightful array of tastes and textures that elevate your no-bake snack experience!
How to Store and Freeze No-Bake Chocolate Peanut Butter Oat Bars
Fridge: Store bars in an airtight container in the fridge for up to 1 week. This keeps them fresh and delicious for snack time or dessert cravings.
Freezer: For longer storage, freeze the bars wrapped individually in plastic wrap and placed in a freezer-safe bag. They can be stored for up to 3 months.
Thawing: To enjoy, simply thaw in the refrigerator overnight or at room temperature for about 30 minutes before indulging in your no-bake chocolate peanut butter oat bars.
Reheating: If desired, you can slightly warm them in the microwave for 10–15 seconds. Enjoy the gooey chocolate goodness!
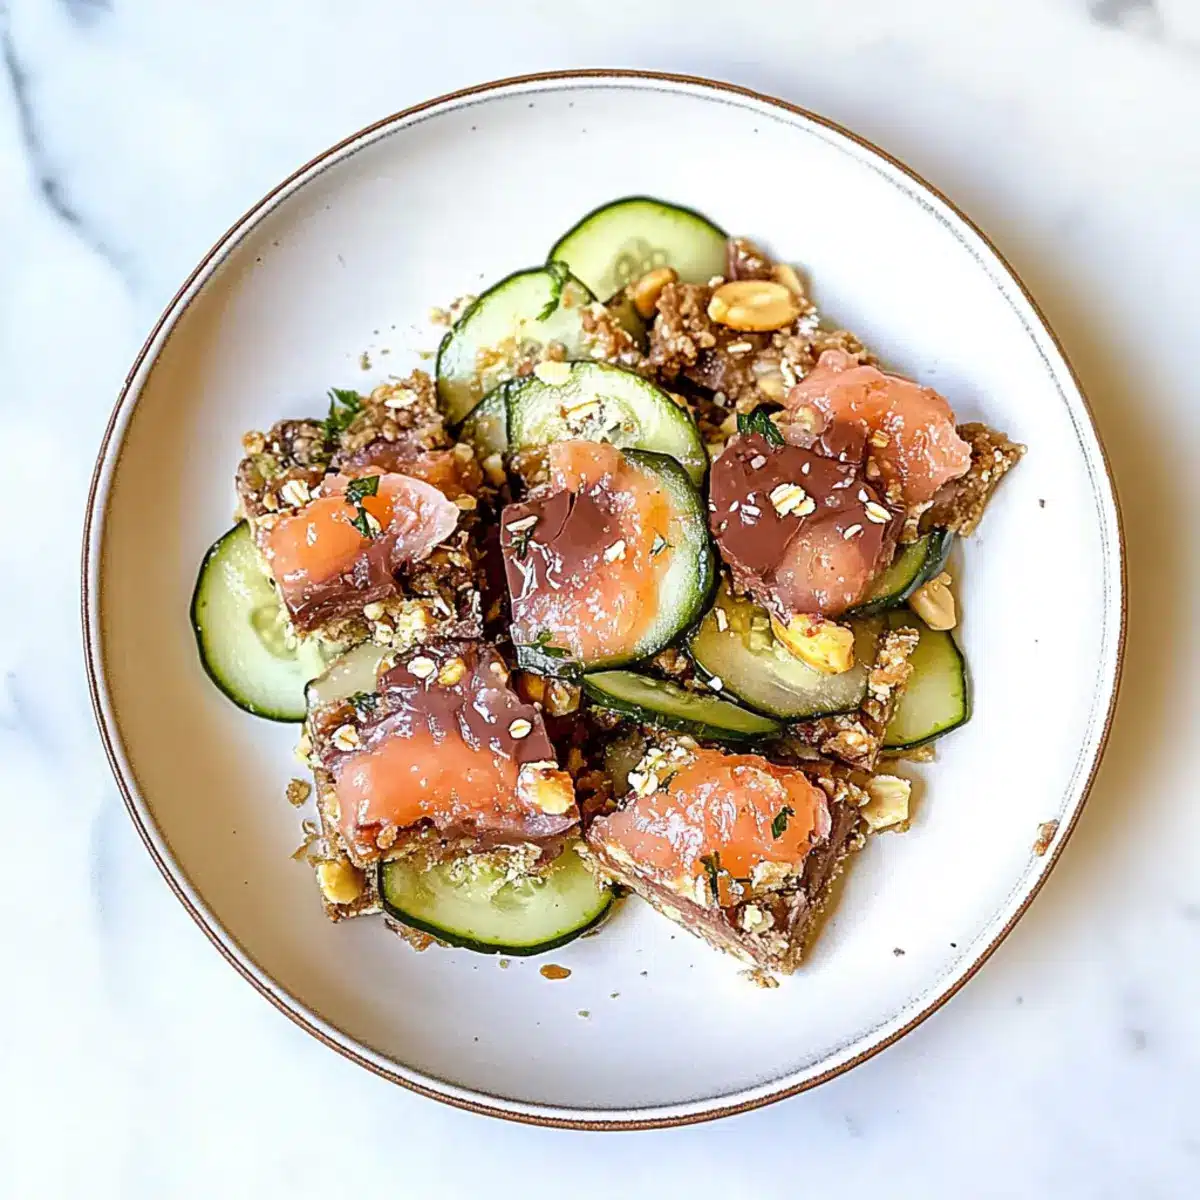
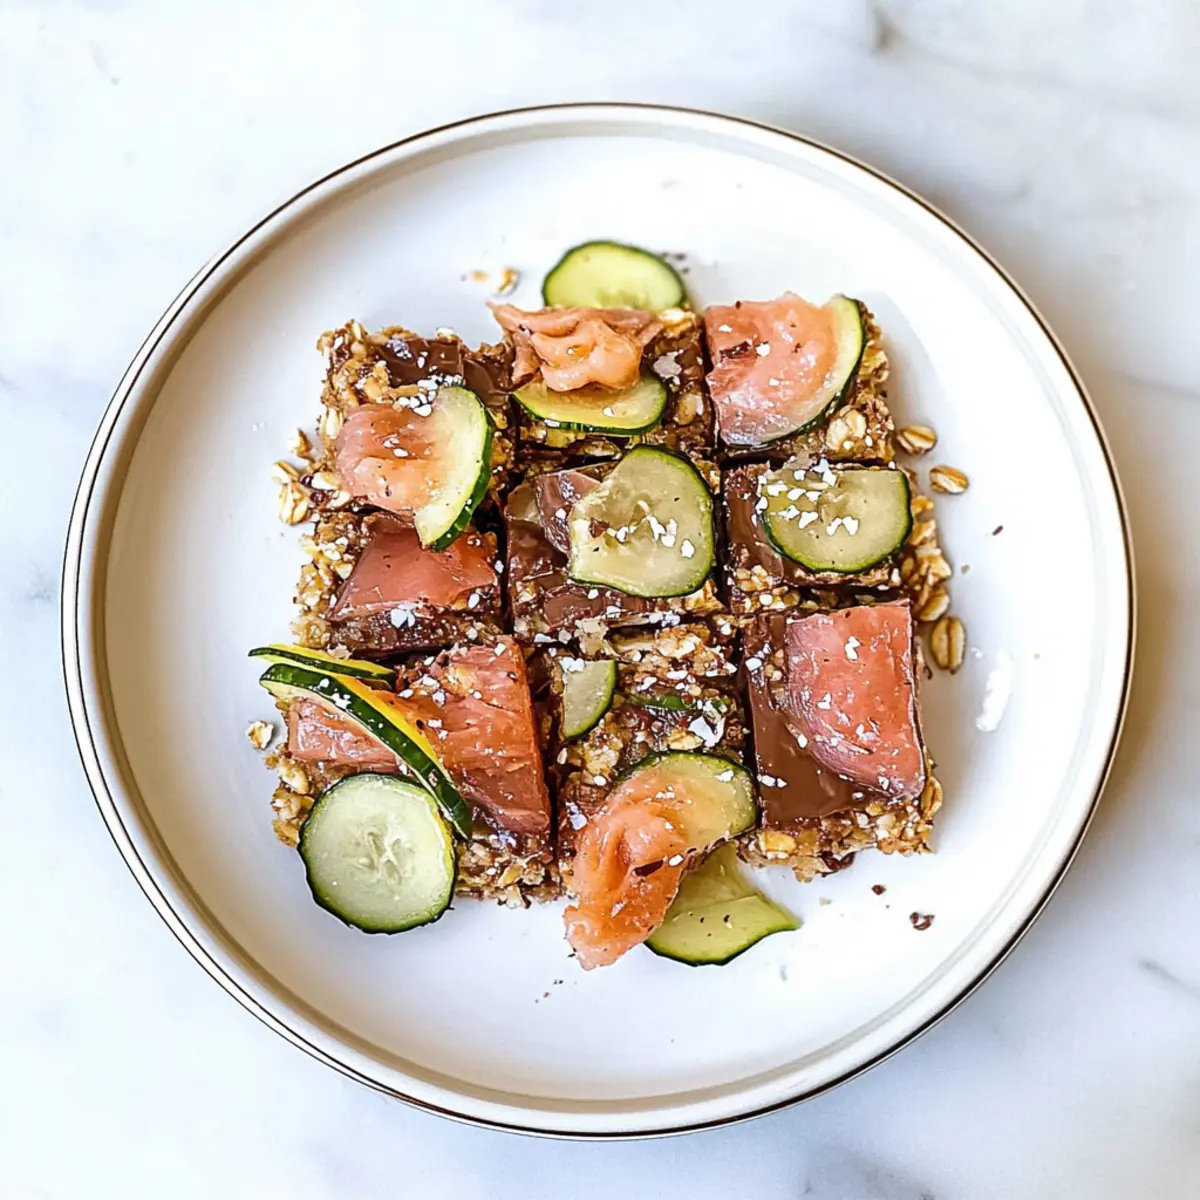
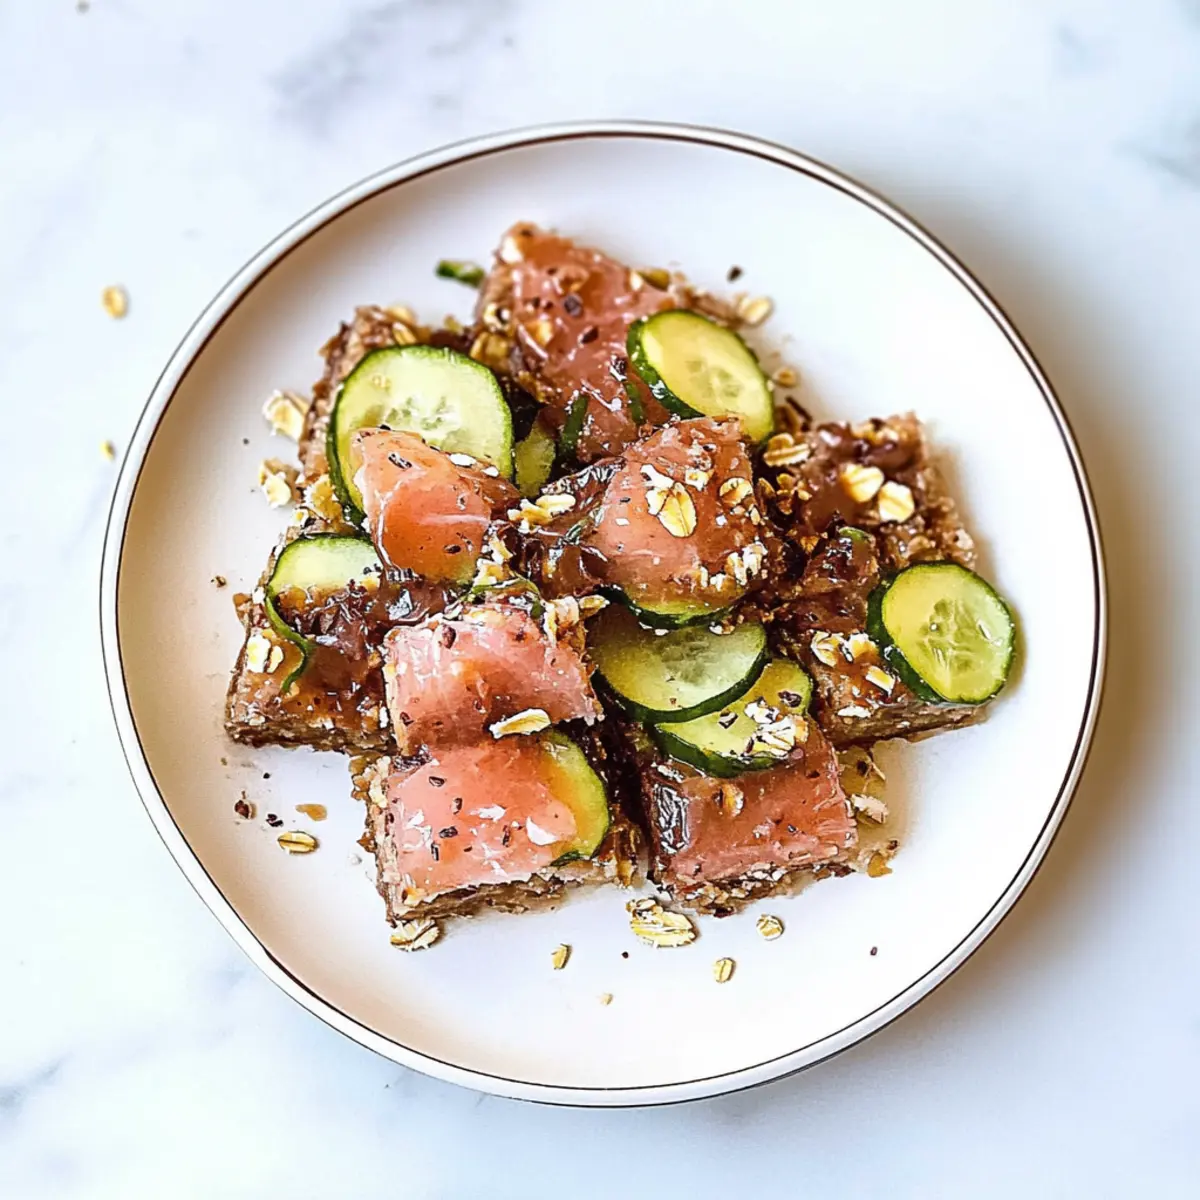
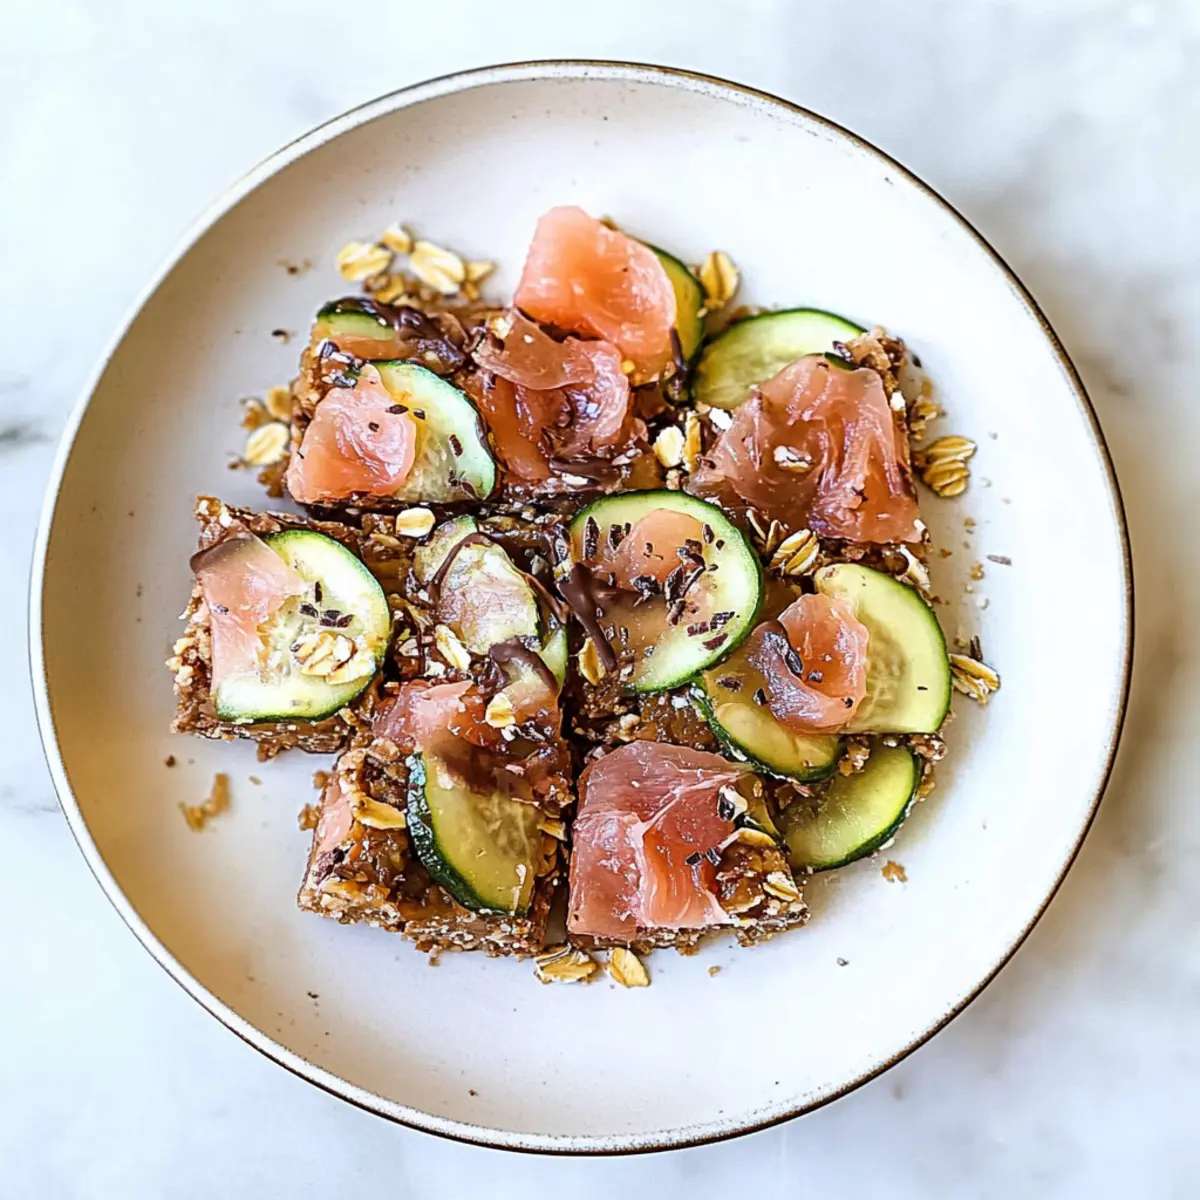
Miso Soy Salmon Sashimi Bowl Variations
Feel free to let your creativity shine by customizing the flavors and ingredients of this scrumptious bowl!
- Gluten-Free: Use tamari instead of soy sauce for a gluten-free alternative.
- Spicy Kick: Add a dollop of sriracha or a drizzle of spicy mayo for a flavorful heat.
- Veggie Boost: Toss in some diced avocado or shredded carrots for extra texture and nutrition.
- Different Protein: Swap salmon for sushi-grade tuna or tofu to cater to different dietary preferences.
- Rice Substitute: Use cauliflower rice for a low-carb option that keeps it light and fresh.
- Herb Infusion: Top the bowl with fresh herbs like cilantro or basil for a delightful burst of flavor.
- Citrus Zest: A squeeze of lime or lemon juice brightens the dish, enhancing all the vibrant flavors.
- Nutrient Boost: Mix in some chopped seaweed or sesame seeds for a nutrient-packed crunch and a fun texture twist.
Don’t hesitate to pair your Miso Soy Salmon Sashimi Bowl with a side of freshly made Coconut Red Lentil soup for a wholesome meal! The harmonious flavors will create a satisfying experience on your dinner table.
No-Bake Chocolate Peanut Butter Oat Bars Recipe FAQs
How do I choose the right oats for this recipe?
Absolutely! For the best texture, I recommend using rolled oats. They provide a delightful chewiness that complements the creamy peanut butter and rich chocolate. Avoid instant oats, as they can lead to a mushy texture in your bars.
What is the best way to store No-Bake Chocolate Peanut Butter Oat Bars?
Store your bars in an airtight container in the fridge, where they’ll stay fresh for up to 1 week. If you’re anything like me and tend to make them in batches, ensure they are well-wrapped to maintain their chewiness and flavor!
Can I freeze these bars for later?
Very! Freezing is a great option for long-term storage. Wrap each bar tightly in plastic wrap, then place them in a freezer-safe bag. They can be stored for up to 3 months. When you’re ready to enjoy, just thaw them overnight in the refrigerator or leave them at room temperature for about 30 minutes.
What should I do if my bars are too crumbly?
If you find your bars falling apart, don’t worry! This can happen if the mixture wasn’t pressed firmly enough into the pan. Next time, try using a bit more peanut butter or honey to help bind the ingredients. Press down firmly while molding to create a dense and cohesive bar that holds together nicely!
Are there any dietary considerations I should know about?
Of course! If you’re preparing these bars for anyone with allergies, be mindful that peanut butter is a common allergen. You can easily substitute it with sunflower seed butter for a nut-free option. Additionally, using gluten-free oats ensures the recipe remains gluten-free, perfect for anyone with dietary restrictions.
How can I add nutritional value to my No-Bake Bars?
For a nutrient boost, consider incorporating protein powder into the mixture. Start with about ¼ cup mixed in with the dry ingredients. You can also fold in some chia seeds or flaxseeds, which add fiber and omega-3 fatty acids, making your delicious bars even healthier!
Savory Miso Soy Salmon Sashimi Bowl for Easy Weeknight Bliss
Ingredients
Equipment
Method
- In a large mixing bowl, combine 2 cups rolled oats, 1 cup natural peanut butter, ½ cup honey, and ½ cup cocoa powder. Mix until well-blended and smooth.
- Gently fold in ½ cup of chocolate chips into the oat mixture, ensuring even distribution.
- Line an 8x8 inch baking pan with parchment paper and transfer the mixture into the pan, pressing down firmly until even.
- Place the pan in the refrigerator and let it chill for at least 2 hours to set.
- Remove the pan from the refrigerator and cut into squares or rectangles.
- Store the cut bars in an airtight container in the fridge for up to a week.
Leave a Reply