
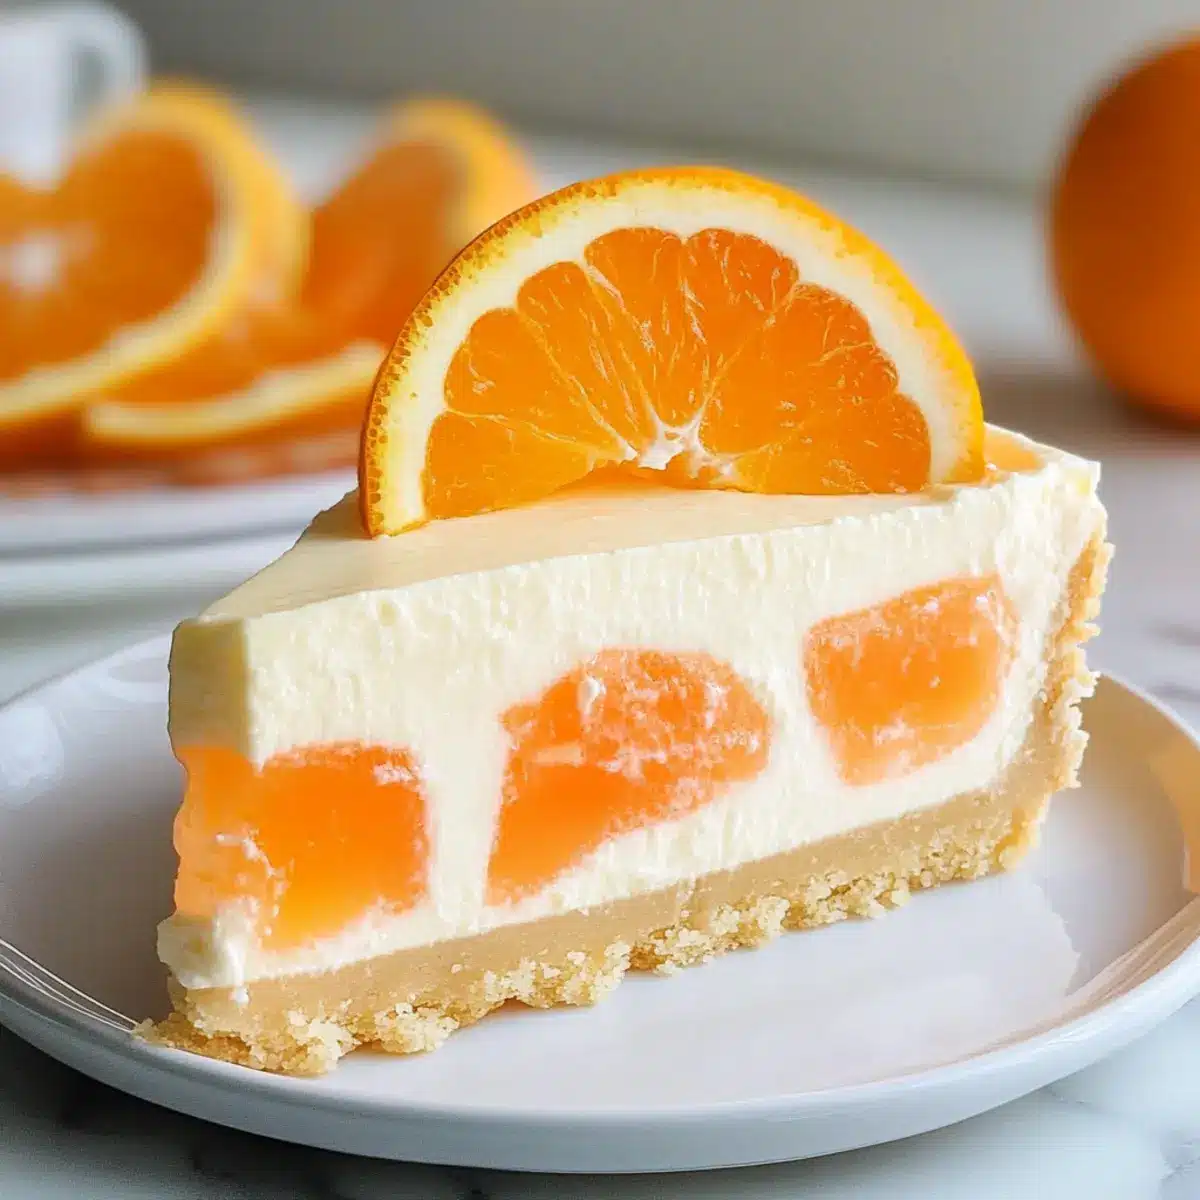
As I stood in my kitchen on a sweltering summer day, the scent of freshly zested oranges wafted through the air, instantly transporting me to my childhood moments spent enjoying frozen creamsicles by the poolside. This nostalgic feeling led me to create my No-Bake Orange Creamsicle Cheesecake, a soft and creamy dessert that beautifully captures the essence of those carefree days. Not only is this delightful treat a breeze to whip up, but it’s also a guaranteed crowd-pleaser at any summer gathering. With zesty orange jello swirled into a smooth vanilla cheesecake filling, this no-bake wonder is perfect for those of us looking to indulge without turning on the oven. So, are you ready to take a culinary trip down memory lane while treating your loved ones to a refreshing slice of happiness?
Why is this cheesecake a must-try?
Effortless Preparation: This no-bake Orange Creamsicle Cheesecake is incredibly simple to make—no oven needed!
Zesty & Refreshing: The zesty orange jello combined with creamy vanilla cheesecake offers a delightful flavor explosion that can whisk you away to summer memories.
Versatile Appeal: Whether you’re hosting a BBQ or a family gathering, this dessert is sure to please everyone, making it a top choice for entertaining.
Customizable Options: Feel free to mix it up with different jello flavors or add fun toppings like whipped cream and fresh fruit for a personal twist.
Perfectly Chilled: Its refreshing qualities make it an ideal treat for hot days, leaving your guests feeling cool and satisfied.
For more sweet inspirations, check out these mouthwatering Orange Cranberry Cookies or try out these creamy Mini Lemon Cheesecakes.
Orange Creamsicle Cheesecake Ingredients
For the Crust
• Graham Cracker Crumbs – Adds the perfect crunchy texture; feel free to use gluten-free crumbs if necessary.
• Unsalted Butter – Binds the crust together; coconut oil works well for a dairy-free version.
For the Cheesecake Filling
• Cream Cheese – The base for a smooth and creamy filling; try dairy-free cream cheese for a vegan option.
• Powdered Sugar – Sweetens the mixture; sugar substitutes can provide a lighter touch if desired.
• Heavy Whipping Cream – Whipped to achieve a light, airy texture; Cool Whip can serve as a convenient alternative.
• Vanilla Extract – Enhances the overall flavor profile; optional but highly recommended for a richer taste.
For the Orange Mixture
• Orange Jello – Infuses a vibrant citrus flavor and lovely color; switch to your favorite flavored gelatin for variety.
• Boiling Water – Essential for dissolving the jello; ensure the water is hot for optimal mixing.
• Orange Zest – Adds a fresh citrus note to the filling; you can omit it if you prefer a milder flavor.
Step‑by‑Step Instructions for Orange Creamsicle Cheesecake
Step 1: Prepare the Jello
Start by dissolving the orange jello in 1 cup of boiling water. Stir until fully dissolved, then allow it to cool at room temperature for about 30 minutes. This step is crucial to ensure that the orange mixture doesn’t melt the whipped cream later on, so be patient and watch for it to thicken slightly before proceeding.
Step 2: Prep the Pan
Take a 9-inch springform pan and spray it generously with cooking spray for easy release. Next, line the bottom with parchment paper for added assurance. Setting up your pan properly now will help keep your Orange Creamsicle Cheesecake intact and looking beautiful when it’s time to serve.
Step 3: Make the Crust
In a bowl, combine the graham cracker crumbs and melted unsalted butter, mixing until you achieve a wet sand-like consistency. Press this mixture firmly into the bottom of the prepared pan, ensuring it’s evenly distributed. Place the crust in the freezer for about 30 minutes to set, providing a stable base for your cheesecake.
Step 4: Beat the Cream Cheese
In a large mixing bowl, combine the softened cream cheese and powdered sugar. Use an electric mixer on medium speed to beat the mixture until it’s smooth and creamy, about 2-3 minutes. This will create a silky filling that serves as the foundation of your Orange Creamsicle Cheesecake, so make sure there are no lumps.
Step 5: Whip the Cream
In another clean bowl, whip the heavy whipping cream along with ½ cup of sugar and a splash of vanilla extract. Continue whipping until stiff peaks form, which will take about 4-5 minutes. This light and airy whipped cream is key to achieving that perfect texture that will elevate your cheesecake to a delightful level.
Step 6: Fold Mixtures
With a spatula, gently fold a third of the whipped cream into the cream cheese mixture until just combined. Then, fold the remaining whipped cream into the cooled orange jello until no streaks remain. This careful folding technique ensures that the lightness of the whipped cream is preserved, resulting in a fluffy filling for your Orange Creamsicle Cheesecake.
Step 7: Assemble Layers
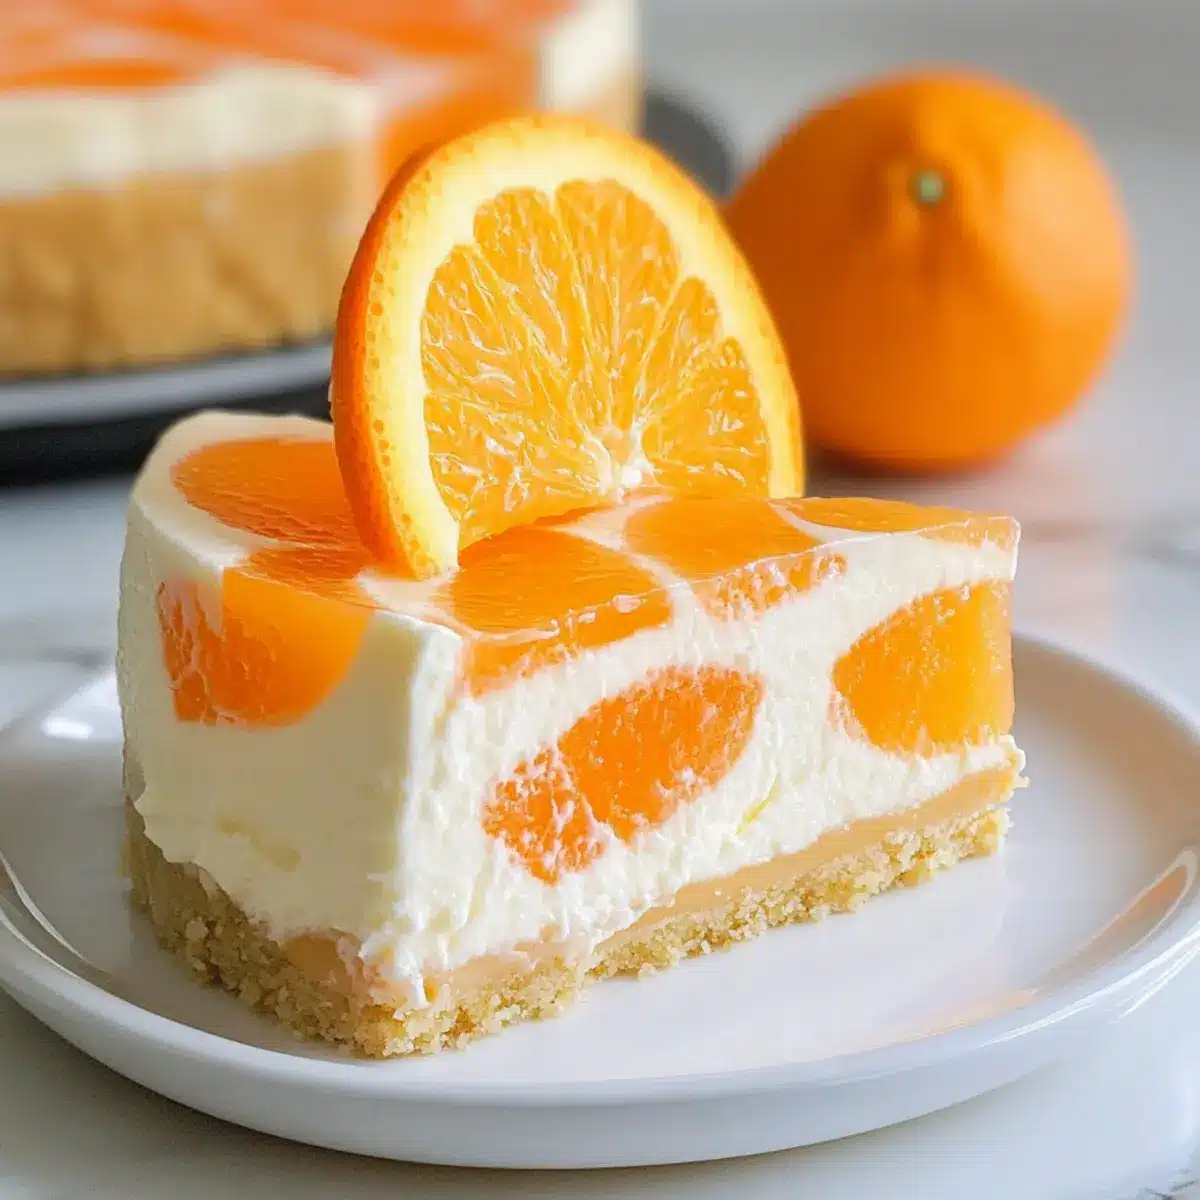
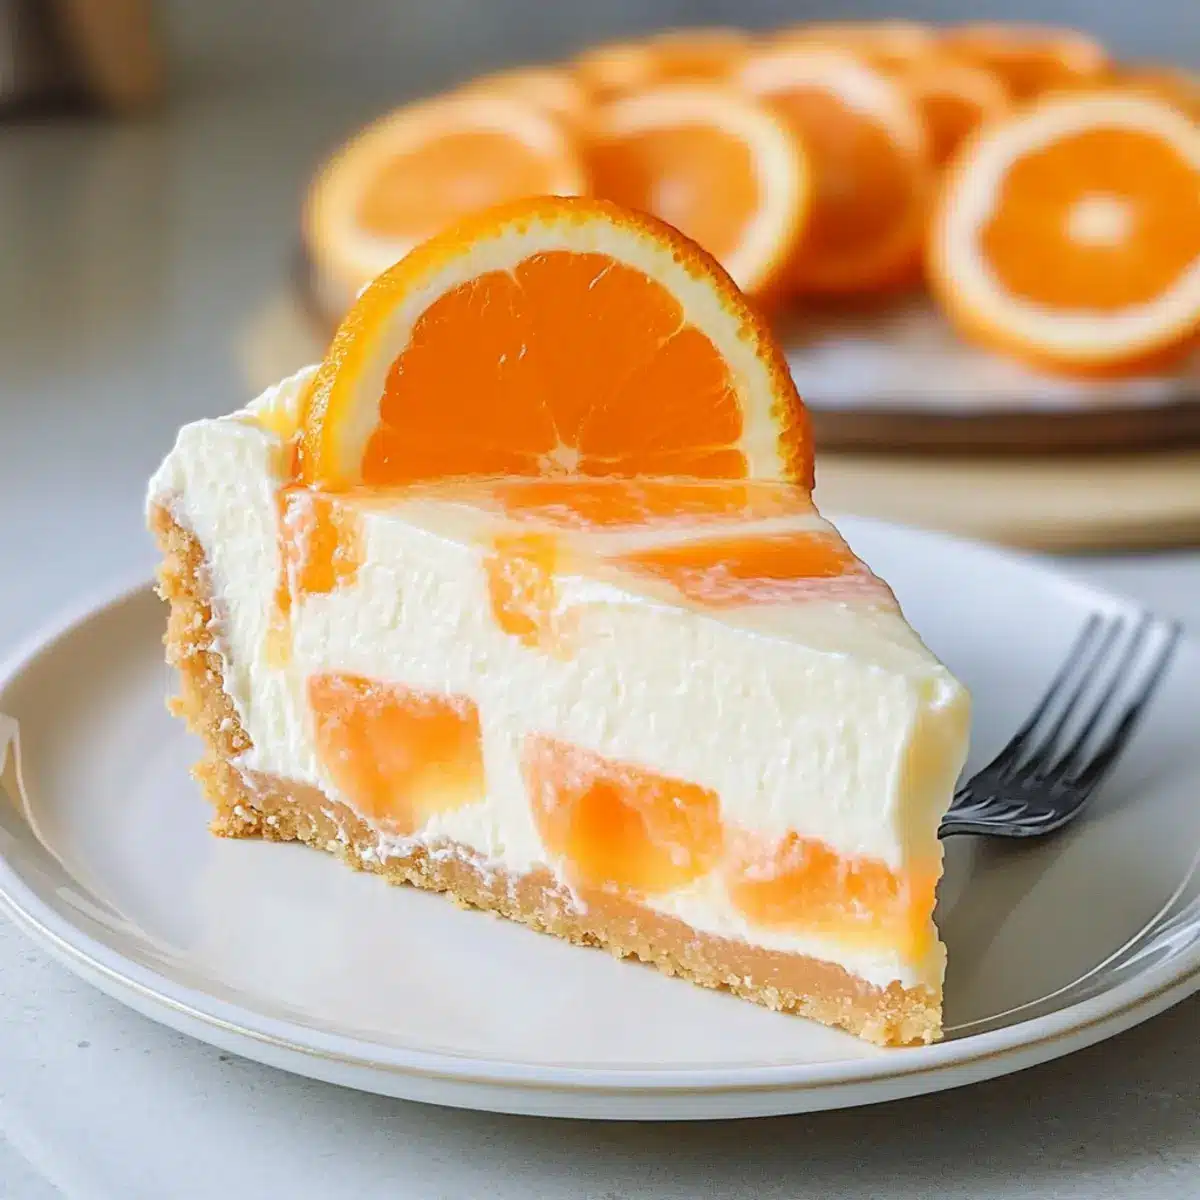
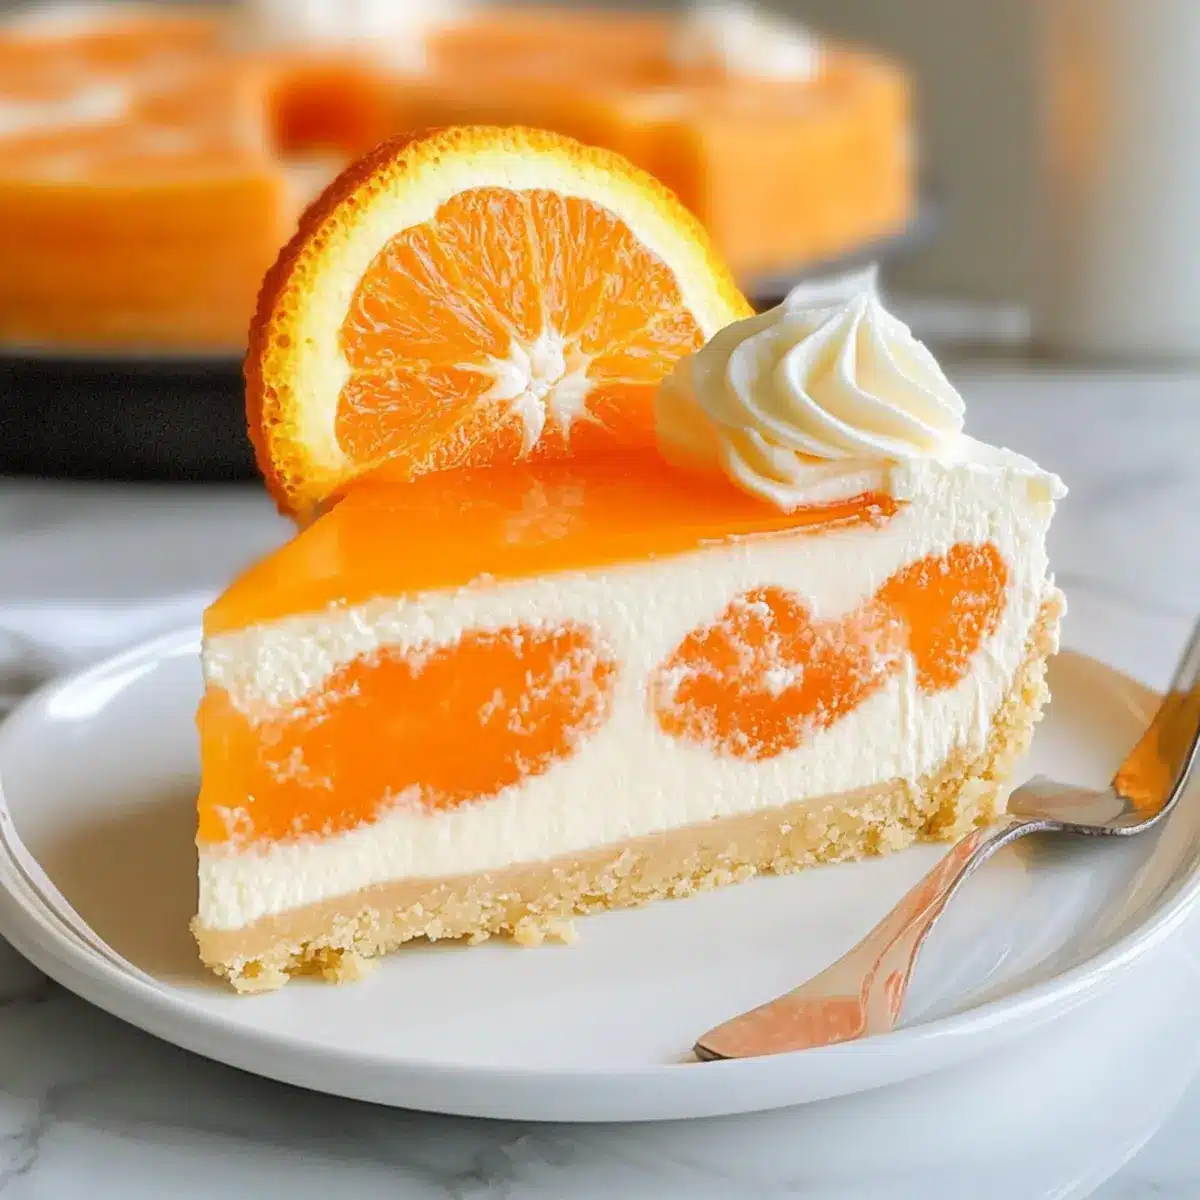
Spoon dollops of the cream cheese mixture into the crust, then alternate with the orange jello mixture, swirling them together for an attractive marbled effect. Continue this layering until both mixtures are used up. Aim for a beautiful presentation, as the swirls will add to the visual appeal of your finished cheesecake.
Step 8: Chill
Cover the assembled cheesecake with plastic wrap and refrigerate it for a minimum of 6 hours or overnight, allowing it to set properly. Chilling is essential, as it helps the layers meld together and the cheesecake to firm up, waiting for the moment it can dazzle your guests at the next gathering. Remove from the pan and slice to serve.
Expert Tips for Orange Creamsicle Cheesecake
-
Cool Jello First: Ensure the orange jello is completely cooled before folding it into the mixtures to prevent melting the whipped cream and ruining the texture.
-
Whip to Stiff Peaks: Whipping the heavy cream until stiff peaks form is essential for achieving that light, airy texture in your Orange Creamsicle Cheesecake.
-
Avoid Overmixing: Gently fold the whipped cream and cream cheese mixtures. Overmixing can deflate the whipped cream and lead to a denser filling.
-
Chill Overnight: For the best results, chill the cheesecake overnight. This allows the flavors to meld beautifully and the cheesecake to set perfectly.
-
Consider Alternatives: Feel free to experiment with flavored jello or alternative ingredients to cater to dietary needs while still enjoying your creamy cheesecake.
Make Ahead Options
These No-Bake Orange Creamsicle Cheesecakes are a dream for busy home cooks looking to save time! You can prepare the crust and filling up to 24 hours in advance, storing the crust in the refrigerator and keeping the filling in an airtight container. When ready to serve, simply layer the cream cheese and orange jello mixtures into the chilled crust and refrigerate for an additional 6 hours or overnight to set fully. For best quality, ensure the orange mixture is completely cooled before mixing to maintain that light, airy texture—your cheesecake will remain just as delicious! This way, you’ll have a delightful dessert ready with minimal effort, perfect for those warm summer gatherings.
Orange Creamsicle Cheesecake Variations
Feel free to explore these exciting twists on the classic Orange Creamsicle Cheesecake, elevating your dessert game to new heights!
-
Flavor Swap: Use strawberry or lemon jello for a vibrant change. Each flavor delivers a unique burst, perfect for variety lovers.
-
Chocolate Drizzle: Top with melted chocolate for a decadent contrast. The richness of chocolate paired with citrus creates a delightful surprise.
-
No-Sugar Added: Use sugar substitutes in the cream cheese filling for a guilt-free dessert. Enjoy the same creamy texture with fewer calories!
-
Whipped Topping: Swap the heavy cream with whipped coconut cream for a dairy-free delight. This will add a tropical feel, perfect for summer gatherings.
-
Fruit Layer: Add fresh fruit slices like strawberries or kiwi between layers. The natural sweetness from the fruit adds freshness and texture to each bite.
-
Nutty Crust: Replace graham cracker crumbs with crushed nuts for a gluten-free and crunchier base. This alternative adds a delightful nutty flavor and a lovely crunch.
-
Orange Infusion: Incorporate orange juice and zest into the cheesecake filling. This will intensify the citrus flavor for those who can’t get enough of that zing!
-
Spicy Kick: For a surprising heat, add a pinch of cayenne pepper to the filling. The subtle warmth will enhance the citrus and keep guests guessing.
Dive into these variations to create the perfect Orange Creamsicle Cheesecake that resonates with your unique taste, and don’t forget to check out these Orange Cranberry Cookies or whip up some Mini Lemon Cheesecakes for a delightful dessert spread!
How to Store and Freeze Orange Creamsicle Cheesecake
Fridge: Store your Orange Creamsicle Cheesecake tightly wrapped in plastic wrap or an airtight container for up to 5 days. For the best taste and texture, enjoy within 3 days.
Freezer: If you want to save it for later, wrap the cheesecake securely in plastic wrap and then aluminum foil; it can last in the freezer for 2-3 months. Thaw overnight in the fridge before serving for optimal flavor.
Serving Tips: When ready to enjoy, allow the cheesecake to sit at room temperature for about 15-20 minutes to soften slightly for easier slicing and a delightful creamy texture.
Reheating: Not applicable for this no-bake dessert; simply serve chilled for best results.
What to Serve with No-Bake Orange Creamsicle Cheesecake
Creating a memorable summer meal pairs beautifully with the creamy, zesty delight of this cheesecake, making every bite a refreshing experience.
-
Fresh Fruit Salad: A medley of fruits adds a juicy element that complements the citrusy notes of the cheesecake.
-
Chilled Lemonade: This tangy beverage provides a refreshing burst that balances the sweetness of the cheesecake, enhancing the sunny vibes.
-
Lightly Salted Peanuts: The crunch and saltiness contrast deliciously with the creamy cheesecake and can add a fun texture.
-
Vanilla Ice Cream: A scoop alongside each slice provides a classic, velvety creaminess, creating an indulgent treat.
-
Pineapple Coconut Smoothie: The tropical flavors create harmony, echoing the fruity tones and refreshing feel of the orange cheesecake.
-
Minted Cucumber Salad: The cool, crisp flavors of cucumbers, enhanced with mint, offer a fresh bite that cleanses the palate.
-
Sparkling Wine: A bubbly drink elevates the dessert experience, emphasizing its celebratory nature and complementing its lightness.
This vibrant spread is sure to bring joy and satisfaction to your gatherings, making each moment memorable!
No-Bake Orange Creamsicle Cheesecake Recipe FAQs
How do I choose the right oranges for zesting?
Absolutely! It’s best to use fresh, ripe oranges that are firm and have a vibrant color. Look for ones with thin skin, as they have more zest and flavor. Avoid any that show dark spots or feel soft, as they may be overripe.
What’s the best way to store leftover cheesecake?
To keep your Orange Creamsicle Cheesecake fresh, wrap it tightly in plastic wrap or place it in an airtight container in the fridge for up to 5 days. For the best flavor and texture, try to consume it within 3 days.
Can I freeze the cheesecake?
Definitely! To freeze, wrap the cheesecake securely in plastic wrap followed by aluminum foil. It can last for about 2-3 months in the freezer. When you’re ready to enjoy, simply thaw it overnight in the fridge, then let it sit at room temperature for about 15-20 minutes to soften before slicing.
What should I do if my whipped cream isn’t stiffening?
No worries! If your whipped cream isn’t forming stiff peaks, make sure you’re using chilled heavy whipping cream and a clean bowl. Whip it at medium to high speed until those lovely peaks form—this usually takes about 4-5 minutes. Remember to chill your mixing bowl and beaters for best results!
Are there any dietary restrictions I should consider?
Very! This recipe can be made accommodating for various dietary needs. For a dairy-free version, use dairy-free cream cheese and coconut oil instead of butter. You can also substitute the powdered sugar with a sweetener of your choice. Be mindful of guests with allergies, particularly to dairy, gluten, or gelatin, and opt for substitutes as needed.
How long does the cheesecake need to chill to set properly?
For all those flavors to meld perfectly, you should let your Orange Creamsicle Cheesecake chill in the refrigerator for at least 6 hours, but overnight is best. This allows the filling to set firmly and the fruity orange jello to provide a satisfying texture contrast.
Refreshing Orange Creamsicle Cheesecake That Melts in Your Mouth
Ingredients
Equipment
Method
- Dissolve the orange jello in 1 cup of boiling water. Stir until fully dissolved and let cool for about 30 minutes.
- Spray a 9-inch springform pan with cooking spray and line the bottom with parchment paper.
- Combine graham cracker crumbs and melted unsalted butter in a bowl. Press the mixture into the bottom of the prepared pan and freeze for 30 minutes.
- In a large mixing bowl, beat softened cream cheese and powdered sugar until smooth and creamy.
- In another bowl, whip the heavy cream, sugar, and vanilla extract until stiff peaks form.
- Gently fold a third of the whipped cream into the cream cheese mixture. Then fold the remaining whipped cream into the cooled orange jello.
- Layer the cream cheese mixture and orange jello mixture into the crust, swirling them together. Aim for a marbled effect.
- Cover with plastic wrap and refrigerate for at least 6 hours or overnight.
Leave a Reply