
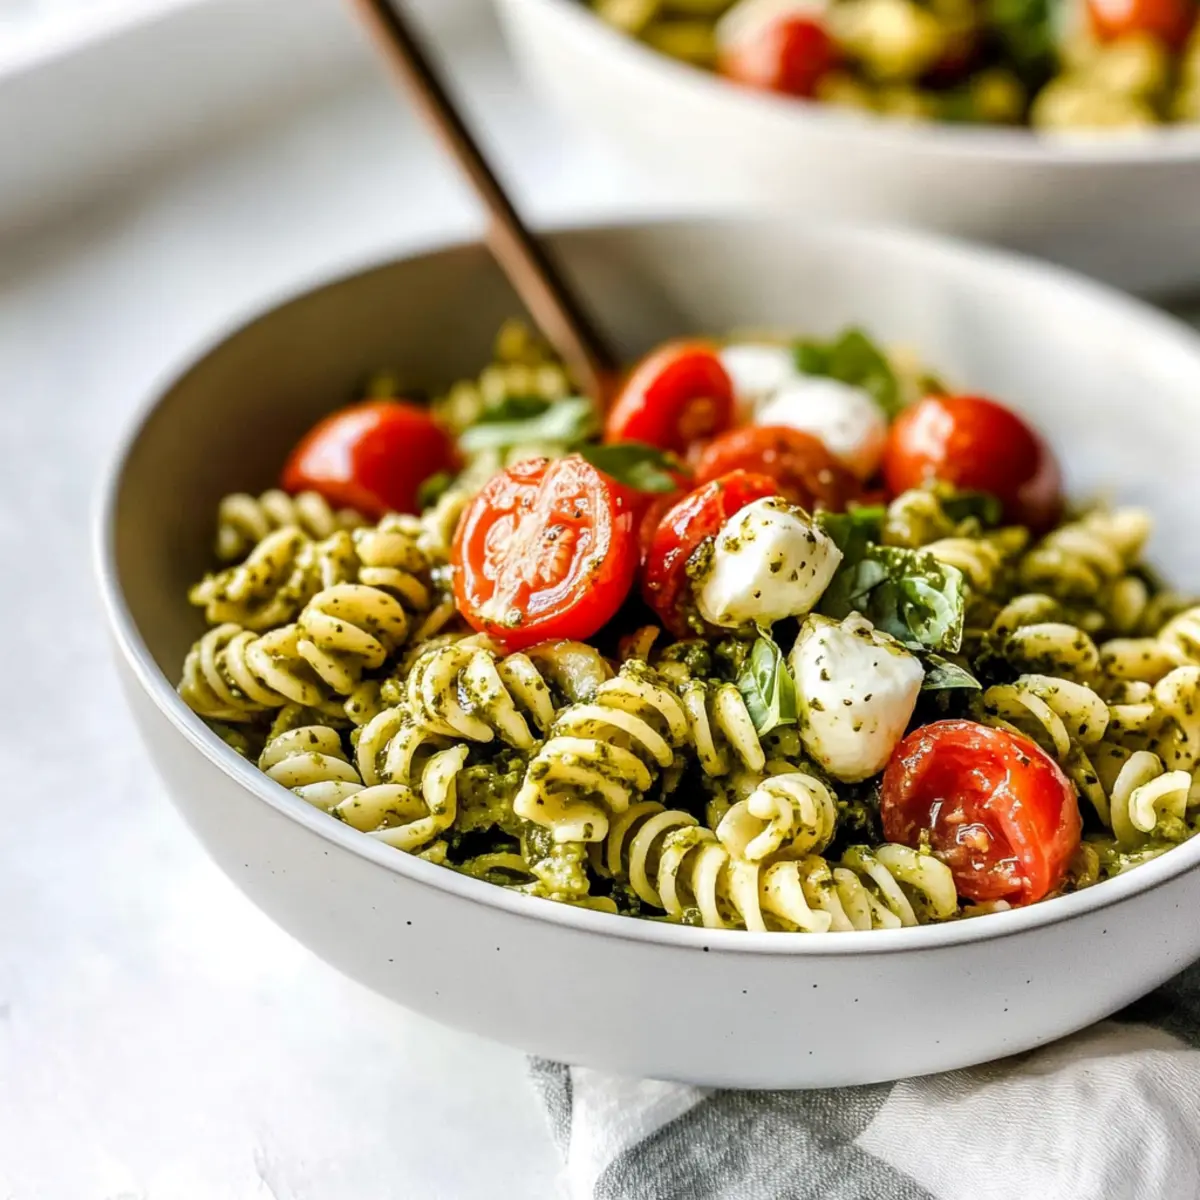
As summer whispers its sweet arrival, I find myself craving dishes that celebrate the season’s bounty—like this Quick and Easy Pesto Pasta Salad. Packed with vibrant cherry tomatoes, creamy mozzarella, and a lush, homemade basil pesto, this dish comes together in a flash, making it perfect for those busy weeknights or spontaneous gatherings. The beauty of this recipe lies not only in its effortless preparation but also in its versatility; whether you’re looking for a light lunch, a zesty side for a barbecue, or a colorful potluck option, this salad checks all the boxes. And with the ability to adapt ingredients based on your pantry or dietary needs, you can make it truly your own. Ready to dive into a plate of garden-fresh goodness?
Why is Pesto Pasta Salad a Must-Try?
Simplicity: This salad is a breeze to prepare, taking just 30 minutes from start to finish. Flavor Burst: The homemade basil pesto and fresh ingredients create an explosion of taste that will delight your senses. Versatile: Customize with your favorite veggies or proteins—grilled chicken or chickpeas are fantastic additions! Crowd-Pleaser: Perfect for potlucks or family gatherings, this dish impresses without requiring culinary expertise. Nutritionally Smart: Packed with healthy fats and vibrant produce, it’s both satisfying and nourishing. Check out more delicious ideas like Asian Cucumber Salad for fresh side options!
Pesto Pasta Salad Ingredients
• Embrace the vibrant flavors with these essential ingredients for your Pesto Pasta Salad.
For the Salad
- Pasta – Choose cavatelli or penne for the best bite and texture.
- Cherry Tomatoes – Adds a burst of sweetness; diced bell peppers work as a crunchy substitute.
- Fresh Mozzarella – Creamy richness that you can replace with feta for added tanginess.
- Red Onion – Offers a sharp flavor; swap with green onions for a milder kick.
- Pepperoncini – Provides a delightful tang; feel free to omit if you prefer less spice.
- Parsley – A fresh herbal note; arugula or basil makes a great replacement and brings in extra greenery.
For the Pesto
- Basil – Essential for a fresh, aromatic flavor; spinach or arugula can serve in a pinch if basil isn’t available.
- Olive Oil – Helps emulsify the pesto; avocado oil is a great alternative for a different flavor profile.
- Pine Nuts – Provides rich nuttiness; walnuts or sunflower seeds are fantastic budget-friendly substitutes.
- Parmesan Cheese – Adds savory depth; use nutritional yeast for a delicious vegan option.
- Lemon Juice – Brightens every bite; extra vinegar can step in if lemons aren’t on hand.
- Garlic – Infuses bold flavor; garlic powder can be used if you need a quick fix.
- Sea Salt & Black Pepper – Essential for seasoning and enhancing all the flavors in your Pesto Pasta Salad.
Step‑by‑Step Instructions for Pesto Pasta Salad
Step 1: Cook the Pasta
In a large pot, bring salted water to a rolling boil and add your chosen pasta, like cavatelli or penne. Cook according to package instructions, usually 8-10 minutes, until al dente. Once tender, drain the pasta and rinse it under cold water to stop the cooking process and cool it down, preventing clumping.
Step 2: Make the Pesto
In a food processor, combine fresh basil, pine nuts, grated Parmesan, garlic, lemon juice, olive oil, sea salt, and black pepper. Pulse the mixture a few times before blending on high until smooth and creamy, about 30-60 seconds. The fragrant aroma should fill your kitchen, revealing a luscious pesto that will coat the pasta beautifully.
Step 3: Assemble the Salad
In a large mixing bowl, combine the cooked and cooled pasta with the vibrant pesto. Add in halved cherry tomatoes, diced fresh mozzarella, pepperoncini, and chopped parsley. Gently toss everything together until the pasta is well-coated with the pesto, and all the ingredients are evenly distributed. The colors should be inviting and bright.
Step 4: Adjust Seasoning and Chill
Taste your Pesto Pasta Salad and adjust seasoning with extra salt and pepper, if necessary. For an enhanced flavor experience, cover the salad and refrigerate for at least 15-20 minutes, allowing the flavors to meld together beautifully. The chilled salad will be refreshing and full of vibrant tastes, perfect for serving.
Step 5: Serve and Enjoy
Once you’re ready to serve, give the Pesto Pasta Salad a gentle toss to revive it. If desired, drizzle a bit more olive oil or sprinkle additional cheese on top for added richness. Serve this colorful dish at your next gathering or enjoy it as a satisfying light lunch, delighting friends and family with every bite!
Expert Tips for Pesto Pasta Salad
- Fresh Ingredients: Use the freshest basil and vegetables for the best flavor; wilting can dull the taste of your pesto pasta salad significantly.
- Adjust Pesto Consistency: If your pesto is too thick, add a splash of pasta water or more olive oil to achieve the desired creaminess.
- Taste as You Go: Always taste your salad before serving; adjust the seasoning to ensure it balances perfectly, enhancing your pesto pasta salad delightfully.
- Prep Ahead: You can make the pesto a day in advance; just store it in an airtight container with a thin layer of olive oil on top to maintain freshness.
- Chill for Flavor: Allowing the Pesto Pasta Salad to chill before serving improves the flavor, letting the ingredients meld beautifully; this can elevate the entire dish.
Pesto Pasta Salad Variations & Substitutions
Feel free to mix and match ingredients to create your perfect version of this vibrant salad!
-
Protein Boost: Add grilled chicken or shrimp for a hearty touch. It transforms the salad into a satisfying main course, perfect for those hangry moments!
-
Chickpea Delight: Stir in canned chickpeas or white beans for extra protein and fiber. This twist makes it filling while keeping it vegetarian; a win-win!
-
Veggie Medley: Swap bell peppers, zucchini, or even roasted veggies for a colorful twist. This allows you to use what’s in season and adds delightful crunch.
-
Nut-Free Version: Use sunflower seeds instead of pine nuts for a nut-free pesto. This adaptation keeps the flavor profile while accommodating allergies.
-
Zesty Greens: Substitute parsley with arugula or kale for a peppery kick. These leafy swaps create a freshness that pairs beautifully with the pesto.
-
Creamy Vegan Option: Replace Parmesan cheese with nutritional yeast for a vegan-friendly pesto. This keeps the dish light yet flavorful—perfect for your plant-based friends!
-
Spice it Up: If you love heat, add sliced jalapeños or a sprinkle of red pepper flakes to the mix. It’s an easy way to awaken your taste buds!
-
Citrus Twist: Use lime juice in place of lemon juice for a zestier note. It’s a small switch that makes a refreshing difference to each bite.
And if you’re looking for other sides to complement your Pesto Pasta Salad, try weaving in some beautifully vibrant options like Beet Salad Feta or a refreshing Mediterranean Salad Zesty. Happy cooking!
How to Store and Freeze Pesto Pasta Salad
- Fridge: Store in an airtight container for up to 4 days. This way, your Pesto Pasta Salad stays fresh and flavorsome. Remember to give it a good toss before serving.
- Freezer: You can freeze the salad for up to 2 months; however, it’s best to leave out the mozzarella and add it fresh upon thawing.
- Thawing: When ready to enjoy, thaw in the refrigerator overnight. Stir in fresh ingredients like mozzarella or herbs after thawing for the best taste and texture.
- Reheating: If you prefer warm pasta salad, gently heat it on the stove with a splash of olive oil until warmed through, ensuring not to overcook the ingredients.
What to Serve with Quick and Easy Pesto Pasta Salad
Elevate your meal with delightful pairings that enhance the fresh and zesty notes of this delightful salad.
-
Garlic Bread: This homemade classic provides a warm, buttery crunch that perfectly complements the creamy pesto flavors.
-
Caprese Skewers: Bright, fresh mozzarella, basil, and juicy tomatoes create a beautiful presentation that echoes the salad’s ingredients.
-
Grilled Vegetables: Seasonal veggies like zucchini and bell peppers add a smoky depth, bringing a lovely contrast to the bright flavors of the salad.
-
Crispy Kale Chips: These crunchy bites offer a satisfying texture and a salty punch, balancing the softness of the pasta beautifully.
-
Citrus Salad: A refreshing combination of oranges and grapefruit lifts the palate, enhancing the vibrant ingredients in the pesto pasta.
-
A Glass of White Wine: A chilled Sauvignon Blanc or Pinot Grigio complements the herbal notes, creating a sophisticated dining experience.
-
Lemon Sorbet: Finish your meal on a light note with this refreshing dessert, accentuating the lemony brightness in your Pesto Pasta Salad.
Make Ahead Options
These Pesto Pasta Salad preparations are ideal for busy weeknights or meal planning enthusiasts! You can cook the pasta and chill it up to 3 days in advance, ensuring it’s ready when you are. Additionally, the homemade pesto can be prepared ahead of time and stored in an airtight container in the refrigerator for up to 5 days—just be sure to drizzle a thin layer of olive oil on top to keep it vibrant and prevent browning. When it’s time to serve, simply combine the pasta with the pesto, cherry tomatoes, mozzarella, and any other fresh ingredients, then toss and adjust seasoning as needed. Enjoy a hearty, refreshing salad with minimal effort and maximum flavor!
Pesto Pasta Salad Recipe FAQs
What type of pasta is best for Pesto Pasta Salad?
Absolutely! For the best texture, I recommend using cavatelli or penne pasta. These shapes hold onto the pesto beautifully and offer a satisfying bite. If you’re in a pinch, any pasta you have on hand will work, but those are my favorites!
How should I store leftovers of Pesto Pasta Salad?
Very! Store any leftovers in an airtight container in the refrigerator for up to 4 days. This method helps preserve the freshness and flavor of the salad. Just remember to give it a good toss before serving to redistribute the pesto and ingredients evenly.
Can I freeze Pesto Pasta Salad?
Yes, you can freeze it! However, I recommend leaving out the mozzarella if you plan to freeze your salad. Place it in a freezer-safe container, and it can be kept for up to 2 months. When you’re ready to enjoy it, simply thaw it in the refrigerator overnight, and then stir in fresh mozzarella and herbs for the best taste and texture.
What if my pesto is too thick?
No worries! If you find that your pesto is too thick, you can easily adjust it. Just add a splash of reserved pasta cooking water or a little more olive oil. Blend again until you reach your desired consistency. This is a great way to enhance the creaminess without compromising flavor!
Are there any dietary considerations for Pesto Pasta Salad?
Great question! This recipe is quite versatile. You can easily make it vegan by substituting the Parmesan cheese with nutritional yeast. For those with nut allergies, replace pine nuts with sunflower seeds, or simply omit them. As always, ensure your other ingredients, like pasta and cheese, align with any dietary restrictions.
How can I make the salad spicier?
If you’d like to add a little heat to your Pesto Pasta Salad, consider incorporating sliced jalapeños or crushed red pepper flakes when assembling the salad. This adds a delightful kick that pairs wonderfully with the coolness of the mozzarella and tomatoes. The more the merrier!
Zesty Pesto Pasta Salad That Whips Up in 30 Minutes
Ingredients
Equipment
Method
- In a large pot, bring salted water to a rolling boil and add your chosen pasta. Cook according to package instructions until al dente, then drain and rinse under cold water.
- In a food processor, combine basil, pine nuts, Parmesan cheese, garlic, lemon juice, olive oil, sea salt, and black pepper. Blend until smooth and creamy, about 30-60 seconds.
- In a large mixing bowl, combine the cooked pasta with the pesto, cherry tomatoes, mozzarella, pepperoncini, and parsley. Toss until well-coated.
- Taste and adjust seasoning if necessary, then cover and refrigerate for at least 15-20 minutes.
- Serve the salad cold, tossing gently before serving and adding more olive oil or cheese if desired.
Leave a Reply