
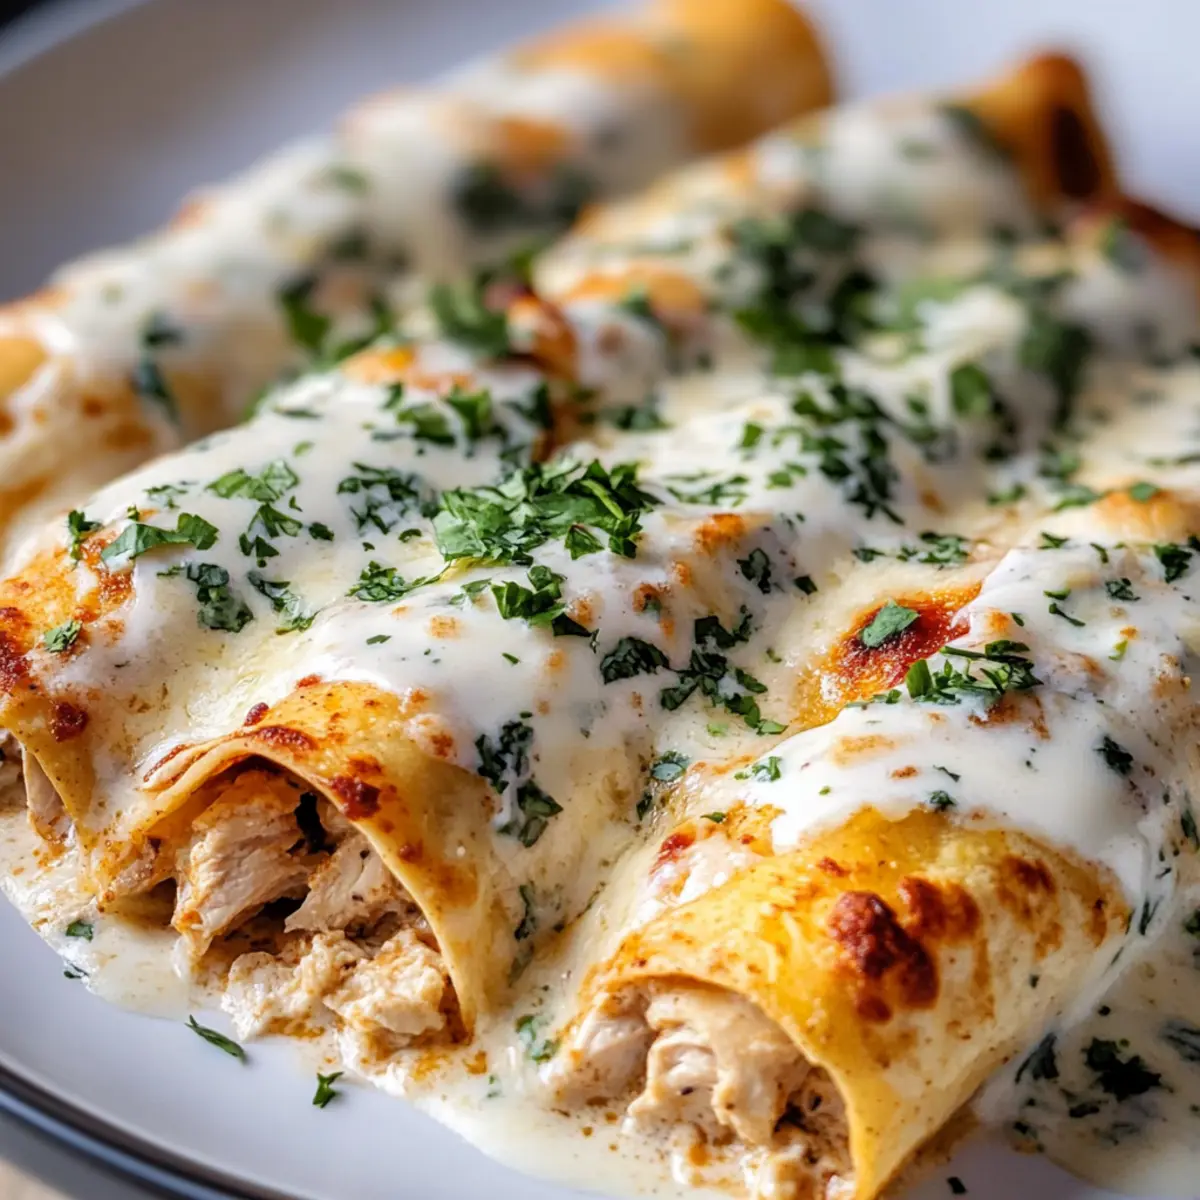
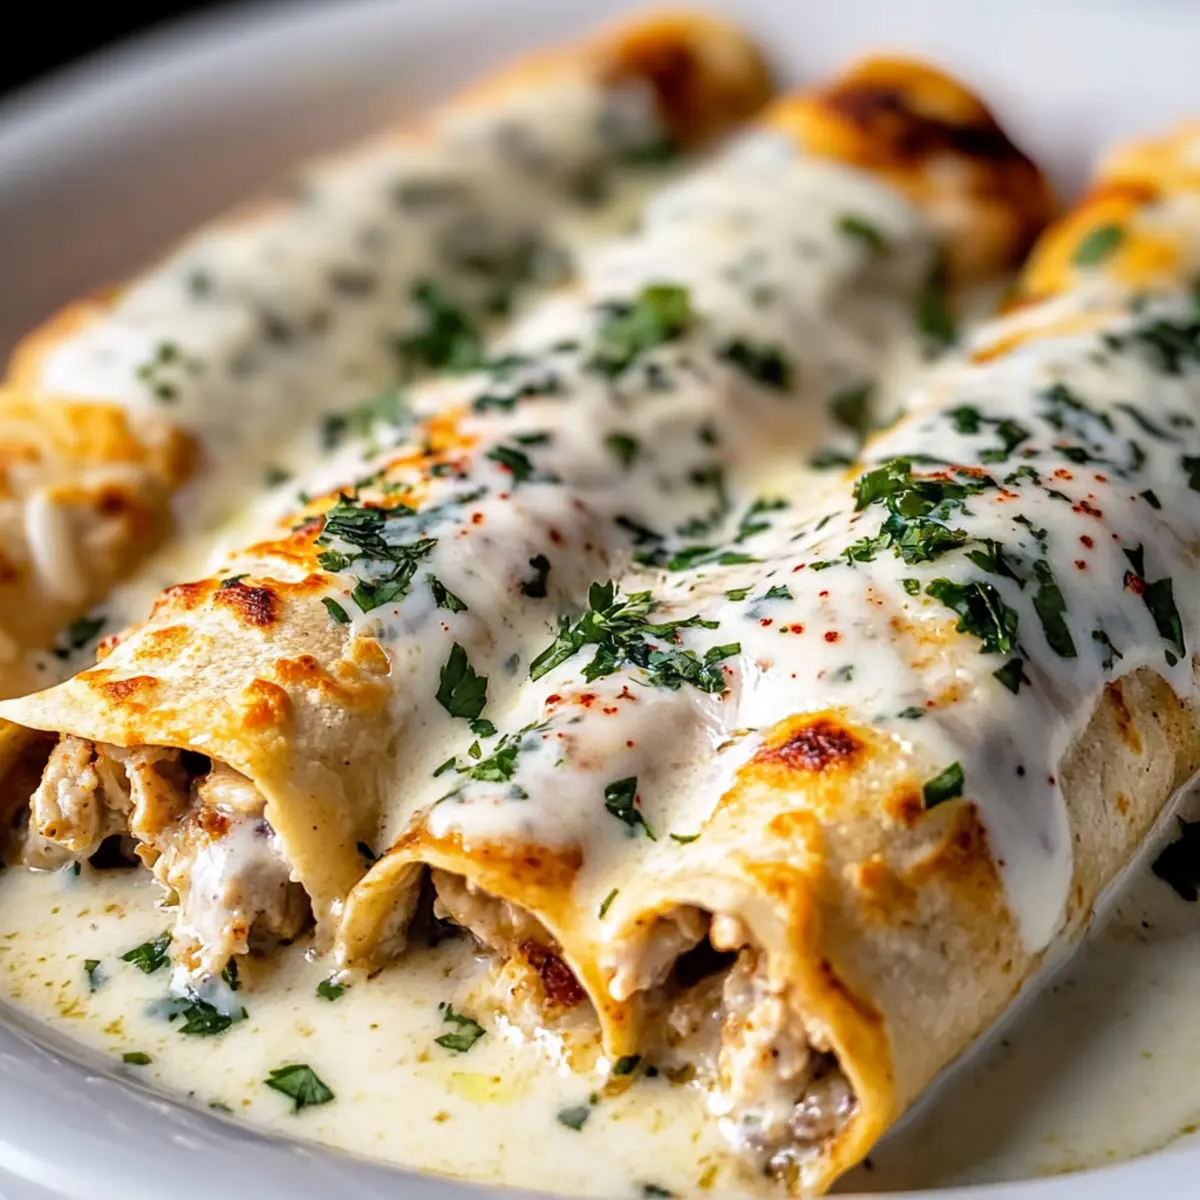
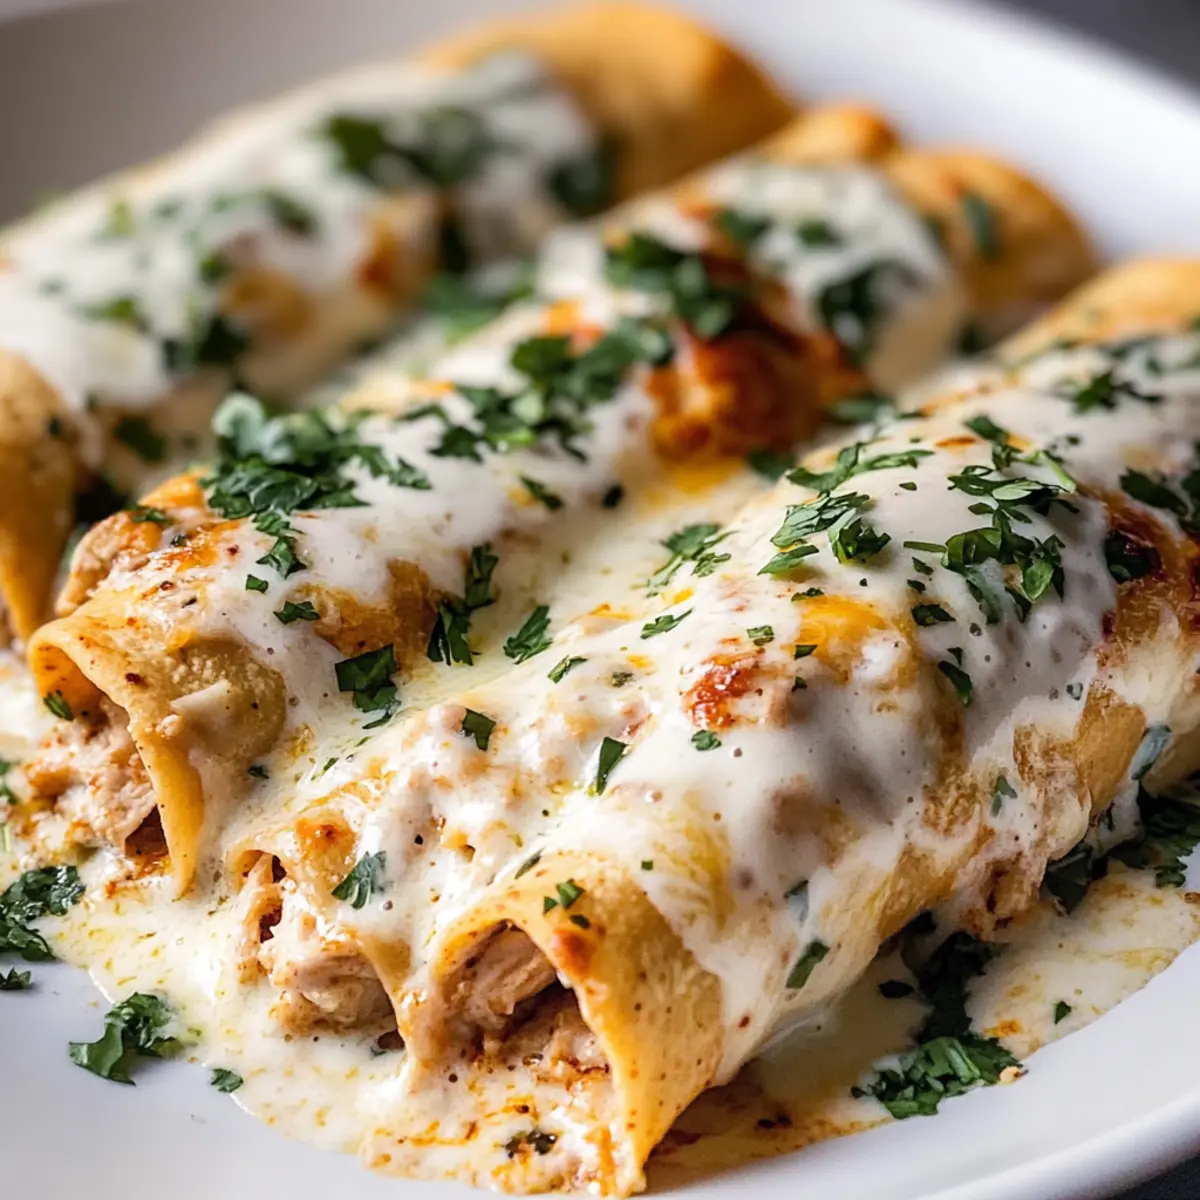
As I stirred the pot, the aroma of warm, spiced chicken filled my kitchen, taking me back to sun-soaked summers spent in Mexico. These High Protein Chicken Enchiladas with Creamy White Sauce offer a refreshing twist on a classic favorite. Wrapped in hearty whole wheat tortillas, each bite is a delightful journey through creamy goodness, perfectly balanced with tender chicken and gooey cheese. Not only are these enchiladas a healthier comfort food option—ideal for those of us seeking delicious meals that won’t weigh us down—but they also come together in no time, making them perfect for busy weeknights. Ready to savor a satisfying batch of enchiladas that nourish both your body and soul? Let’s dive in!
Why are these enchiladas a must-try?
Healthy Comfort: These High Protein Chicken Enchiladas deliver a guilt-free indulgence without sacrificing flavor or satisfaction. Quick Preparation: Ideal for busy weeknights, they come together in a snap, making dinner a breeze. Versatile Filling: Customize with veggies or spices to match your mood—think bell peppers or a dash of hot sauce! Family Favorite: Packed with cheesy goodness, they’re sure to impress both kids and adults alike. Pair them with a zesty salad or cilantro-lime rice for an even more delightful experience!
High Protein Chicken Enchiladas Ingredients
For the Filling
• Cooked Chicken (2 cups) – Provides the main protein source for the dish; can substitute with shredded turkey for a lighter option.
• Olive Oil (1 tbsp) – Adds moisture to the filling; avocado oil works as a great alternative.
• Garlic Powder (1 tsp) – Enhances the flavor; fresh garlic can be used for an even bolder taste.
• Cumin (1 tsp) – Adds an earthy flavor profile; chili powder can be substituted for a different kick.
• Salt (1/2 tsp) – Enhances all flavors beautifully.
• Black Pepper (1/4 tsp) – Balances the dish with a mild spice.
• Shredded Cheese (1/2 cup + for topping) – Adds richness and cheesy goodness; a blend of Monterey Jack and cheddar can deepen the flavor.
For the Tortillas and Sauce
• Whole Wheat Tortillas (8) – Forms the base for the enchiladas, promoting fiber intake; corn tortillas give a gluten-free option.
• Greek Yogurt (1 cup) – Acts as a healthier alternative to sour cream, adding creaminess to the sauce; low-fat sour cream can also be used if preferred.
• Milk (1/4 cup) – Helps achieve a smooth consistency in the sauce; half-and-half will make it creamier if desired.
These High Protein Chicken Enchiladas are not only a delicious twist on a classic but also a healthy comfort food that everyone will love! Enjoy crafting this wholesome dish with family and friends.
Step‑by‑Step Instructions for High Protein Chicken Enchiladas
Step 1: Prepare the Chicken Filling
In a large mixing bowl, combine 2 cups of shredded cooked chicken with 1 tablespoon of olive oil, 1 teaspoon of garlic powder, 1 teaspoon of cumin, 1/2 teaspoon of salt, and 1/4 teaspoon of black pepper. Stir well until the chicken is evenly coated with the spices, and mix in 1/4 cup of shredded cheese. This filling will bring a savory flavor to your high protein chicken enchiladas.
Step 2: Craft the White Sauce
In a medium bowl, whisk together 1 cup of Greek yogurt and 1/4 cup of milk until smooth and creamy. Season the mixture with 1 teaspoon of garlic powder, 1/2 teaspoon of salt, and a pinch of black pepper to create a velvety white sauce. The sauce will give your enchiladas a rich base, making each bite delectable and satisfying.
Step 3: Assemble the Enchiladas
Preheat your oven to 375°F (190°C) while lightly greasing a baking dish. Spread a layer of the creamy white sauce evenly at the bottom of the dish. This layer will prevent sticking and add moisture during baking, ensuring that your high protein chicken enchiladas remain tender and delicious.
Step 4: Fill and Roll
Warm the whole wheat tortillas briefly in a dry skillet or microwave to make them pliable. Spoon a generous amount of the chicken filling onto each tortilla, then roll tightly and place seam-side down in the prepared baking dish. This method helps maintain the structure of each enchilada while creating a lovely presentation in the dish.
Step 5: Top and Bake
Once all the enchiladas are nestled in the baking dish, pour the remaining white sauce evenly over the top, ensuring they are well-coated. Sprinkle with additional shredded cheese for that gooey, melted finish. This final touch guarantees a golden, appetizing appearance once baked to perfection.
Step 6: Bake to Perfection
Transfer the dish to the preheated oven and bake for 25-30 minutes, or until the cheese is melted, bubbly, and golden brown. Keep an eye on the enchiladas toward the end of the baking time to make sure they don’t overcook. The delightful aroma will fill your home, tantalizing everyone’s taste buds.
Step 7: Rest and Serve
Once baked, remove the enchiladas from the oven and let them rest for 5-10 minutes to allow the sauce to settle. This step is crucial for achieving the right texture. Serve your high protein chicken enchiladas garnished with fresh cilantro or a dollop of Greek yogurt for added creaminess and freshness.

High Protein Chicken Enchiladas Variations
Feel free to personalize these enchiladas and make them truly yours with delightful twists and healthier swaps!
-
Vegetarian Delight: Swap the chicken for black beans or lentils for a nourishing vegetarian option that’s just as satisfying. Add some sautéed bell peppers for extra color and crunch.
-
Spicy Kick: For those who love a little heat, mix diced jalapeños or a splash of hot sauce into the chicken filling. This twist elevates the flavor to new levels with every bite!
-
Low-Carb Option: Use cauliflower rice as a filling base instead of chicken. This provides a great way to enjoy low-carb enchiladas while still being deliciously filling.
-
Different Cheeses: Experiment with a blend of cheeses like pepper jack for a zesty flavor or mozzarella for a milder taste. Each option gives a unique twist to your cheesy sauce drizzle.
-
Extra Creamy: Replace Greek yogurt with cream cheese to amp up the creaminess of your sauce. This variation provides an even richer texture that cheese lovers will adore!
-
Herb Infusion: Add freshly chopped cilantro or basil into the chicken filling for an aromatic touch. The fresh herbs will brighten up each bite, enhancing the overall flavor profile.
-
Vegetable Medley: Stir in some spinach or zucchini into the chicken mixture before rolling. Adding veggies not only boosts nutrition but also makes each bite colorful and vibrant.
-
Corn Tortillas: For a gluten-free experience, switch to corn tortillas which also add a different texture and flavor to these High Protein Chicken Enchiladas. They complement the creamy sauce beautifully!
With all these variations, your possibilities are endless! Elevate your cooking game and enjoy the process of discovering new flavors. And if you love comfort food, you might also enjoy pairing these enchiladas with a warm bowl of Poblano Chicken Tortilla Soup. Happy cooking!
Make Ahead Options
These High Protein Chicken Enchiladas are perfect for meal prep enthusiasts! You can prepare the chicken filling and white sauce up to 24 hours in advance; just store them separately in airtight containers in the refrigerator. Additionally, you can assemble the enchiladas and refrigerate them, covered, for up to 3 days before baking. To maintain their delicious quality, ensure they are tightly wrapped and keep the sauce moist. When ready to serve, preheat your oven to 375°F (190°C), pour the remaining white sauce on top, and then bake for 25-30 minutes until bubbly and golden. With this make-ahead approach, you’ll have a wholesome, satisfying meal ready with minimal effort on busy weekdays!
Expert Tips for High Protein Chicken Enchiladas
-
Warm Tortillas: Ensure tortillas are warmed properly to prevent cracking during rolling. This will help maintain the enchiladas’ perfect shape and texture.
-
Cheese Balance: Use a mix of cheeses for enhanced flavor. A combination of Monterey Jack and cheddar gives that perfect gooey topping on your high protein chicken enchiladas.
-
Sauce Consistency: Whisk the white sauce thoroughly to achieve a smooth consistency. This ensures an even coating and creamy texture across the enchiladas when baked.
-
Allow to Rest: Let the enchiladas rest for 5-10 minutes before serving. This step allows the flavors to meld beautifully and helps achieve that perfect sauce consistency.
-
Creative Fillings: Don’t hesitate to mix in veggies like bell peppers or corn for extra texture and nutrition. Be inventive—make these enchiladas your own!
Storage Tips for High Protein Chicken Enchiladas
Fridge: Store leftovers in an airtight container for up to 4 days. Ensure the enchiladas are cool before sealing to prevent condensation.
Freezer: To freeze unbaked enchiladas, wrap them tightly in plastic wrap and aluminum foil, storing for up to 3 months. Thaw in the refrigerator overnight before baking.
Reheating: Reheat baked enchiladas in the oven at 350°F (175°C) for about 20 minutes until heated through, or microwave for 2-3 minutes but avoid overcooking to maintain creaminess.
Make-Ahead: Assemble the High Protein Chicken Enchiladas in advance, store them in the fridge overnight, and bake when ready for a convenient meal.
What to Serve with High Protein Chicken Enchiladas
Enhance your meal with delightful sides that perfectly complement the comforting goodness of these enchiladas.
-
Cilantro-Lime Rice: This fluffy rice adds a zesty kick, balancing the creamy enchiladas beautifully. It’s a fresh, aromatic pairing that brightens each bite.
-
Fresh Garden Salad: Crisp greens tossed with a tangy vinaigrette provide a refreshing contrast to the richness of the dish. Add cherry tomatoes and avocados for extra color and flavor.
-
Grilled Corn on the Cob: Sweet, slightly charred corn offers a crunchy texture and a burst of sweetness, creating a satisfying balance to the creamy filling.
-
Black Bean Salsa: This zesty blend of black beans, tomatoes, and lime adds a vibrant touch. It’s healthy, rich in protein, and complements the flavors of the enchiladas.
-
Creamy Guacamole: A dollop of guacamole brings rich creaminess and healthy fats, enhancing the overall taste experience. It’s a classic partner that adds a comforting touch.
-
Margaritas or Sparkling Water: Refreshing drinks elevate the meal; the slight acidity cuts through the creamy enchiladas, creating a delightful dining experience.
-
Chocolate Flan: For dessert, this rich, velvety flan is the perfect ending—providing a luscious, sweet finale that contrasts savory flavors beautifully.
-
Baked Tortilla Chips: Crispy, crunchy tortilla chips with a hint of salt provide texture and can be enjoyed with any of the salsas or guacamole. They make for a fun appetizer too!
-
Roasted Vegetables: Seasoned roasted veggies, like zucchini and bell peppers, add a colorful array of textures and flavors to your table. They perfectly complement the richness of the enchiladas.
High Protein Chicken Enchiladas Recipe FAQs
What type of tortillas work best for these enchiladas?
Whole wheat tortillas are fantastic as they add fiber to the dish. However, if you’re looking for a gluten-free option, you can easily substitute them with corn tortillas. Just warm them beforehand to prevent cracking during assembly!
How long can I store leftover high protein chicken enchiladas?
Absolutely! You can store leftovers in an airtight container in the refrigerator for up to 4 days. Just be sure they are completely cool before sealing the container to prevent condensation, which can make the enchiladas soggy.
Can I freeze these enchiladas, and if so, how?
Yes, you can! To freeze unbaked high protein chicken enchiladas, assemble them first, but don’t bake. Instead, wrap them tightly in plastic wrap and then in aluminum foil. They can be stored in the freezer for up to 3 months. For best results, thaw them in the refrigerator overnight before baking them as per the instructions.
What if my white sauce is too thick?
No worries! If you find the sauce a bit too thick, simply add a splash of milk or a little more Greek yogurt until you achieve your desired consistency. A smooth, creamy sauce is what brings these enchiladas to the next level!
Are there any dietary considerations for this recipe?
Absolutely! This recipe can be made lighter by using shredded turkey instead of chicken, and you can also switch to a low-fat Greek yogurt variant. For vegan guests, try filling the enchiladas with beans, lentils, or sautéed veggies instead of meat and use a dairy-free alternative for the sauce. Always check for any specific allergies related to ingredients like dairy or gluten.
How can I enhance the flavor of the chicken filling?
Very easy! You can add various spices or ingredients, such as bell peppers, corn, or even spinach for an extra nutritious twist. For a bit of heat, consider mixing in cayenne pepper or hot sauce to the chicken filling, tailoring the flavor to your preference. These little tweaks ensure every batch is custom-made for your taste buds!
High Protein Chicken Enchiladas: Your Healthy Comfort Fix
Ingredients
Equipment
Method
- In a large mixing bowl, combine 2 cups of shredded cooked chicken with 1 tablespoon of olive oil, 1 teaspoon of garlic powder, 1 teaspoon of cumin, 1/2 teaspoon of salt, and 1/4 teaspoon of black pepper. Stir well until the chicken is evenly coated with the spices, and mix in 1/4 cup of shredded cheese.
- In a medium bowl, whisk together 1 cup of Greek yogurt and 1/4 cup of milk until smooth and creamy. Season with 1 teaspoon of garlic powder, 1/2 teaspoon of salt, and a pinch of black pepper.
- Preheat your oven to 375°F (190°C) while lightly greasing a baking dish. Spread a layer of the creamy white sauce evenly at the bottom of the dish.
- Warm the whole wheat tortillas briefly in a dry skillet or microwave to make them pliable. Spoon a generous amount of the chicken filling onto each tortilla, then roll tightly and place seam-side down in the prepared baking dish.
- Once all the enchiladas are in the baking dish, pour the remaining white sauce evenly over the top and sprinkle with additional shredded cheese.
- Transfer the dish to the preheated oven and bake for 25-30 minutes, or until the cheese is melted and golden brown.
- Once baked, remove the enchiladas from the oven and let them rest for 5-10 minutes before serving.
Leave a Reply