
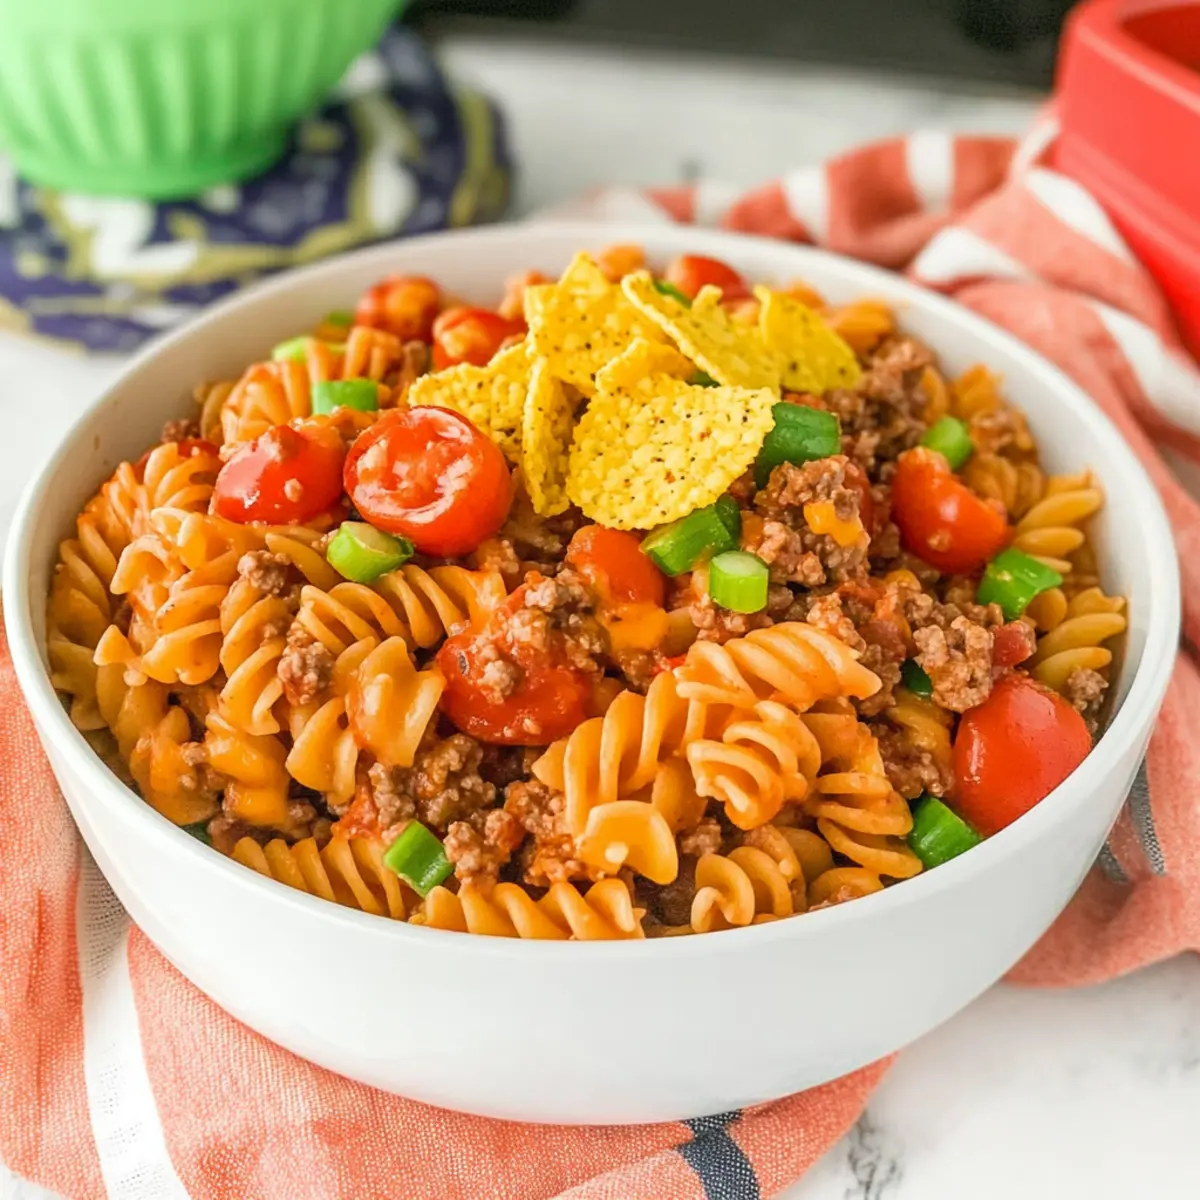
As I rummaged through my pantry one evening, I stumbled upon a treasure trove of ingredients just waiting to be brought together. That’s when the idea for my 20-Minute Cheesy Taco Pasta Salad sparked to life. This dish perfectly marries the flavors of a classic taco with the heartiness of a pasta salad, resulting in a colorful, family-friendly meal that’s as easy to prepare as it is delicious. In just 20 minutes, you can whip up this vibrant creation, making it the ideal choice for busy weeknights or last-minute potlucks. Plus, the satisfying crunch of Doritos added just before serving will have your guests coming back for seconds. Curious to see how this delightful dish comes together? Let’s dive into the recipe!

Why is this Cheesy Taco Pasta Salad a must-try?
Quick and Easy: In just 20 minutes, you can prepare a delightful meal that combines the best of both tacos and pasta salad. Perfect for busy evenings!
Flavor Explosion: The mix of seasoned beef, creamy cheeses, and tangy Catalina dressing creates a robust taste that feels like a fiesta in every bite.
Family-Friendly Appeal: This dish caters to all ages, making it a hit for everyone. Plus, the added crunch of Doritos takes it to another level!
Versatile Ingredients: Feel free to switch things up! You could opt for shredded chicken or even add some black beans for an extra nutrient boost.
Potluck Perfect: This Cheesy Taco Pasta Salad is not only easy to make but also makes for an impressive dish at any gathering, just like my Mediterranean Salad Zesty or a tasty Beet Salad Feta. Your friends will be asking for the recipe!
Cheesy Taco Pasta Salad Ingredients
For the Pasta Salad
• Rotini Pasta – Cooked al dente to provide a sturdy base that holds all the flavors.
• Ground Beef – Seasoned with taco seasoning to add a savory protein kick to the dish.
• Taco Seasoning – This blend boosts the beef’s flavor with authentic taco spices, perfect for our Cheesy Taco Pasta Salad.
• Cherry Tomatoes – Halved to add fresh sweetness and a pop of color to the salad.
• Green Onions – Sliced for a refreshing crunch and mild onion flavor.
• Shredded Cheese (Cheddar + Monterey Jack Blend) – Adds creaminess and that delicious cheesy goodness; you can swap with a dairy-free option if needed.
• Catalina Dressing – Provides tangy moisture; if you prefer, ranch or vinaigrette work well as substitutes.
• Doritos (Crushed) – Brings a delightful crunch and extra flavor, but feel free to use tortilla chips as an alternative.
This ingredient list will set the stage for creating a delightful Cheesy Taco Pasta Salad that your family and friends will love!
Step‑by‑Step Instructions for Cheesy Taco Pasta Salad
Step 1: Cook the Pasta
Begin by bringing a large pot of salted water to a rolling boil. Add in the rotini pasta and cook according to package directions until al dente, usually about 8-10 minutes. Once cooked, drain the pasta and rinse it under cold water to stop the cooking process. This cooling step ensures your Cheesy Taco Pasta Salad will be fresh and not mushy.
Step 2: Brown the Beef
While the pasta cooks, heat a large skillet over medium-high heat. Add the ground beef, breaking it apart with a spatula as it cooks. Brown the beef for about 5-7 minutes until it is no longer pink and reaches a temperature of 160°F (70°C). Once done, drain any excess fat and stir in the taco seasoning to thoroughly coat the beef in those delicious spices.
Step 3: Combine Ingredients
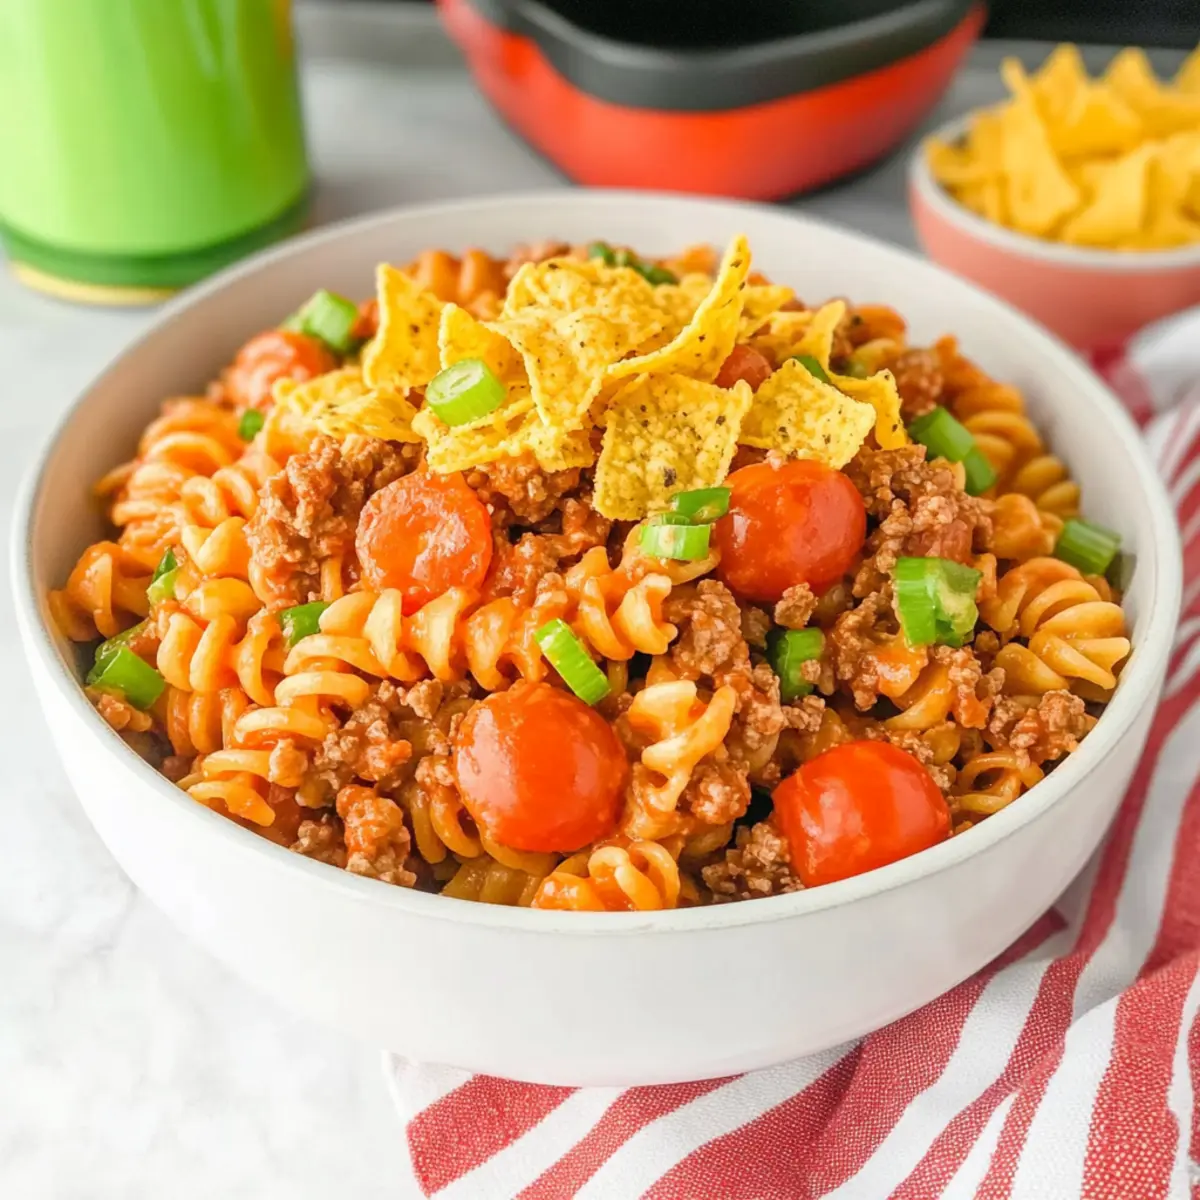
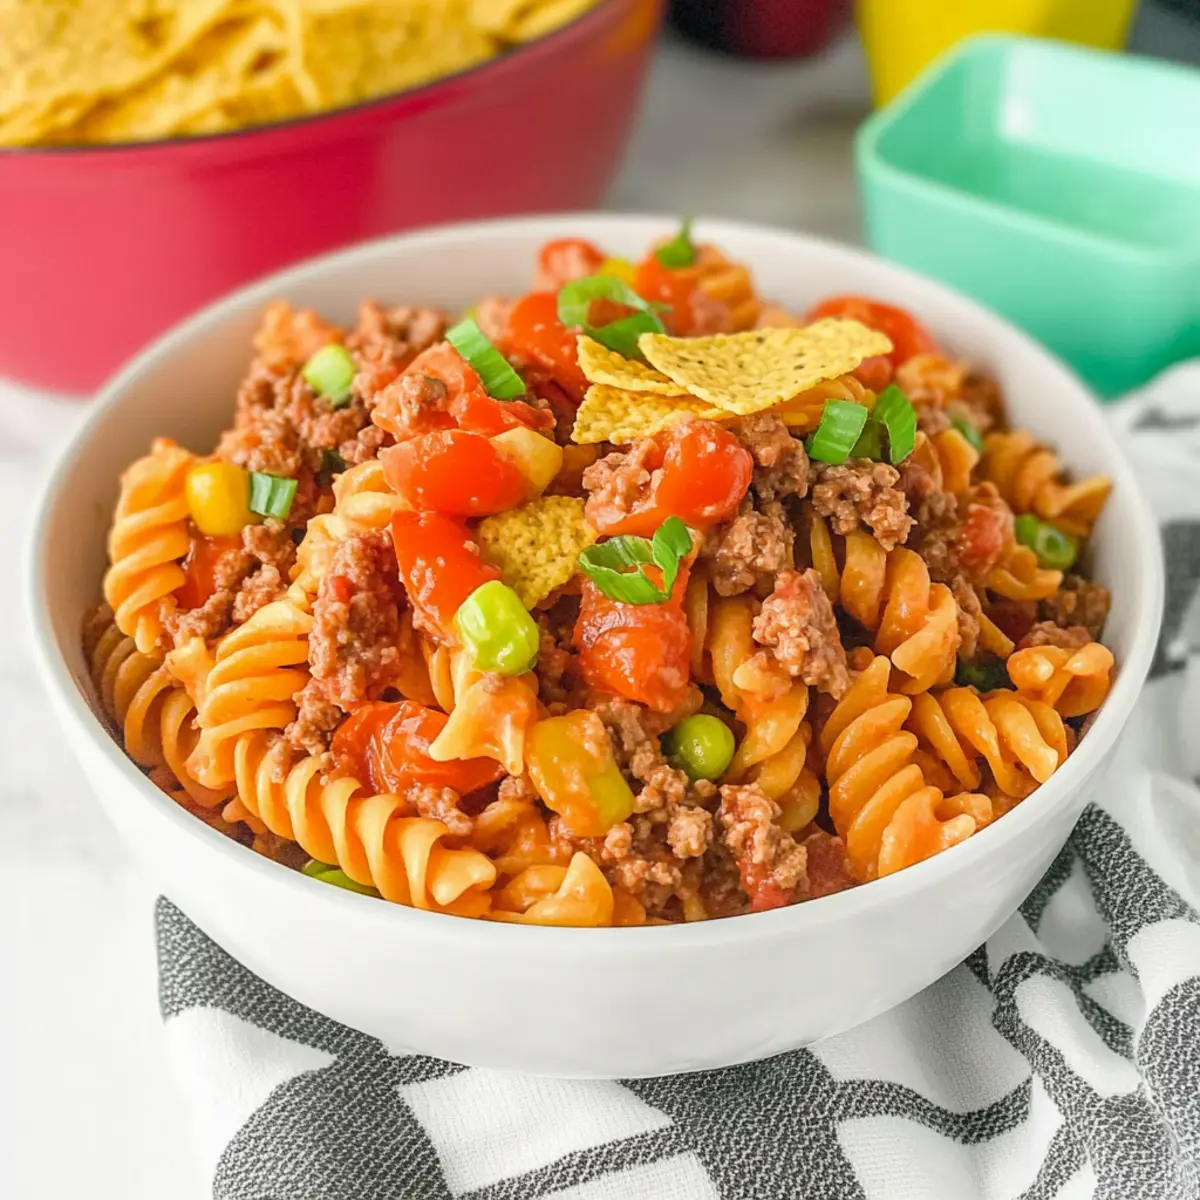
In a big mixing bowl, combine the cooked rotini pasta, seasoned ground beef, halved cherry tomatoes, sliced green onions, and shredded cheese. Use a large spoon to gently fold the ingredients together until everything is evenly distributed. The vibrant colors and textures of your Cheesy Taco Pasta Salad will start to come together beautifully.
Step 4: Add the Dressing
Pour the Catalina dressing over the pasta mixture, ensuring each ingredient gets a good coating. Gently stir everything together until the dressing is well incorporated, creating a creamy, cohesive salad. Take a moment to admire the delightful melding of your Cheesy Taco Pasta Salad, and adjust the seasoning if needed to your taste.
Step 5: Chill or Serve Immediately
If time allows, cover the bowl and chill the salad in the refrigerator for about 15 minutes. This resting period helps the flavors meld more beautifully. However, if you’re short on time, you can serve it right away! Either way, your Cheesy Taco Pasta Salad is ready to impress.
Step 6: Add Crunch with Doritos
Just before serving, fold in the crushed Doritos for an irresistible crunch. This final touch will add a satisfying texture that your family and friends will love. Serve the salad in a large bowl, and watch as everyone digs into this fun and flavorful Cheesy Taco Pasta Salad!
Expert Tips for Cheesy Taco Pasta Salad
-
Cooking Beef: Ensure the ground beef is cooked thoroughly and browned well for maximum flavor. Use a meat thermometer to check for a safe internal temperature of 160°F (70°C).
-
Chill for Flavor: Allowing the Cheesy Taco Pasta Salad to chill for about 15 minutes enhances the flavors. However, be sure to add the Doritos just before serving to keep their crunch!
-
Mixing Technique: When combining the ingredients and dressing, use a gentle folding motion to avoid breaking the pasta and ensure an even coating of flavor throughout.
-
Fresh Vegetables: Use fresh, ripe tomatoes for the best taste and color. Feel free to experiment with add-ins like bell peppers or avocados for extra texture and nutrients.
-
Storage Tips: Store leftovers in an airtight container in the refrigerator for up to 3 days. Add more dressing if it seems dry before serving again.
Make Ahead Options
These Cheesy Taco Pasta Salad is perfect for meal prep enthusiasts! You can cook the rotini pasta and brown the ground beef up to 3 days in advance, storing each component separately in airtight containers. Just refrigerate the pasta to keep it fresh and prevent it from getting mushy, and combine it with the seasoned beef right before assembling. The chopped vegetables and shredded cheese can also be prepped a day ahead, stored in the fridge for maximum crunch. When you’re ready to serve, simply mix everything together with the Catalina dressing and fold in the crushed Doritos just before serving to maintain their delightful crunch. This way, you’ll have a fabulous dish ready with minimal effort, perfect for busy weeknights!
How to Store and Freeze Cheesy Taco Pasta Salad
Fridge: Store your Cheesy Taco Pasta Salad in an airtight container for up to 3 days. This will maintain its freshness, but add crushed Doritos just before enjoying.
Freezer: While not recommended for freezing, if you must, place the salad in a freezer-safe container. It can last up to 1 month, but be aware that texture may change upon thawing.
Reheating: If you’ve stored leftovers, gently stir in a little additional Catalina dressing before serving to refresh flavors. Serve cold or at room temperature for the best taste.
Preparation Tips: To save time, you can prepare the salad components in advance, keeping them separately stored until ready to assemble. This retains freshness, especially for the crunchy Doritos!
What to Serve with Cheesy Taco Pasta Salad
The perfect gathering deserves the perfect sides to elevate your feast and complement every bite.
-
Cornbread Muffins: These sweet and savory muffins provide a delightful contrast to the tanginess of the salad, making for a comforting addition.
-
Guacamole: Rich and creamy, this dip adds a touch of smoothness to the crunchy pasta salad and enhances the Mexican flavor profile beautifully.
-
Chili: A warm bowl of hearty chili pairs perfectly with the coolness of the salad, creating a satisfying combination of cold and hot dishes.
-
Grilled Veggies: Charred bell peppers, zucchini, and squash bring a smoky depth that complements the vibrant flavors of the pasta salad.
-
Spanish Rice: Fluffy, seasoned rice enriches your meal with a satisfying texture and can soak up any leftover dressing flavors.
-
Sangria: A glass of refreshing sangria with its fruity notes makes for a delightful drink to wash down the rich, cheesy goodness of the salad.
-
Chocolate Chip Cookies: End on a sweet note! These treats bring nostalgia and comfort, a blissful finish after your savory meal.
Cheesy Taco Pasta Salad Variations
Feel free to unleash your creativity and customize this delightful dish to suit your taste!
-
Chicken Swap: Replace ground beef with shredded chicken or turkey for a lighter twist. It’s equally delicious and perfect for using leftovers!
-
Plant-Based Upgrade: Use lentils or black beans instead of beef for a vegetarian-friendly option. This hearty substitution adds protein and fiber!
-
Extra Veggies: Toss in some bell peppers, corn, or avocado for added flavor and nutrition. These colorful additions brighten the salad and enhance texture.
-
Spice it Up: Top with jalapeños or dash of hot sauce for a kick of heat. Your taste buds will thank you for this zesty upgrade!
-
Crunchy Alternatives: Switch Doritos for tortilla chips or crunchy rice noodles if you prefer different textures. Each option offers a unique crunch that makes this dish fun.
-
Cheese Lover’s Delight: Experiment with different cheese varieties like pepper jack for an extra kick or cream cheese for added creaminess. The world is your cheesy oyster!
-
Dressing Dilemmas: If Catalina isn’t your style, try ranch dressing or a zesty vinaigrette for a refreshing alternative. Each brings a new flavor profile to your beloved salad.
-
Serving Inspiration: This taco-inspired pasta salad pairs beautifully with other favorites like my Cranberry Rigatoni Salad or an Asian Cucumber Salad. They’ll surely complement each other at your next gathering!
Cheesy Taco Pasta Salad Recipe FAQs
How do I choose ripe tomatoes for my Cheesy Taco Pasta Salad?
Absolutely! Look for cherry tomatoes that are firm, vibrant in color, and slightly shiny. Avoid any that have dark spots or are overly soft, as these can indicate overripeness. If you can, give them a little squeeze; they should feel plump!
What’s the best way to store leftover Cheesy Taco Pasta Salad?
To keep your salad fresh, store any leftovers in an airtight container in the refrigerator for up to 3 days. Make sure to add the crushed Doritos just before serving to ensure they stay crunchy!
Can I freeze my Cheesy Taco Pasta Salad?
While it’s not ideal to freeze, if you must, transfer the salad to a freezer-safe container and it should last up to 1 month. Just remember that the texture may change once thawed, initially looking a bit soggy. To serve, gently stir in some fresh Catalina dressing to revive the flavors.
What if I accidentally overcooked the pasta?
No worries! If your pasta becomes too soft, consider using less dressing to balance the texture for your Cheesy Taco Pasta Salad. You could also add more crunchy ingredients, like extra crushed Doritos or even some chopped bell peppers, to enhance the overall experience!
Is this recipe suitable for dietary restrictions, like allergies?
Make sure to check for allergies! The Cheesy Taco Pasta Salad contains dairy (cheese and dressing), so if there are any dairy allergies in your family, you can easily substitute the cheese with a dairy-free alternative. Additionally, you might want to confirm the taco seasoning is gluten-free if that’s a concern!
How do I adjust the seasoning if my salad ends up tasting bland?
If your Cheesy Taco Pasta Salad isn’t as flavorful as you’d like, try adding a pinch of salt or a dash more taco seasoning. Mixing in a bit of lime juice can also brighten the flavors wonderfully! Grab a taste and adjust according to your preference!
Easy Cheesy Taco Pasta Salad for Your Next Potluck
Ingredients
Equipment
Method
- Begin by bringing a large pot of salted water to a rolling boil. Add in the rotini pasta and cook until al dente, about 8-10 minutes. Drain the pasta and rinse under cold water.
- In a large skillet over medium-high heat, add the ground beef and cook until no longer pink, about 5-7 minutes. Drain excess fat and stir in taco seasoning.
- In a big mixing bowl, combine the cooked rotini pasta, seasoned ground beef, cherry tomatoes, green onions, and shredded cheese, folding gently to mix.
- Pour the Catalina dressing over the mixture and stir until well combined.
- If time allows, chill in the refrigerator for about 15 minutes; otherwise, serve immediately.
- Just before serving, fold in the crushed Doritos for crunch.
Leave a Reply