
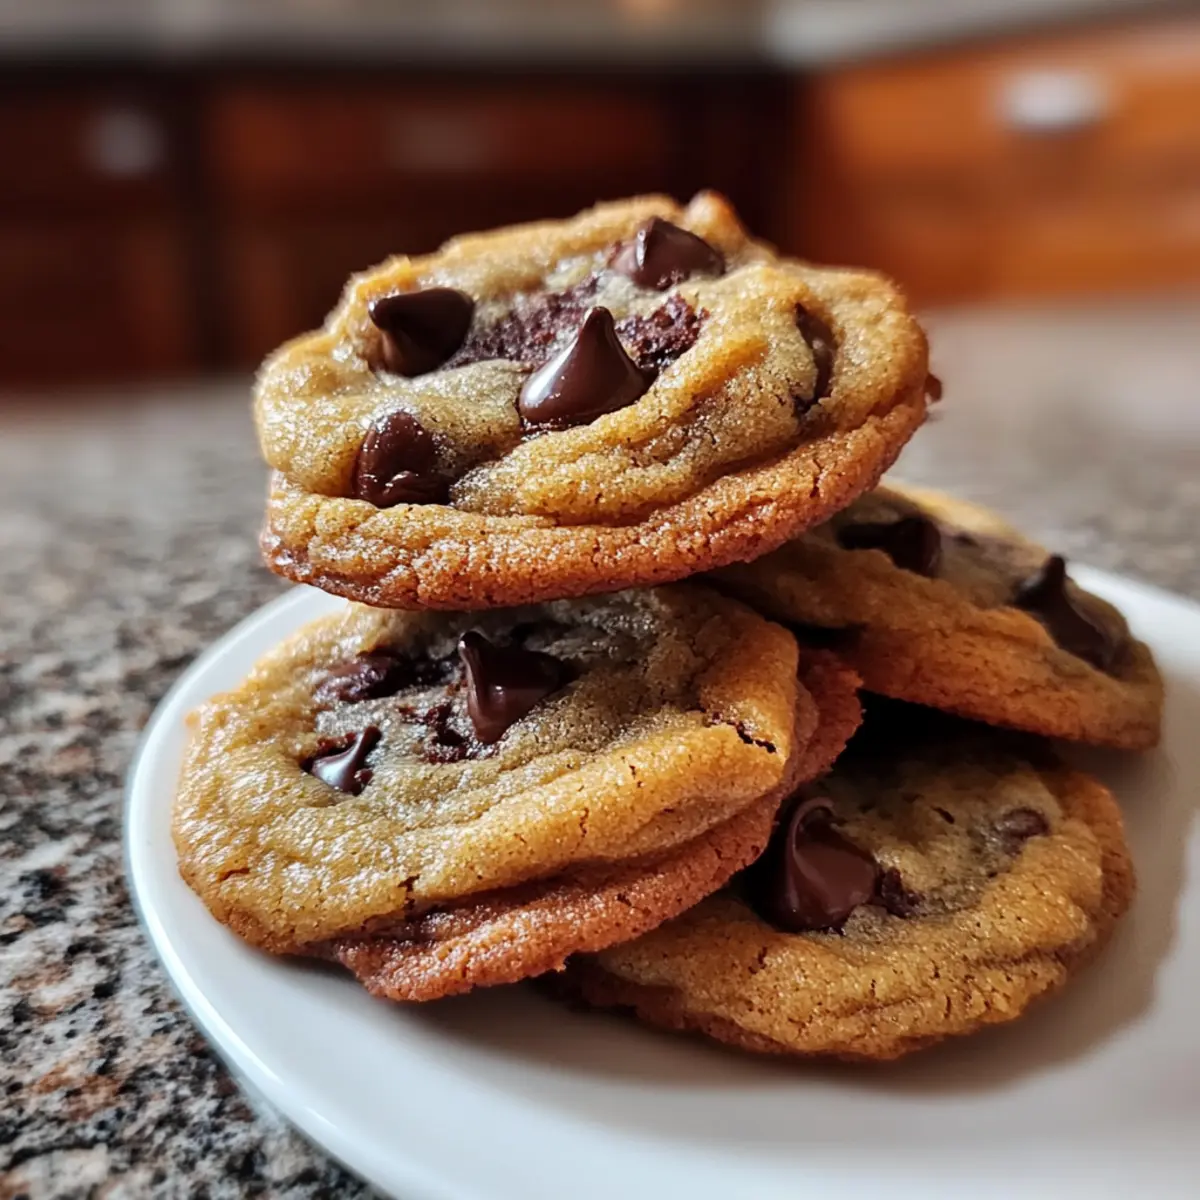
The delightful scent of chocolate wafting through the kitchen never fails to ignite fond memories of childhood. Whether reminiscing about after-school baking sessions or treating loved ones to a sweet surprise, my Crispy and Chewy Chocolate Chip Cookies are perfect for any occasion. This recipe not only yields cookies with irresistibly crispy edges and gooey centers but also offers the flexibility to customize with your favorite nuts or chocolate varieties. In just 30 minutes, you can create a warm, comforting batch that will make you the hero of any gathering. Plus, with gluten-free options available, everyone can indulge in this homemade goodness. Ready to bring a touch of nostalgia to your baking? Let’s dive into the recipe!
Why Are These Cookies So Irresistible?
Childhood Memories: The enticing aroma of baking cookies will transport you back to blissful moments spent in the kitchen.
Customizable Delight: From nutty crunch to various chocolate flavors, you can tailor these cookies to suit any palate.
Gluten-Free Option: With a simple swap, you can enjoy gluten-free treats without sacrificing flavor or texture.
Quick & Easy: In just 30 minutes, you’ll have a batch of warm cookies ready to impress family and friends.
Perfect for Sharing: Whether for gatherings or cozy nights in, these cookies are a guaranteed crowd-pleaser, just like other favorites such as Chocolate Pie Decadent and Danish Butter Cookies.
Bake a batch today and create sweet memories!
Crispy and Chewy Chocolate Chip Cookies Ingredients
• Get ready to bake these delicious cookies!
For the Batter
- Unsalted Butter – Provides richness and moisture; substitute with vegan butter for a dairy-free option.
- Brown Sugar – Adds sweetness and moisture for a chewy texture; can swap half for coconut sugar for a subtle caramel flavor.
- Granulated Sugar – Balances sweetness and enhances the cookie’s structure; no direct substitution recommended.
- Eggs – Help bind the ingredients and provide structure; use flax eggs (1 tbsp ground flaxseed + 2.5 tbsp water) for a vegan alternative.
- Vanilla Extract – Adds a warm, inviting flavor; use pure vanilla for the best taste, or substitute with almond extract for a twist.
- All-Purpose Flour – Provides structure and texture; substitute with a gluten-free flour blend using a 1:1 ratio for gluten-free cookies.
- Baking Soda – Acts as a leavening agent to help cookies rise; no substitute necessary.
- Salt – Enhances flavor; use sea salt or omit for a low-sodium version.
For the Mix-Ins
- Chocolate Chips – Add sweetness and texture; feel free to mix dark, milk, or white chocolate chips for diversity.
Now that you have your ingredients ready, let’s get started on creating a batch of these delightful Crispy and Chewy Chocolate Chip Cookies!
Step‑by‑Step Instructions for Crispy and Chewy Chocolate Chip Cookies
Step 1: Preheat the Oven
Begin your baking adventure by preheating your oven to 350°F (175°C). This crucial step ensures that your Crispy and Chewy Chocolate Chip Cookies bake evenly, resulting in perfectly golden edges and tender centers. While the oven heats up, gather all your ingredients, and line a couple of baking sheets with parchment paper.
Step 2: Cream the Butter and Sugars
In a large mixing bowl, add the softened unsalted butter, brown sugar, and granulated sugar. Use a hand mixer or stand mixer to blend these ingredients on medium speed until the mixture becomes smooth and creamy, about 2-3 minutes. You’re looking for a fluffy texture that indicates air has been incorporated, creating a delightful lift for your cookies.
Step 3: Incorporate the Eggs and Vanilla
Once your butter-sugar mixture is fluffy, add the eggs, one at a time. Mix well after each addition to ensure they’re fully integrated. Then, pour in the vanilla extract, blending it into the mixture. This step helps to create a rich flavor base for your Crispy and Chewy Chocolate Chip Cookies that will make them irresistible.
Step 4: Combine Dry Ingredients
In a separate bowl, whisk together the all-purpose flour, baking soda, and salt. This step is vital for distributing the leavening agent evenly throughout your flour. Once well mixed, gradually add your dry ingredients to the wet mixture, stirring gently until just combined. Be careful not to overmix, as this will affect the texture of your cookies.
Step 5: Fold in the Chocolate Chips
With the dough nearly complete, it’s time to add the star ingredient: chocolate chips! Gently fold these into the cookie dough using a spatula. This keeps the cookies’ texture light and airy while ensuring each bite is packed with chocolate. Feel free to mix different types of chocolate for a fun twist.
Step 6: Scoop the Dough
Using a tablespoon or a cookie scoop, drop rounded balls of dough onto the ungreased baking sheets, leaving about two inches of space between each. This spacing allows the cookies to spread beautifully as they bake. You should aim for about 12 cookies per sheet to ensure even baking.
Step 7: Bake the Cookies
Place the baking sheets in the preheated oven and bake for 10-12 minutes. Keep a close eye on them; the cookies are ready when the edges turn golden brown, and the centers still appear soft. This balance is key to achieving the delightful crispy-chewy contrast that defines these cookies.
Step 8: Cool and Transfer
After baking, remove the cookies from the oven and let them cool on the baking sheets for about 5 minutes. This resting period allows the cookies to set. Transfer them to wire racks to cool completely, ensuring they retain their perfect texture and flavor. The warm aroma will be absolutely irresistible!
What to Serve with Crispy and Chewy Chocolate Chip Cookies
Indulging in the gooey goodness of freshly baked cookies is just the beginning of your dessert experience; let’s elevate it with delightful pairings!
- Glass of Milk: This classic combo enhances the cookies’ flavors, creating a creamy dip for that perfect bite.
- Vanilla Ice Cream: A scoop nestled atop a warm cookie transforms your treat into an irresistible dessert sundae.
- Fresh Berries: The tartness of strawberries or raspberries offers a refreshing contrast to the sweetness of the cookies and adds a vibrant color.
- Espresso or Coffee: Rich, bold coffee enhances the chocolate flavors, making for a cozy afternoon snack.
- Nutty Trail Mix: Sprinkle some crunchy trail mix alongside for a fun, textural contrast that pairs wonderfully with the chewy cookies.
- Caramel Sauce Drizzle: A warm, gooey drizzle over the cookies introduces an extra layer of indulgence to your treat experience.
- Chocolate Milkshake: Blend up a creamy shake to dip your cookies into – the ultimate indulgence for chocolate lovers!
- Salted Caramel Latte: This sweet and slightly salty drink complements the cookies beautifully, enhancing their flavors in each sip.
- Toasted Coconut Flakes: For a tropical twist, sprinkle toasted coconut on top of the cookies for an unexpected yet delightful crunch.
Expert Tips for Crispy and Chewy Chocolate Chip Cookies
- Measure Ingredients Accurately: Use a kitchen scale or proper measuring cups to ensure the right ingredient ratios. This prevents any cookie mishaps!
- Chill the Dough: For thicker cookies, refrigerate the dough for at least 30 minutes before baking. This step enhances the chewy texture of your Crispy and Chewy Chocolate Chip Cookies.
- Do Not Overbake: Keep an eye on the cookies; they should be slightly underbaked when you take them out. They will continue to firm up as they cool.
- Customize Wisely: If adding mix-ins like nuts or dried fruit, make sure to adjust chocolate chip quantity to maintain balance in flavor and texture.
- Storage Matters: Store cookies in an airtight container to keep them soft. Placing a slice of bread in the container can help maintain their moisture!
How to Store and Freeze Crispy and Chewy Chocolate Chip Cookies
Room Temperature: Store cookies in an airtight container at room temperature for up to 1 week to maintain their chewy texture and flavor.
Freezer: For longer storage, freeze baked cookies in a single layer; once solid, transfer them to a freezer bag. They can be stored for up to 3 months.
Dough Storage: If you’d like to prep ahead, shape cookie dough into balls, freeze until solid, then store in a freezer bag. Bake from frozen, adding a couple of extra minutes to the baking time.
Reheating: To enjoy cookies warm, reheat in the microwave for 10-15 seconds or in the oven at 350°F (175°C) for 5-7 minutes. This will bring back that fresh-baked goodness to your Crispy and Chewy Chocolate Chip Cookies!
Crispy and Chewy Chocolate Chip Cookies Variations
Feel free to unleash your creativity in the kitchen with these delightful twists that will elevate your baking experience!
-
Nutty Crunch: Substitute half of the chocolate chips with your favorite chopped nuts like walnuts or pecans to add a delightful crunch. The nutty flavor pairs beautifully with the sweetness of chocolate.
-
Flavored Chocolate Chips: Try using flavored chocolate chips such as peanut butter or toffee for a unique spin. This simple substitution can create a whole new cookie experience that’s sure to surprise your taste buds.
-
Cinnamon Swirl: Add a teaspoon of cinnamon to the dough for a warming spice that complements the sweetness of the cookies. Imagine biting into a cookie that houses a hint of cozy warmth!
-
Oatmeal Addition: Mix in a half-cup of oats for a heartier texture. These crispy, chewy cookies take on a rustic charm that is reminiscent of oatmeal cookies, perfect for breakfast indulgence.
-
Dried Fruits: Add 1/2 cup of dried cranberries or raisins for a chewy contrast against the chocolate. This twist not only boosts flavor but adds a touch of wholesome goodness.
-
Gluten-Free Bliss: Swap the all-purpose flour for a 1:1 gluten-free blend to enjoy these cookies without compromising taste or texture. Your friends with gluten sensitivities will thank you!
-
Salted Caramel Drizzle: Drizzle a homemade or store-bought salted caramel sauce over cooled cookies for a luxurious finish. This decadent touch brings a delightful contrast to the chocolate.
-
Spicy Kick: For those who enjoy a bit of heat, add a dash of cayenne pepper or chili powder to the dough. This unexpected twist will intrigue adventurous eaters and elevate your cookie game!
With these variations, your Crispy and Chewy Chocolate Chip Cookies can take on new dimensions of flavor, sparking joy in every bite! And while you’re at it, consider serving them alongside some scrumptious Chocolate Pie Decadent or delightful Orange Cranberry Cookies for an enticing dessert spread. Happy baking!
Make Ahead Options
These Crispy and Chewy Chocolate Chip Cookies are a fantastic option for busy home cooks looking to save time without compromising on taste. You can prepare the cookie dough up to 3 days in advance; simply scoop the dough into balls, place them on a baking sheet, and freeze until solid. After freezing, transfer the dough balls to an airtight container or freezer bag. To maintain quality, it’s best to bake the cookies straight from the freezer, adding an extra minute or two to the baking time. When you’re ready to enjoy, simply pop them in the oven, and you’ll have freshly baked cookies that are just as delicious as if they were made from scratch on the spot!
Crispy and Chewy Chocolate Chip Cookies Recipe FAQs
What is the best way to select chocolate chips for my cookies?
Absolutely! When choosing chocolate chips, look for high-quality brands that contain real chocolate for the best flavor. You can mix dark, milk, or even white chocolate for a flavor explosion. If you’re feeling adventurous, consider using flavored chocolate chips, like peanut butter or butterscotch, to give your cookies a unique twist!
How should I store my Crispy and Chewy Chocolate Chip Cookies?
To keep your cookies fresh, store them in an airtight container at room temperature for up to 1 week. They’ll maintain their chewy texture and delightful taste. If you want to keep them longer, freezing is a great option—just make sure they’re completely cool before freezing in a single layer!
Can I freeze the cookie dough, and if so, how should I do it?
Absolutely! You can freeze cookie dough balls for up to 3 months. Simply scoop the dough into rounded tablespoons, place the balls on a baking sheet lined with parchment paper, and freeze until solid. Once frozen, transfer them to a freezer bag. When you’re ready to bake, pop them straight from the freezer into the oven, adding an extra minute or two to the baking time.
What can I do if my cookie dough is too sticky?
Very! If you find your cookie dough is too sticky to work with, you can chill it in the refrigerator for 30 minutes to an hour. This will make it easier to scoop and shape. Alternatively, you can try adding a tablespoon of flour at a time until you achieve a more manageable consistency. Just be cautious not to overdo it, as this can affect the texture of your cookies.
Are these cookies safe for people with nut allergies?
Indeed! If you or your loved ones have nut allergies, it’s best to avoid adding nuts altogether. This recipe is naturally nut-free, but double-check that your chocolate chips and other ingredients are also nut-free. For a nutty flavor, you can experiment with nut-free alternatives like sunflower seeds or pumpkin seeds instead.
How can I make these cookies gluten-free?
Certainly! To whip up gluten-free Crispy and Chewy Chocolate Chip Cookies, simply substitute the all-purpose flour with a gluten-free flour blend using a 1:1 ratio. Be sure to choose a blend that contains xanthan gum, as it will help provide structure and chewiness, making your cookies just as delightful!
Crispy and Chewy Chocolate Chip Cookies: Homemade Bliss
Ingredients
Equipment
Method
- Preheat your oven to 350°F (175°C) and line baking sheets with parchment paper.
- In a large mixing bowl, blend unsalted butter, brown sugar, and granulated sugar until smooth and creamy.
- Add eggs one at a time, mixing well after each addition and then stir in the vanilla extract.
- In a separate bowl, whisk together flour, baking soda, and salt. Gradually add to wet mixture, stirring gently.
- Fold in chocolate chips gently to maintain a light texture.
- Scoop rounded balls of dough onto baking sheets, leaving about two inches apart.
- Bake for 10-12 minutes until edges are golden brown while centers remain soft.
- Let cool on baking sheets for 5 minutes before transferring to wire racks.
Leave a Reply